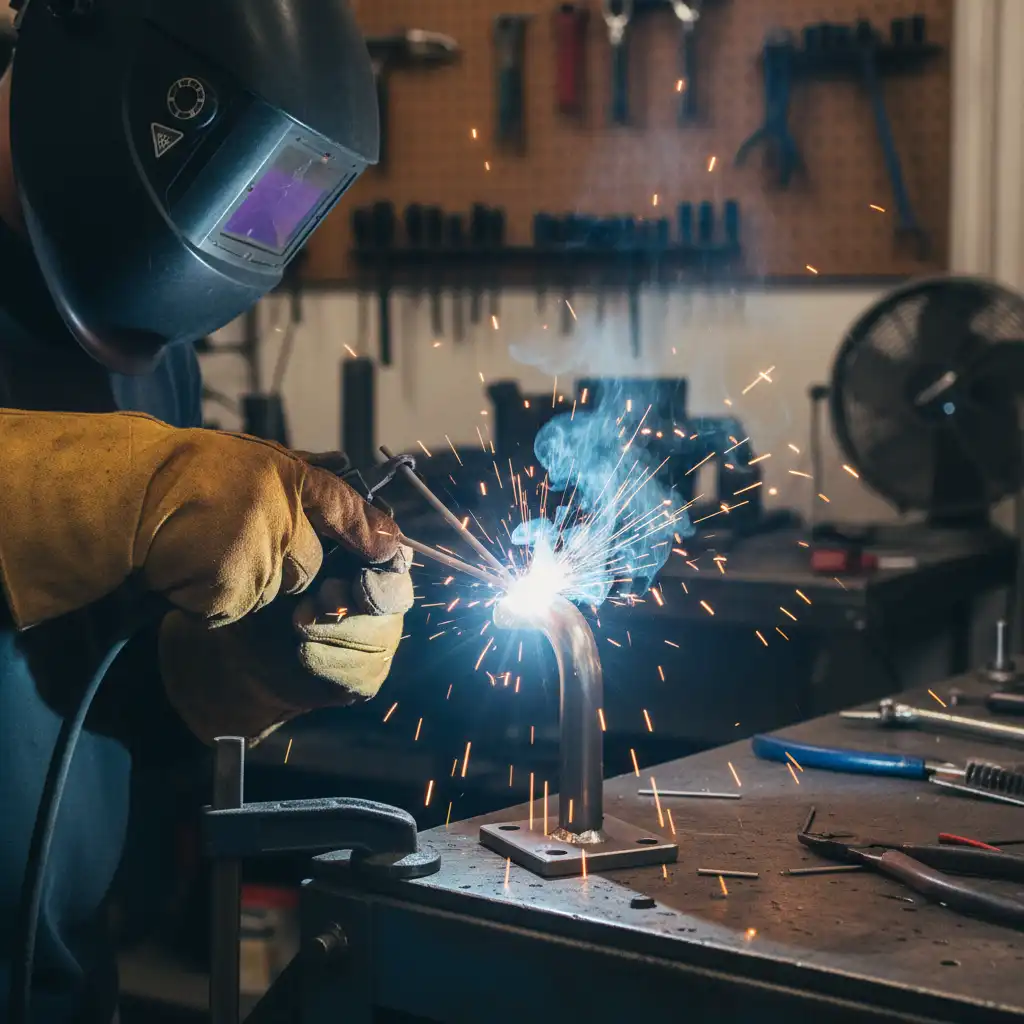
You can dive into hands-on welding with projects that are easy and rewarding. Check out these popular beginner ideas:
Safety disclaimer (United States — OSHA/ANSI) Before you begin any welding work, perform a site-specific hazard assessment and follow local OSHA and ANSI guidance. Welding produces intense light, heat, sparks and hazardous fumes; if you are unsure, consult your facility LSO or EHS representative. Use this guide for introductory guidance only—not as a substitute for formal training or site procedures.
Quick safety checklist
- Welding helmet: start with shade #10 for common MIG tasks and adjust by amperage.
- Fire protection: keep an ABC 2‑A:10‑B:C extinguisher within reach and follow OSHA hot-work/fire-watch rules.
- Ventilation: prefer source capture; aim for ≥6 ACH (~150 CFM) or use a local fume extractor positioned at the arc.
- Post-weld watch: inspect for smoldering for at least 30 minutes after hot work.
(See OSHA welding and hot work guidance for details.)
| Project Type | Description |
|---|---|
| Wall-Mounted Coat Racks | Simple and functional, perfect for practice. |
| Custom Tool Holders | Budget-friendly and great for building skills. |
| DIY Fire Pits | A fun way to blend creativity with necessity. |
MIG welding stands out for beginners. It’s quick to learn and doesn’t need fancy tools. All you need is a MIG welder, some basic gear, and a little curiosity.
For beginners, a conservative MIG (GMAW) starter example for ER70S‑6 0.030″ (0.8 mm) wire on mild steel (2–6 mm): 75/25 Ar/CO₂ shield; voltage 16–20 V; wire feed 150–300 ipm (≈3.8–7.6 m/min); gas flow 35–50 cfh (≈16–24 L/min). Start short‑circuit transfer with 10–13 mm stick‑out. Test on scrap: if bead is flat/narrow, raise voltage slightly; if poor penetration or cold lap, increase wire feed or slow travel; reduce settings to cut spatter or prevent burn‑through (MillerWelds parameter guide).
Key Takeaways
- Begin with easy projects like coat racks, tool holders, or fire pits. These help you get better at welding. – Try using a MIG welder because it is simple to use. It does not need many tools and is great for new welders. – Always put on safety gear like a helmet and gloves. This keeps you safe while you weld. – Make sure your workspace is clean and neat. This helps stop accidents and keeps you safe. – Practice welding on scrap metal before your real project. This helps you get better at welding.
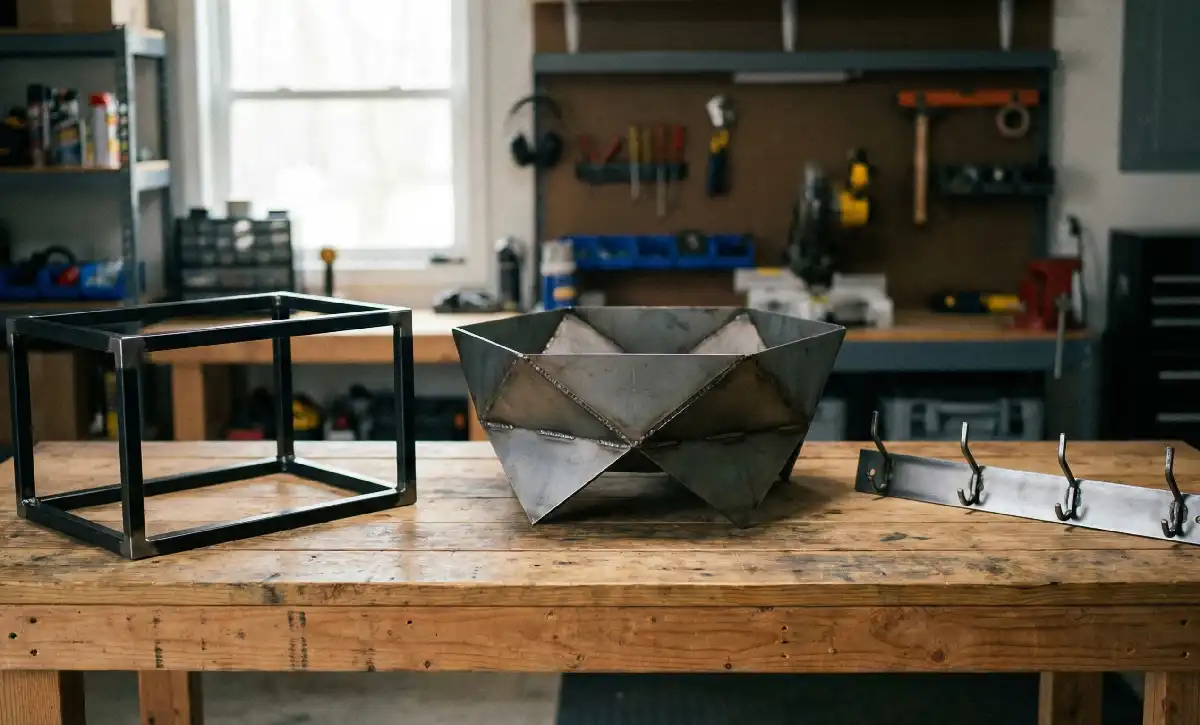
Coat Hook Welding
Materials
You do not need fancy supplies for this project. Grab a few pieces of scrap steel or flat bar. You can use old metal rods or even leftover steel from other projects. Pick up some metal hooks or bend your own from steel rod. You will also need a metal plate or strip for the base. If you want, add a little paint or clear coat at the end for a nice finish.
Tools (MIG Welder)
You only need a few tools to get started:
- MIG welder (perfect for beginners)
- Angle grinder (for cleaning and smoothing edges)
- Wire brush
- Clamps (to hold pieces in place)
- Measuring tape and marker
- Safety gear (helmet, gloves, jacket)
Steps
Let’s break it down into simple steps:
- Measure and cut your base plate to the size you want.
- Clean all metal surfaces with a wire brush. This helps you get strong welds.
- Mark where you want each hook to go.
- Clamp the hooks in place on the base.
- Use your MIG welder to tack weld each hook. Tack welding means you make small welds to hold things together before finishing.
- Once everything looks good, weld each hook fully to the base. Try to keep your welds straight and even.
- Let the metal cool. Use your grinder to smooth any rough spots.
- Wipe the rack clean. Add paint or a clear coat if you like.
Here’s how long you can expect this project to take:
| Project Type | Estimated Time |
|---|---|
| Coat Hook Welding | 3–4 hours |
Skills Learned
You will pick up some great skills with this project:
Beginners should practice only on same‑material low‑carbon (mild) steel; welding dissimilar metals requires special filler metals, possible preheat/PWHT, and formal procedure qualification — not recommended for entry‑level practice.
Tip: Take your time with each weld. You will see your skills improve with every project!
Picture Frame Welding
Materials
You can make a sturdy picture frame with just a few pieces of metal. For beginners, hot-rolled weldable steel works best. You can find these at most hardware stores. Here’s a quick look at two great options:
| Metal Type | Description |
|---|---|
| Hot-Rolled Weldable Steel Solid Angle | 6-ft x 1-in, suitable for frame corners. |
| Hot-Rolled Weldable Steel Plain Square Tube | 11-in x 1-in x 1-in, ideal for frame structure. |
You will also need sandpaper or a wire brush to clean the metal. If you want to hang your frame, grab a couple of small hooks or a length of wire.
Tools
You do not need many tools for this project. Here is what you should have ready:
- MIG welder
- Angle grinder or metal file
- Measuring tape
- Marker or chalk
- Clamps
- Safety gear (helmet, gloves, jacket)
Steps
Let’s get started! Follow these steps to build your own metal picture frame:
- Measure and mark four equal lengths of steel for the sides of your frame.
- Cut the steel pieces with your grinder or saw.
- Clean the edges with sandpaper or a wire brush.
- Lay out the pieces in a rectangle. Make sure the corners fit together.
- Clamp the corners so they stay in place.
- Tack weld each corner. Check that the frame is square.
- Finish welding each corner. Try to keep your welds neat.
- Let the frame cool. Use your grinder to smooth any rough spots.
- Add hooks or wire to the back for hanging.
- Wipe the frame clean. Paint it if you want a different look.
Tips for Beginners
Tip: Take your time with each step. Double-check your measurements before you cut. If you are new to welding, practice on scrap pieces first. Keep your workspace tidy and wear your safety gear. You will get better with every project!
Tool Holder Welding
Materials
You can build a simple garden tool holder with just a few items. Grab some scrap steel bars or rods. You might want a flat steel plate for the back. If you want to add compartments, pick up extra pieces for dividers. You can use leftover metal from other projects. Sandpaper or a wire brush will help you clean the metal before you start.
| Material | Purpose |
|---|---|
| Steel bars/rods | Main frame and hooks |
| Flat steel plate | Backing for holder |
| Extra steel | Dividers for compartments |
| Sandpaper/wire brush | Cleaning surfaces |
Tools
You do not need fancy equipment for this project. Here is what you should have:
- MIG welder
- Angle grinder or metal file
- Measuring tape
- Marker or chalk
- Clamps
- Safety gear (helmet, gloves, jacket)
Steps
Ready to get started? Follow these steps to make your own tool holder:
- Measure and cut steel bars for the frame. Decide how many tools you want to hang.
- Clean all metal pieces with sandpaper or a wire brush.
- Lay out the frame and mark spots for hooks or compartments.
- Clamp the pieces together so they do not move.
- Tack weld the frame and hooks in place. Check that everything lines up.
- Weld all joints fully. Try to keep your lines straight and neat.
- Add dividers if you want compartments for hammers, screwdrivers, or welding rods.
- Let the holder cool. Use your grinder to smooth rough edges.
- Wipe it clean. Paint or coat it for a finished look.
Tip: You can customize your tool holder by adding extra hooks or compartments. This helps you keep your workspace organized and efficient.
Uses
A welded tool holder is more than just a place to hang your tools. You get durability and creative freedom. Here are some practical uses and benefits:
- Durability: Welded joints last longer than glue or screws.
- Creative Freedom: You can design the holder to fit your needs.
- Cost Savings: Build your own and save money.
- Home Repairs: Use your skills to fix gates or railings.
- Automotive Customizations: Repair car parts or make custom pieces.
- Creative Ventures: Try making garden art or metal furniture.
- Small-Scale Construction: Build storage units or barbecue grills.
You will improve your welding skills while making something useful for your home or workshop. This project is simple, practical, and a great way to get started.
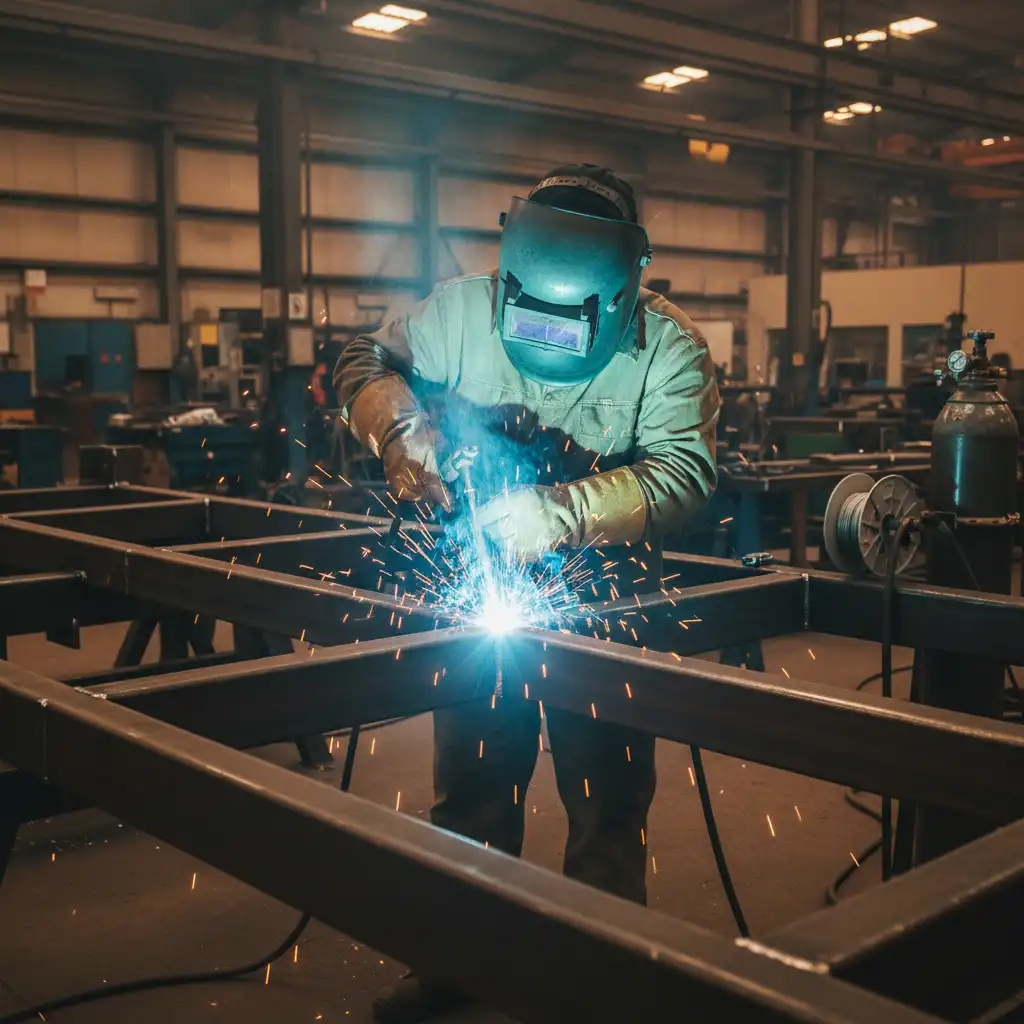
Welding Safety Tips
Before you strike an arc, ground your approach in authoritative guidance: the OSHA Welding, Cutting, and Brazing safety topic page explains ventilation, PPE, fire prevention, and electrical hazards, and the AWS 2021 ANSI Z49.1 Safety in Welding, Cutting, and Allied Processes details eye and face protection, including recommended filter lens shades for common welding tasks.

Protective Gear
You must wear the right gear before welding. This gear keeps you safe from sparks and heat. It also protects your eyes from bright light. Always wear these items:
- Welding helmet
- Heat-resistant gloves
- Flame-resistant clothing
- Respiratory protection
- Safety boots
Tip: Always use your safety gear, even for small jobs. Accidents can happen very fast.
Workspace Setup
A safe workspace is very important. Keep your area clean and free from things that burn. Here are some ways to set up your space:
- Make sure your workspace is clean and dry.
- Take away anything that can catch fire. Keep them far away.
- Use good ventilation to remove fumes and gases.
- Keep a fire extinguisher and first aid kit close.
- Check your welding tools and cables for any damage.
- Use fire-resistant blankets or shields to cover nearby things.
- Take breaks so you do not get too tired.
Note: Good ventilation helps you breathe better and stay healthy.
Basic Rules
You can stop most injuries by following simple rules. Here are some things to remember:
| Safety Rule | Description |
|---|---|
| Personal Protective Equipment (PPE) | Always wear your helmet, gloves, jacket, and boots. |
| Proper Ventilation | Make sure you have fresh air and use exhaust fans if needed. |
| Fire Precautions | Keep a fire extinguisher nearby and clear away flammable items. |
| Electrical Safety | Check cables, ground your equipment, and avoid wet areas. |
| Safe Working Environment | Keep your area tidy and take breaks to avoid fatigue. |
New welders often get hurt by electric shock, breathing bad fumes, fires, or hurting their eyes. You can stop these problems by using your tools the right way. Use good ventilation, keep your area clean, and always protect your eyes.
Stay careful and follow these tips every time you weld. You will build good habits and keep yourself safe.
You just explored three easy projects that help you build skills and confidence. MIG welding makes each project simple and fun. You get clean welds, less mess, and more control. Here are some long-term perks:
- Save money with fewer mistakes and less wasted material.
- Tackle many types of metal and project shapes.
- Work longer with less fatigue.
“I started with a basic welder and good safety gear. Now, I feel ready to try more projects!”
Keep learning with books, videos, and online forums. Stay safe, practice often, and enjoy your welding journey!
FAQ
How do I know if my weld is strong enough?
A good weld looks smooth and even. You should not see holes or cracks. Try pulling on the pieces. If they stay together, your weld is likely strong. Practice helps you get better!
Can I use a different welder for these projects?
You can use a stick or TIG welder, but MIG welding is easiest for beginners. MIG gives you more control and cleaner welds. Start with MIG if you are new.
What metal works best for beginners?
Mild steel is your best choice. It is easy to cut and weld. You can find it at most hardware stores. Avoid aluminum or stainless steel until you have more experience.
Do I need to clean the metal before welding?
Yes! Clean metal gives you better welds. Use a wire brush or sandpaper to remove rust, paint, or oil. Dirty metal can cause weak welds and lots of sparks.