You need to pick the best way to clean precision parts. This helps keep the substrate safe. If you choose the wrong way, you might hurt delicate surfaces. You could also miss dirt that is hard to see. Precision cleaning has many good points, like:
- Getting rid of dirt that can break equipment
- Making things safer for people and machines
- Following tough industry rules
Laser cleaning is a strong tool for safe cleaning. It does not touch the part. Using the right cleaning method for the substrate and dirt helps you not make expensive errors.
Key Takeaways
- Pick the best cleaning way for the part and dirt. This stops harm and makes cleaning work well.
- Always look at the maker’s datasheet for your part’s material. This helps you not use chemicals that can hurt the part.
- Use soft cleaning ways, mostly for fragile parts. Do not use too much force so you do not scratch or hurt the surface.
- Use good drying steps to stop rust and other problems. Make sure no water or leftover stuff is on the parts after cleaning.
- Stop mixing dirt by using different tools for each part and change cleaning liquids often. This keeps your precision parts safe and clean.
Identify Substrate and Contaminant
Substrate Types
You need to know what your precision part is made of. Each substrate reacts in its own way to cleaning. Here are some materials you might see in electronics and machines:
- FR-4: This is epoxy resin and fiberglass. It is used in many circuit boards.
- CEM-1 / CEM-3: These are paper or fiberglass types. They are found in cheaper PCBs.
- Polyimide: This is flexible and can handle heat. It works well for flexible circuits.
- PTFE: This material works with high frequencies. It is used in RF jobs.
- Ceramic Substrates: These are good for heat and electrical insulation. They are used in high-power parts.
- Metal Core Substrates: These have metal inside. They help move heat away.
- High-Performance Materials: Brands like Rogers and Isola are used for fast and high-frequency needs.
Tip: Always look at the manufacturer’s datasheet for your part’s substrate. This helps you avoid damage when cleaning.
Common Contaminants
Precision parts can get many kinds of contaminants. You need to know what they are before you clean. Here is a table that shows what you might find:
| Contaminant Type | Description |
|---|---|
| Flux Residue | Sticky stuff that grabs dust and water. It lowers insulation. |
| Ionic Contamination | Charged bits that can cause shorts and leaks. |
| Dust and Dirt | Tiny pieces that hold water and make paths for electricity. |
| Fingerprint Oils | Oils and salts from hands. They make soldering harder. |
| Moisture | Makes corrosion happen faster and raises conductivity. |
Cleaning Needs Assessment
You need to check your cleaning needs based on the part’s material, the contaminant, and the rules for your industry. Start by looking at the biggest particle size allowed for your job. For example, semiconductor parts may need no particles bigger than five microns. Automotive parts may allow up to 200 microns. You should also think about:
- Design Accuracy: Make sure your part stays within strict limits after cleaning.
- Contaminant Removal: Take away tiny chips and leftovers from making the part.
- Performance Assurance: Stop wear and problems by cleaning away tiny contaminants.
Check your team and your tools. Pick a cleaning method that fits your skills and the part’s complexity. Always follow your industry’s cleanliness rules to keep your parts working well and safely.
Precision Cleaning Methods
You need to pick the best way to clean your parts. Each cleaning method works better for certain substrates and contaminants. You must keep the substrate safe and make sure the part is clean. Here are the main ways you can clean precision parts.
Water-Based Cleaning

Water-based cleaning is a common way to clean precision parts. It works for many types of dirt. It is safe for most substrates and does not use strong chemicals.
Aqueous cleaning solutions can be used in different ways. You can pick the method based on how dirty the part is.
Here are the steps for water-based cleaning:
- Take off loose oil or dirt first.
- Pick the right cleaner for your dirt.
- Put the part in the solution or spray it.
- Use gentle shaking or ultrasonic waves if needed.
- Rinse the part with clean water.
- Dry the part with air or a lint-free cloth.
Water-based cleaners work well for polar contaminants like salts and oxidation. They are safer and better for the environment than solvent cleaners. You should pick the cleaner that matches your dirt.
| Contaminant Type | Cleaning Solution Type | Effectiveness |
|---|---|---|
| Polar Contaminants | Water-based cleaners | Good for salts, emulsion residue, oxidation |
| Non-polar Contaminants | Solvent-based cleaners | Good for machining oils and resins |
| Particulate Contaminants | Both methods | Needs displacement cleaning |
You must follow safety rules to protect sensitive substrates:
| Safety Precaution | Description |
|---|---|
| Reduce chemical exposure | Using water-based cleaning lowers worker contact with harmful chemicals. |
| Avoid compressed air | Wet cleaning stops dust from getting into the air. |
| Pre-clean parts | Taking off oil or dirt first helps the cleaner work better. |
| Oil skimming | Removes oil from the surface to keep the solution clean. |
| Filter solution | Filtering the solution often keeps it working well. |
| Maintain concentration | Follow the maker’s rules for best cleaning. |
| Change solution based on performance | Only change the solution when it stops working well. |
| Keep chemicals away | Make sure no other shop chemicals are near the cleaning sink. |
Water-based cleaning helps you get clean surfaces and keeps the part safe. Always check the substrate and dirt before you start.
Solvent Cleaning
Solvent cleaning is good for removing oils and grease. You must pick the right solvent for your part and dirt. Here are the main types of solvents and their pros and cons:
| Solvent Type | Advantages | Disadvantages |
|---|---|---|
| Petroleum-Based Solvents | Gets rid of thick grease, easy to find | Flammable, may leave oily residue, needs good airflow |
| Chlorinated Solvents | Not flammable, great for vapor cleaning | Toxic, rules limit use because of pollution |
| Oxygenated Solvents | Dries fast, leaves no residue | Flammable, may harm plastics or coatings |
| Bio-Based / Citrus-Based Solvents | Safer, smells nice, easy to use | Slower, costs more, not good for heavy grease |
Here are the steps for solvent cleaning:
- Wear gloves and eye protection.
- Make sure the area has good airflow.
- Put the solvent on the part with a brush, spray, or soak.
- Shake gently if needed.
- Rinse with clean solvent or water if it works.
- Dry the part well.
You must think about health and safety risks:
- Some solvents can cause cancer.
- Others may hurt your memory or thinking.
- Exposure can cause problems with having children and other health issues.
Solvent cleaning works best for non-polar contaminants like machining oils. Use it carefully to protect yourself and the environment.
Laser Cleaning for Precision Parts
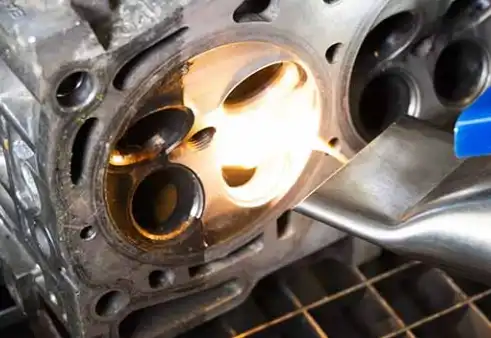
Laser cleaning is a new way to clean without touching the part. It uses laser beams to remove dirt. You do not touch the part, so you do not damage it. Laser cleaning is great for delicate surfaces.
Here are the steps for laser cleaning:
- Set up the laser system as the maker says.
- Pick the right laser settings for your part and dirt.
- Hold the part in place.
- Point the laser at the dirty spot.
- Turn on the laser and move it slowly.
- Check the part to see if it is clean.
Laser cleaning has many good points:
- It is faster and more exact than old methods.
- It lowers the chance of hurting the surface.
- Laser cleaning does not scratch the part.
- You can remove rust, paint, oxidation, and grease without harm.
- It saves time and is very precise.
- You do not touch the part, so you do not scratch it.
- Laser cleaning is good for removing tough dirt.
- It is a non-contact way that keeps delicate materials safe.
- Laser cleaning makes cleaning faster and more even.
| Method | Risk of Substrate Damage | Precision Level | Ideal Use Case |
|---|---|---|---|
| Laser Cleaning | Low | High | Delicate surfaces and precision work |
| Abrasive Blasting | High | Moderate | General surface cleaning |
Laser cleaning helps you get clean surfaces and keep precision. Match the laser settings to your part and dirt for the best results.
Materials contraindications & fit reminders — Laser cleaning works well for many metals and coatings, but some materials need extreme caution. Avoid or test carefully on: thin polymer films and thin painted/coated layers, soft elastomers and rubber seals, highly reflective/mirror finishes, and temper‑sensitive alloys (can anneal). Watch for failure signs: discoloration, charring, sudden fumes, gloss loss, or surface roughening. Always run a verification on a same‑material scrap: start at low energy, increase gradually, and monitor color/roughness and temperature before full use.
Abrasive and Manual Techniques
Abrasive and manual cleaning use force to remove dirt. You must be careful, especially with delicate parts. Here are some abrasive materials you can use:
| Abrasive Material | Description | Applications |
|---|---|---|
| Coated Abrasives | Good for blending and smoothing surfaces. | Makes finishes better on delicate parts. |
| Non-woven Abrasives | Removes material evenly and makes smooth finishes. | Good for getting surfaces ready. |
| Hand Brushes | Lets you clean small areas with control. | Good for hard-to-reach or delicate spots. |
You can also use:
- Aluminum Oxide for fine finishes on metals and glass.
- Silicon Carbide for cutting hard materials like ceramics.
- Garnet for cleaning steel and aluminum with less pressure.
- Crushed Glass for gentle cleaning of delicate surfaces.
- Plastic Media for taking off paint in aerospace and cars.
Here are the steps for abrasive and manual cleaning:
- Pick the right abrasive for your part.
- Wear gloves and eye protection.
- Gently rub the abrasive on the dirty spot.
- Use light pressure to avoid damage.
- Check the part to see if it is clean.
- Rinse and dry the part if needed.
Abrasive methods can hurt delicate parts. Use them only if other ways do not work. Laser cleaning is safer for precision parts because it keeps the surface safe.
Choosing the Best Method
You must think about a few things when picking a cleaning method:
| Factor | Description |
|---|---|
| Cleaning method or process | The way you clean, which can be different. |
| Type and amount of contamination | What kind and how much dirt is on the part. |
| Properties of the object | The material, shape, and surface of the part. |
Always match the cleaning method to your part and dirt. Water-based cleaning is best for polar contaminants and general cleaning. Solvent cleaning works for oils and grease but needs care. Laser cleaning is best for delicate surfaces and precision work. Abrasive and manual ways are good for tough dirt but can hurt the part.
You must keep your precision parts safe and clean by picking the right cleaning method. Laser cleaning gives you the best safety and precision for delicate parts. You can use it to remove many kinds of dirt without hurting the part.
Parameter guardrails and pass/fail criteria
Start conservative and validate on a scrap part before scaling. For delicate electronics use ultrasonic ~40 kHz (or 68–130 kHz for very fine residues) at low power, bath temps 30–50°C; avoid sustained spray pressures above ~30 bar on thin parts. Aim for rinse conductivity consistent with fresh water (low µS/cm) and dry at temperatures below the substrate’s rated limit (commonly 40–80°C for polymers) until no wet spots remain. Pass = dry interior, tissue unchanged, and no visible particles >50 µm; fail = any dampness or escaping bubbles. See IEST‑STD‑CC1246 cleanliness levels and IPC cleanliness guidance for verification.
Avoiding Common Cleaning Errors
Cleaning precision parts is not easy. You must avoid mistakes that can hurt the part or make it work badly. This section helps you find common errors and shows ways to stop them. Picking the right method and being gentle keeps the surface safe and helps your parts last longer.
Chemical Damage
Chemical damage happens if you use the wrong cleaner or leave residue. Some chemicals react with the substrate and harm the surface. This can make the part weaker or change how it works. Always check if your cleaning solution works with the substrate. Read the datasheet before you clean. If you are unsure, test the cleaner on a small spot.
Common mistakes that lead to chemical damage:
- Using strong acids or bases on sensitive surfaces
- Leaving residues after rinsing
- Mixing different cleaning chemicals
How to prevent chemical damage:
- Pick a cleaning solution that matches the substrate and contaminant
- Rinse parts well to remove all residues
- Keep chemicals away from the cleaning area
- Teach staff to follow safety rules
Tip: If you see color changes, pits, or rough spots, stop cleaning and check for chemical damage.
Excessive Force
Too much force when cleaning can scratch or bend the surface. Scrubbing harder does not always clean better. It can cause more harm. Surface damage can make the part not last as long or work poorly.
Mistakes to avoid:
- Scrubbing with abrasive pads on delicate surfaces
- Using high-pressure sprays on fragile parts
- Pressing hard with brushes or tools
Prevention strategies:
- Use soft brushes or microfiber cloths for manual cleaning
- Pick non-contact methods like laser cleaning for sensitive surfaces
- Use gentle pressure and check the part often
- Teach staff to know when to stop and look for damage
Note: Always match the cleaning method to the part’s material and the type of residues you need to remove.
Improper Drying
Drying is very important in cleaning. If you leave water or residue, you risk rust and other problems. Hidden water can hurt the part over time. In some systems, water can react and cause safety risks. Even a little water can make electronics or vacuum parts fail.
- Hidden water can cause rust and weaken the part over time.
- In oxygen systems, water can react and be dangerous under pressure.
- For electronics, even a little water can cause big problems when powered up.
- In vacuum systems, leftover water can leak out and hurt the environment.
You need to pick the best way to dry parts to avoid residue.
| Drying Method | Advantages | Disadvantages |
|---|---|---|
| Air knife | Stops rust, removes water residue | Costs more for equipment |
| Air hose | Stops rust, removes water residue | Costs more to run and fix |
| Oven | Needed before special inspections | Long heat can hurt coatings |
Best practices for drying:
- Use air knives or hoses for quick drying and to stop rust
- Dry parts in an oven if you need to check them with special liquids
- Do not leave parts wet or in damp places
- Look for water spots or residue before storing parts
Cross-Contamination
Cross-contamination happens when dirt from one part gets on another during cleaning. This can ruin your work and cause new problems. In ultrasonic cleaning, dirt removed from a part can get into the solution. The dirt may stick to other parts.
Another problem in ultrasonic cleaning is cross-contamination. When dirt leaves a part, the cleaning solution gets dirty. The dirt can stick to other parts.
You need good habits to stop cross-contamination.
- Use color-coded cleaning tools so you do not mix them up.
- Teach staff to keep equipment separate and store tools apart.
- Use color codes for tools to help everyone understand.
- Switch to microfiber cloths to clean better.
- Use flat mops with tanks or spray-and-vac systems to lower cross-contamination.
- Use HEPA vacuum cleaners to catch tiny particles.
- Make sure staff wash their hands well.
How to get the best results:
- Change cleaning solutions often so dirt does not build up
- Store clean and dirty tools in different places
- Check parts after cleaning for dirt or damage
Tip: Always use new cleaning solutions and tools for each batch of precision parts. This keeps the surface clean and stops damage.
By following these steps, you can avoid common mistakes and get better cleaning results. Careful handling and picking the right method protect the surface and keep dirt away. This helps your precision parts stay high quality and work well.
Inspection and Post-Cleaning Care

Cleanliness Verification
You need to check if your cleaning process worked. Use both visual checks and scientific tests. Look for any dirt, stains, or water spots on the surface. For a more accurate check, use special methods that measure tiny particles and residues. The table below shows two common ways to test how clean your parts are:
| Method | Description |
|---|---|
| Particulate Counting (ASTM F312) | This method sizes and counts particles on surfaces using solvent flushes and filter-based microscopy. It can find particles as small as one micron. |
| Nonvolatile Residue (NVR) Testing (ASTM F331) | This method uses heating and weighing to measure the mass of residues left after cleaning. It shows how much contamination remains. |
Tip: Always use the right test for your part’s needs. This helps you meet industry standards and avoid problems later.
Standards and regulatory references (quick-check)
For traceable inspection and testing, consult these primary standards and guidance: IPC J-STD-001 — Requirements for Soldered Electrical and Electronic Assemblies (cleanliness guidance), IPC TM-650 — Test Methods (ionic/SIR procedures), ISO 16232 — Cleanliness of Components for Fluid Systems, and IEST‑STD‑CC1246 — Product Cleanliness Levels. For worker safety and exposure limits, refer to OSHA PEL / ACGIH TLV guidance. These are entry points to the canonical documents—always check the full standard and consult your compliance officer before changing procedures.
Substrate Protection
After cleaning, you must protect the substrate from new damage. Pick a coating or treatment that fits your part’s needs. Follow these steps:
- Check the part’s working temperature.
- Think about any chemicals used during cleaning.
- Decide if you need a coating for repair or just for protection.
- Talk with a coatings expert about the part’s condition.
Effective surface preparation means you remove all contamination, have a clean substrate, and create a rough profile for coatings to stick.
Watch out for problems like salt or flash rust. Salt can cause bubbling in coatings. Flash rust can appear fast if you do not coat the part soon after cleaning.
Storage Tips
Store your cleaned parts the right way to keep them safe. Use proper packaging to stop dirt from getting back on the surface. Choose packaging with an inner layer that blocks air and an outer layer that protects from damage. You can fill the package with an inert gas before sealing to keep the part dry and clean.
- Use HEPA-filtered air and keep the storage area clean.
- Move parts only in clean conditions.
- Work at low-particle stations and clean often.
- Wear cleanroom gowns to lower contamination risks.
- Always check that hardware is clean before packaging.
Good storage keeps your cleaning work from going to waste. Clean parts last longer and work better when you protect them from new dirt.
You can get parts clean with no residue if you do these things: First, always use the cleaning steps from the manufacturer. Take off dirt and other contaminants as soon as you see them. Handle and store your parts carefully so they do not get dirty again. Use gentle ways to clean so you do not damage the parts.
Laser cleaning is a safe way to clean delicate surfaces. It lets you clean with high accuracy. When you pick the right cleaning method for the substrate and contaminant, you get better results. You will have fewer mistakes and your parts will last longer.
| Benefit | Description |
|---|---|
| Improved Yield | You get more good parts and fewer bad ones. |
| Enhanced Durability | Your precision parts work longer and break less. |
Check your parts often and clean them the right way. This helps them work well and last a long time.
Safety & regulatory disclaimer
This procedure involves chemicals and operations that must comply with applicable local and national rules (e.g., OSHA for workplace PPE and hazard communication, EPA/RCRA or local authorities for hazardous‑waste disposal, and REACH limits where EU law applies). Use minimum PPE (chemical‑resistant gloves and eye protection; NIOSH‑approved respirator if ventilation is inadequate), ensure adequate ventilation, consult SDS, and perform a site risk assessment. Version: 1.0 — Last updated 2026‑02‑03. For technical review or corrections, contact the technical reviewer at corrections@example.com.
FAQ
What is the safest way to clean delicate precision parts?
You should use laser cleaning or gentle water-based methods. These options protect the surface and remove dirt without causing scratches. Always test your method on a small area first.
How often should I clean my precision parts?
You need to clean parts whenever you see dirt or after each use. For critical equipment, follow the schedule in your maintenance manual. Regular cleaning keeps your parts working well.
Can I use household cleaners on precision parts?
You should avoid household cleaners. Many contain harsh chemicals that can damage sensitive materials. Always use cleaners made for your specific part and contaminant.
What should I do if I see rust after cleaning?
If you see rust, dry the part right away and apply a protective coating. Store the part in a dry place. You may need to clean it again using a rust remover made for your substrate.
How can I prevent cross-contamination during cleaning?
Use separate tools for each part. Change cleaning solutions often. Store clean and dirty tools apart. This keeps dirt from spreading and protects your precision parts.