You must think about power and site needs for laser welding. The correct setup makes welds strong and keeps the area safe. You stay safe by wearing the right clothes and gloves. Modular rooms with good airflow and special glass windows help you deal with heat. These windows let you watch the process safely. Extraction systems take away heat and fumes. Safety doors and warning lights tell you when lasers are working. Doing these things helps you follow health and safety rules. You also get the best results from your laser.
Key Takeaways
- Learn about laser welding power. It helps make strong welds. Always check power settings for your material and job.
- Pick the right power for your welding work. Use less power for thin materials. Use more power for thick materials. This helps you get good results.
- Keep your workspace safe. Make sure there is good airflow. Use safety tools and keep things neat. This stops accidents from happening.
- Check your equipment often. Clean the lenses and test the power supply. Follow a plan to keep everything working well.
- Teach your team about safety rules. Good training stops mistakes. It helps everyone stay safe near lasers.
Laser Welding Power Basics

What Is Laser Welding Power?
You should know what laser welding power is before you begin. Laser welding power is the energy the laser beam gives to the workpiece. This energy is needed to make strong welds. Special meters and sensors measure this power. These tools check how much energy hits each area. If you do not measure power right, your welds can be weak or crack. Always check your power settings. Make sure your welding matches your material and job.
How Power Affects Weld Quality
The power you pick for your laser changes your weld quality. More power lets the laser melt deeper into the metal. This helps you join thick pieces together. Too much power can make a big hot area. This can melt too much or even turn metal into vapor. Less power makes a shallow weld and a smaller hot area. You need to balance your power. This helps you get good welds and avoid problems.
Different metals act differently when you change the power. Here is a table that shows how power changes weld quality for some metals:
| Metal Type | Effect of Power on Weld Quality |
|---|---|
| Stainless Steel | More power can change how strong and hard the weld is. It also changes the weld’s tiny structure. |
| Aluminum | It is hard to weld because it reflects light and moves heat fast. High-power lasers help stop problems. |
Aluminum can have problems like holes, weak joins, and cracks. You can fix these by using high-power fiber lasers and the right gas. For metals that move heat fast, you can use two laser beams or heat the metal first to get better welds.
Typical Power Ranges for Laser Welders
There are many kinds of laser welders in factories. Each kind uses a different power range. Handheld and portable laser welders use 1000 to 5000 watts. Use less power for simple jobs. Use more power for faster and better welding.
| Power Range | Description |
|---|---|
| 1000W | Lowest power for simple jobs |
| 5000W | Highest power for strong welding |
Match your power to your material’s thickness. Here are some easy rules:
- Thin materials (less than 1.0 mm): 500-1500 watts
- Medium thickness (1.0-3.0 mm): 1500-3000 watts
- Thick materials (over 3.0 mm): 3000-6000 watts
Car factories use lasers from 2000W to 12000W. Electronics use lower power, especially for thin parts.
Spot size and power density are important too. A small spot size gives more power in one place. This makes deep and narrow welds. A big spot size spreads the energy out. This makes wide but shallow welds. Change your welding settings to get the best weld for your job.
Tip: Always check your welding settings before you start. The right power, spot size, and speed help you make strong and clean welds every time.
Key Welding Parameters
Laser Power and Welding Speed
You can change how laser welding works by changing laser power and welding speed. If you turn up the laser power, you can make a keyhole effect. This effect helps the laser go deeper into the metal. But if you use too much power, the metal can get too hot or have marks on the surface. If you use less power and move the laser faster, the weld will look smoother but will not go as deep. You need to find the right mix so you do not get holes or bent metal. The table below shows good welding speeds for different metals and power levels:
| Material Type | Thickness | Power (W) | Welding Speed (mm/s) |
|---|---|---|---|
| Stainless Steel | < 1mm | 500 – 1000 | 30 – 80 |
| 1 – 3mm | 1000 – 2000 | 20 – 50 | |
| > 3mm | 2000 – 3000 | 10 – 30 | |
| Copper | < 1mm | 800 – 1200 | 20 – 50 |
| 1 – 3mm | 1200 – 2000 | 10 – 30 | |
| > 3mm | 2000 – 3000 | 5 – 20 | |
| Aluminum | < 1mm | 600 – 1000 | 30 – 70 |
| 1 – 3mm | 1000 – 2000 | 20 – 50 | |
| > 3mm | 2000 – 3000 | 10 – 30 | |
| Carbon Steel | < 3mm | 800 – 1500 | 30 – 70 |
| 3 – 6mm | 1500 – 2500 | 20 – 50 | |
| > 6mm | 2500 – 3500 | 10 – 30 |
Focal Position and Spot Size
You also have to set the laser’s focus and spot size. A short focal length gives a small spot and more energy in one place. This is good for careful welding and thin metal. A bigger spot is better for thick metal. It helps you cut fast and keep the weld clean. Here is a simple guide:
- Pick a small spot for thin metal to get more control.
- Use a big spot for thick metal to keep welding fast and strong.
The table below shows how changing the focus changes the spot size and energy:
| Aspect | Description |
|---|---|
| Focal Length Impact | Short focal lengths make small spots for careful welding. |
| Spot Size | Small spots help you control heat and do tiny welds. |
| Energy Density | More energy in one spot means deeper and faster welds. |
| Application | Short focal lengths are good for shiny metals; long ones are good for big pieces. |
Power Density for Keyhole Welding
Power density is important for how deep the weld goes and how well it works. If you get power density over 1.5 MW/cm², you can do keyhole welding. This makes deep and skinny welds and works well for thick metal. The chart below shows how power density changes the weld and how deep it goes:
| Welding Mode | Power Density | Penetration Depth | Typical Application |
|---|---|---|---|
| Conduction | < 10⁵ W/cm² | Shallow (up to 0.5 mm) | Thin metals, careful welding |
| Transition | 10⁵ – 10⁶ W/cm² | Medium (1–2 mm) | Medium thick metal sheets |
| Keyhole Welding | > 10⁶ W/cm² | Deep (>2 mm) | Strong welds, thick metal |
Tip: For strong welds, try to use about 1 kW of laser power for each millimeter you want to weld deep. Change your settings to fit your metal and its thickness to get the best welds.
Choosing Laser Welder Power
Application-Based Power Selection
You need to match the laser welder power to your material and job. The right choice helps you get strong welds and good performance. Start by looking at the type of metal you want to weld. Copper, steel, and aluminum each need different settings. You should also think about how thick the metal is and how fast you want to work. Here are the main things you should check when you select laser welding power:
- Type of laser: Pick CO2, Nd:YAG, or fiber lasers for your application.
- Power output: This affects how deep the weld goes and how fast you can weld. Most jobs use between 1500W and 2000W.
- Welding speed: Faster speeds help you finish more work, but can change weld quality.
- Focal spot size and focus control: Smaller spots give you more control.
- Cooling system: Water-cooled systems work best for high power.
- Automation and control: These features help you get better results.
- Safety features: Look for covers and emergency stops.
- Maintenance: Easy maintenance keeps your machine running.
- Energy use: Efficient machines save money.
- Operating environment: Make sure your laser works in your shop’s temperature and humidity.
You can use this table to find recommended laser welder power levels for different metal thicknesses:
| Metal Thickness | Wire Diameter | Voltage (Volts) | Wire Feed Speed (IPM) | Gas Flow Rate (CFH) |
|---|---|---|---|---|
| Thick Metals (1/4″ to 1/2″+) | 0.035″ or 0.045″ | 22–28 | 300–450 | N/A |
| Medium-Thickness Metals (1/8″ to 1/4″) | 0.030″ or 0.035″ | 18–22 | 200–300 | 20–25 |
| Thin Metals (24 Gauge to 1/8″) | 0.023″ | 14–18 | 100–200 | 15–20 |
Tip: Always ask yourself how much power you need for your job. The ideal power level depends on your metal and thickness. If you want to optimize laser power, test your settings before you start production.
Common Mistakes in Power Choice
Many people make mistakes when they pick laser welding power. These mistakes can hurt weld quality and machine performance. You should know what to avoid. The table below shows common mistakes and what can happen:
| Common Mistakes | Effects on Weld Outcomes |
|---|---|
| Insufficient Training | You may not know how settings change your welds. |
| Parameter Mismanagement | Wrong settings can cause bad welds. |
| Lack of Procedural Compliance | Skipping steps can make defects. |
| Limited Troubleshooting Skills | Hard to fix problems, which can get worse. |
| Inconsistent Production Quality | More scrap and rework. |
| Machine Damage | Ignoring safety can break your machine. |
| Safety Hazards | Not using protection can be dangerous. |
| Higher Laser Power | Too much power can cause spatter and burn-through. |
| Welding Speed | Wrong speed changes heat and weld fusion. |
| Focal Position | Bad focus can make weak or uneven welds. |
You should always check your settings and follow safety steps. Avoid using more power than you need. Too much or too little power can cause problems. If you want the best results, use the recommended laser welder power levels for your job.
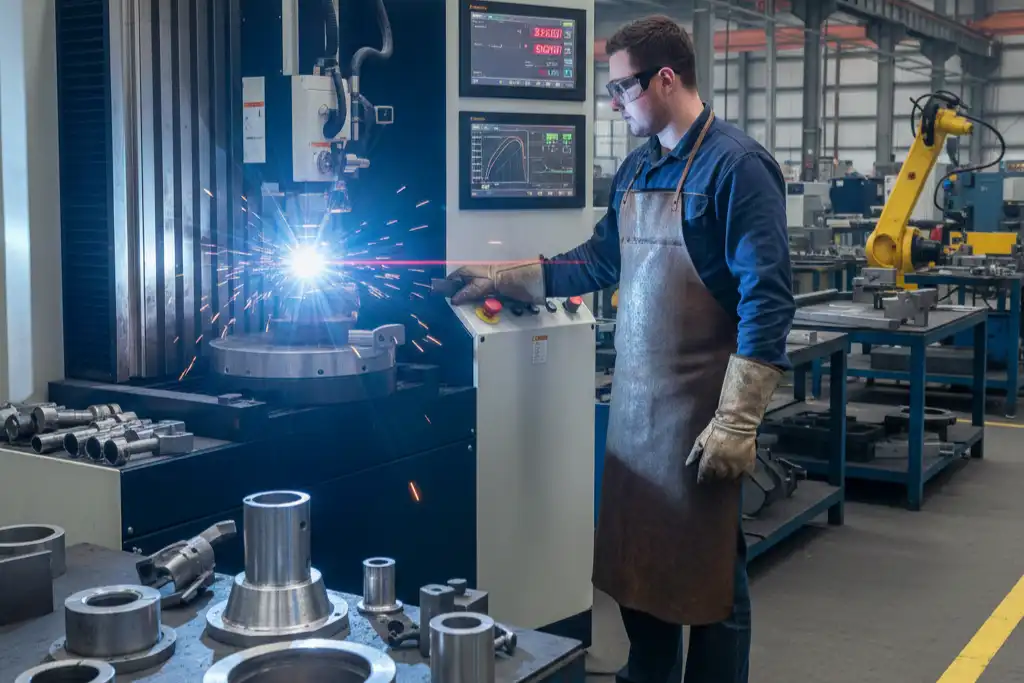
Site Requirements for Laser Welding
Getting your workspace ready for laser welding is very important. You need a safe, clean, and organized area. This helps your equipment work well. This part will show you what you need for a good setup.
Space and Layout Needs
Start with a planned space for your laser welding. A good layout keeps you safe. It also helps you work faster. When your area is set up right, you can control the laser better. You can also manage the power for each job.
| Requirement | Description |
|---|---|
| Designated Controlled Area | Use a closed area to stop laser beams from escaping. This helps keep people safe. |
| Proper Signage | Put up clear signs to warn about laser dangers and rules. |
| Safety Interlocks | Use systems that turn off the laser if there is a problem. This keeps you and others safe. |
| Built-in Safety Features | Look for things like a key switch, two-step trigger, and safety circuits. |
| Laser Welding Enclosures | Use enclosures that meet safety rules for safe welding. |
| Ventilation Systems | Install systems to remove bad air and dust. |
A smart layout helps you work better and safer. Keep walkways clear. Put your materials where you can reach them easily. This helps stop messes and lowers the chance of accidents.
| Strategy | Impact on Workflow | Impact on Safety |
|---|---|---|
| Optimize material flow | Makes work faster | Less mess, fewer accidents |
| Clear access paths | Easier to move around | Quick exits in emergencies, less crowding |
Tip: Keep your area neat and use laser curtains to protect others. Teach everyone the safety rules. Check your equipment often.
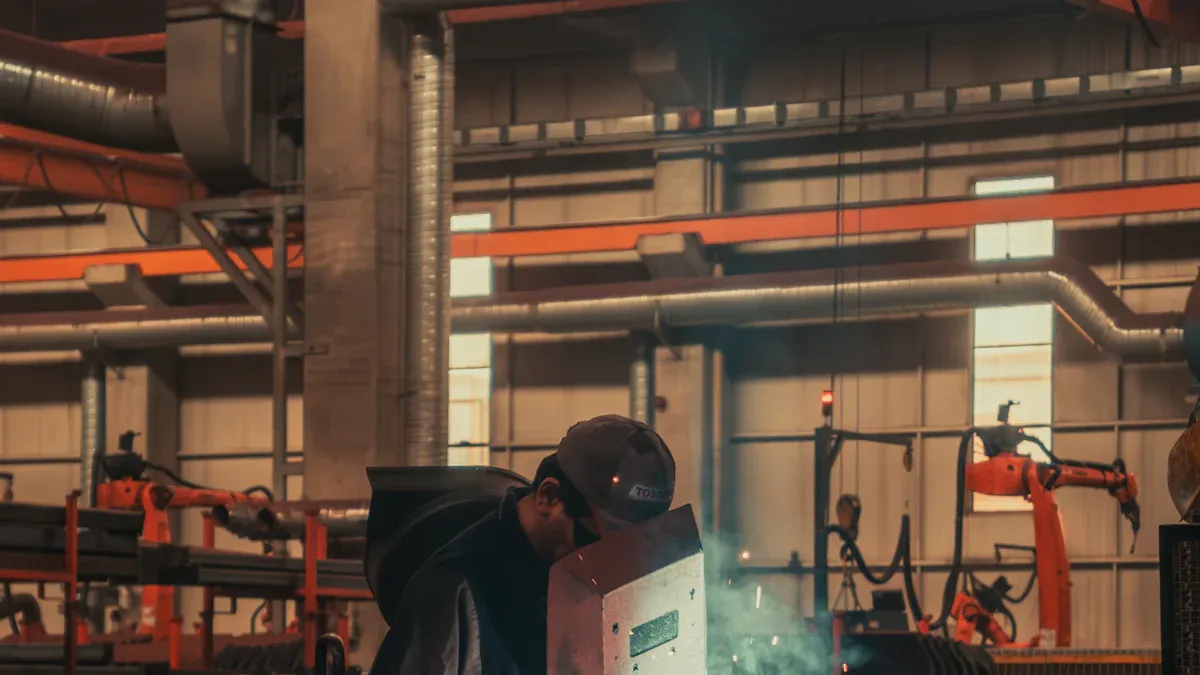
Ventilation and Fume Extraction
Laser welding makes fumes and dust that can be bad for you. You need strong fans and fume systems to keep the air clean. These systems take away metal bits, gases, and other bad things from the air.
| Source | Key Recommendations |
|---|---|
| ACGIH | Use safe exposure limits called TLVs. These are often stricter than OSHA rules. |
| NIOSH | Follow safe limits and use air controls and tests. |
| EU Directives | Check and control dangerous stuff. Follow strict rules for metals like chromium. |
Fumes from laser welding can make you feel sick or give you headaches. Breathing these fumes for a long time can hurt your lungs. You could get metal fume fever or even cancer. You might also breathe in tiny plastics or toxic metals like lead and chromium. These can cause asthma or other health problems. Heavy metals like chromium and nickel are very dangerous. Bad gases like nitrogen oxides can hurt your lungs. Dust from welding can also make it hard to breathe.
Note: Always use local exhaust fans and check the air often. This keeps you safe and follows the law.
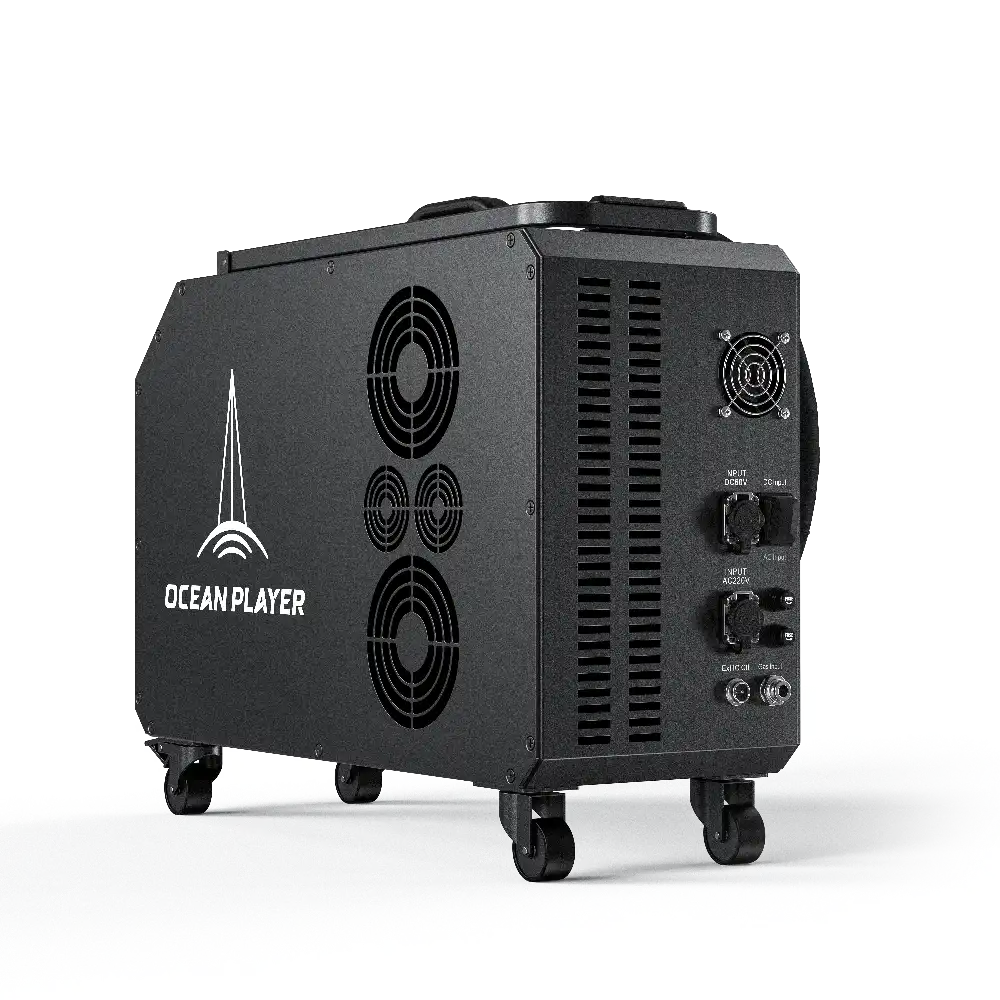
Electrical Supply and Cooling
Laser welding machines need steady power and good cooling. The right setup keeps your laser working well.
- Water-cooled systems are best for high power and long jobs. They can run up to 3000W for a long time. You need to change the water and clean filters often, but you get better results.
- Air-cooled systems cost less and are easy to take care of. They work for lasers under 1500W and in cool rooms (under 30°C).
If you do not cool your laser right, the power can drop. The laser can get too hot and make weak welds. You might see cracks or holes in your welds. If your machine gets hot a lot, it can break down more and cost more to fix.
Tip: Always check your cooling before you start. Good cooling keeps your laser strong and focused.
Safety and Environmental Controls
You must follow safety and environmental rules when using laser welding. These rules keep you and others safe.
| Control Type | Description |
|---|---|
| Exposure Limits | Follow rules like ANSI Z136.1 to stop burns and eye injuries from lasers. |
| Personal Protective Equipment | Wear gloves, helmets, and special glasses as OSHA and ANSI say. |
| Controlled Access Zones | Only let trained people near lasers. Use signs and barriers. |
| Emergency Protocols | Have clear steps for shutting down and leaving if needed. |
| Training and Certification | Make sure everyone gets special training on safety. |
| Air Quality Management | Use local exhaust fans to control fumes and dust. |
| Fire Safety Measures | Use fire barriers and keep your area clean. |
Laser welding makes fumes and dust that float in the air. You need to check the air and use exhaust fans. Fire can start if flammable things are near the laser. Use fire barriers and check your area often.
Engineering controls like interlocks and beam covers are very important. These can lower the risk of laser injuries by over 40%. Interlocks turn off the laser if a door opens. Beam covers make strong lasers safer to use.
Remember: Always check how much power you need and look at your safety systems before you start. The right setup helps you get the best welds and keeps everyone safe.
Assessing and Optimizing Setup
Evaluating Power and Site Conditions
You should check your laser welding setup often. First, look at your power settings. Make sure your laser has enough power for your metal and its thickness. If your welds are weak, you may have low power or not enough energy in one spot. If you see holes or burn marks, your power might be too high. Look around your work area for problems like bad airflow or a messy space. These things can hurt your welding results. Watch out for these common problems:
- Porosity: Gas bubbles can form if your power is not steady or your shielding gas is wrong.
- Cracking: Cooling too fast or using too much power can make cracks.
- Lack of fusion: Not enough power or dirty metal can make weak welds.
Use this table to find problems and what causes them:
| Weld Defect | Cause | Impact |
|---|---|---|
| Lack of penetration | Not enough power or energy density | Weak welds, poor conductivity |
| Over penetration | Too much power | Damage to parts, safety risks |
| Spatter | Unstable power or molten pool | Short circuits, messy welds |
| Porosity | Bad gas shielding, unstable power | Weak welds, possible leaks |
| Cracking | Fast cooling, high power | Weld failure, hidden defects |
Upgrading Your Workspace
You can make your workspace better by adding stronger cooling, better fans, and steady power. Use local fans to pull out fumes. Keep your area neat and tidy. Upgrade your laser controls so you can set the right power every time. Add safety locks and clear warning signs. These steps help stop accidents and make your welds better.
Maintaining Optimal Welding Conditions
Check and take care of your laser welding system often. Clean your lenses and look at your power supply. Change filters in your cooling system. Test your energy to make sure your laser stays strong. Make a plan for regular care. This helps you stop breakdowns and keeps your welding working well. When you keep your setup in good shape, you get strong welds and a safe place to work. You also save money because your machine will not break as much.
Tip: A good care plan helps your laser welding system stay safe and work well for a long time.
You need to match laser welding power and site setup to your job. The right laser settings and workspace help you get strong, safe welding results. Check your setup often and make changes when needed.
Good planning leads to better welds and a safer shop.
- Review your power and site needs.
- Test your welding parameters.
- Train your team on safety.
FAQ
What is the main benefit of laser welding over traditional welding?
Laser welding makes cleaner welds than regular welding. It is more precise and uses focused energy. Less heat spreads to other parts. This stops warping and keeps your parts looking nice.
How much space do you need for a laser welding setup?
You need a special area for your laser welding equipment. Make sure there is enough room for safety barriers. Keep walkways clear and leave space for ventilation. This helps you work safely and quickly.
Why is ventilation important during welding?
Ventilation takes away bad fumes and dust from the air. It protects your lungs and keeps your workspace safe. Good airflow helps your equipment last longer. It also makes the area more comfortable.
Can you use a laser for both cutting and welding?
Yes, you can use a laser for cutting and welding. You just change the settings and adjust the focus. This lets you do different jobs with one machine.