When you work with welds, you often see fabrication specs that call for a minimum distance between welds. Most jobs require the greater of 75mm or five times the thickest wall thickness from weld toe to weld toe. For non-pressure attachments, you usually need at least 50mm between welds. Codes may not always list a minimum, but you follow these standards to keep welds safe and strong. You might face spacing problems in the field, but skilled welders find ways to solve them.
Key Takeaways
- Keep at least 75 mm or five times the thickest wall between welds. This helps make the welds strong and safe. – Follow welding codes like ASME B31.3 and API 650. These rules help stop cracks and weak spots from happening. – Use tools like calipers and laser measuring devices to check weld spacing. This helps you avoid expensive errors. – Plan your workspace so paths are open and safe during welding. – Learn from real welders’ stories. You can fix mistakes, but good spacing stops big problems.
Minimum distance between welds in practice
Code and spec guidelines
You need to follow certain codes when you decide weld spacing. Some common codes are ASME B31.3, ASME Section VIII, and API 650. These codes help keep your welds safe and strong. The table below lists some main rules:
| Standard | Minimum Weld Spacing Requirement |
|---|---|
| ASME B31.3 | At least one pipe diameter or 25 mm, whichever is greater. |
| ASME Section VIII | Spacing should prevent overlap of heat-affected zones (HAZ). |
| API 650 | Minimum distance of 100 mm (4 inches) between horizontal and vertical welds. |
Not every code gives a strict minimum distance. Sometimes, you only get a guideline. You must use your judgment or follow your company’s rules. These rules help keep your welds safe and easy to check.
Typical measurements
In the field, weld spacing can be different. Many welders and companies use their own rules if the code does not say. Here is a table with some common measurements:
| Source | Minimum Weld Spacing |
|---|---|
| ASME B31.3 | No requirement; common practice: 2t or 40 mm |
| Informal company-standard | Often 3 × D or 3 in (~75 mm) |
| Non-code recommendations | 4 × t or 1 × D, with lower bound of 38 mm (1.5 in) |
| NDT recommendation | ≥ 10 mm (~0.4 in) for inspection access |
| Pipelines (sleeve spacing) | ≥ 1 × pipe diameter between sleeves |
The minimum distance between welds can change for many reasons. These reasons include material thickness, pipe diameter, and weld type. The table below shows how these things affect spacing:
| Factor | Description |
|---|---|
| Material Thickness | Thicker materials need more space to avoid heat-affected zone (HAZ) overlap. |
| Pipe Diameter | Larger pipes often require more distance between welds for strength and stress reasons. |
| Weld Type | Some welds need more space for looks or to keep the structure strong. |
| Residual Stresses | You must avoid overlapping stress fields to prevent distortion. |
| Aesthetic Preferences | Sometimes, you space welds for a better appearance, especially in new construction. |
Why spacing rules exist
You need spacing rules for many reasons:
- Stops heat-affected zones (HAZ) from overlapping and weakening the joint.
- Lets you do non-destructive testing (NDT) to check welds.
- Lowers the chance of cracks starting between welds.
- Makes it easier to fix welds if needed.
- Prevents metallurgical problems, especially with multi-pass welding.
Tip: Always check your project’s code and company rules before welding. This helps you avoid mistakes and keeps your work safe.
The minimum distance between welds is not just a number. It helps keep your structure strong and helps you pass inspections. When you know why these rules exist, you can make better choices on every job.
Why weld spacing matters

Risks of close welds
Some people think putting welds close together saves time or space. But this can cause big problems. When welds are too close, the heat-affected zones (HAZ) can touch each other. This makes the metal weaker. The HAZ can get brittle and crack more easily. Cracks might not show up right away. Cold cracking can start after the weld cools down. It can spread into the weld. These cracks often happen because of extra stress and trapped hydrogen in the metal.
If you do not follow the minimum distance between welds, you risk defects. Overlapping HAZ areas can make the metal bend or break under pressure. It also gets harder to check the welds for problems. In piping systems, weak spots can cause leaks or bursts. This can put people and machines in danger.
Note: Always leave enough space between welds. This helps stop heat-affected zones from overlapping and lowers the chance of cracks.
Structural failures
Bad weld spacing does not just make small cracks. It can cause big failures. History shows that some disasters happened because welds were too close or not done right.
- The King Street Bridge fell down in 1962. Brittle fracturing and lamellar tearing, made worse by bad weld spacing, caused the collapse.
- The El Paso Civic Center had a similar problem. Lamellar tearing led to a big investigation and changes in welding rules.
- In another case, a building fell because of a bad weld. This showed how important good welding is for safety.
If you do not use the right weld spacing, you risk the whole structure. Even one weak weld can start a chain reaction. This can lead to a collapse or serious damage.
Real-world consequences
Not following weld spacing rules can cost more than just repairs. It can waste time, money, and even lives. Here are some real-life effects:
- In cars, bad weld spacing can make panels come apart. This makes the car unsafe.
- In factories, welds in the wrong place can make machines break or products fail.
- Small welding mistakes can turn into big cracks. These can cause sudden breaks in bridges, buildings, or pipes.
Here is a table that shows how much bad weld spacing can cost:
| Cost Type | Impact on Costs |
|---|---|
| Rework costs | 200-300% of original weld price |
| Production delays | $50,000+ per day in lost output |
| Rejected components | Complete fabrication restart costs |
| Late delivery penalties | 5-15% of contract value |
You can see that not following the minimum distance between welds can cost a lot of money. More important, it can put workers and the public in danger. Good weld spacing keeps your projects safe, strong, and on time.
Stories from real welders
Common challenges
It is hard to keep the right space between welds. Weld shrinkage can bend and twist the metal. You need to control heat so the metal does not get ruined. Sometimes, it is tough to reach the joints or use your tools. Safety and the work area can make welding harder. Your welding skills matter a lot, so you must do things the same way each time.
- Managing heat and stopping distortion
- Getting to joints and placing tools
- Keeping welds strong and good
- Staying safe and working in tough places
Weld mapping helps you do your work the same way every time. Clamps and fixtures hold parts steady and stop them from bending.
Mistakes and fixes
Mistakes happen if you hurry or do not plan well. One welder said he put pipe supports too close together. The welds touched and cracked after cooling. You can fix this by grinding out the bad weld and welding again with enough space. Another welder did not check the root opening, so the joints were weak. You can fix this by checking the gap before welding and making it better for strong welds.
If you see bending or cracks, stop and look at your weld spacing. Fixing problems early saves time and money.
Practical solutions
There are ways to stop spacing problems. Get your joints ready before you weld. Make grooves that fit the metal and joint type. Check the root opening to make the weld strong. Use clamps and fixtures to keep parts in place. Weld mapping helps you plan and keep the right space between welds.
| Solution | How It Helps |
|---|---|
| Joint preparation | Makes welds strong and last longer |
| Groove design | Fits the metal and joint type |
| Root opening check | Makes welds stronger and deeper |
| Clamps/fixtures | Stops bending and keeps things lined up |
| Weld mapping | Keeps weld spacing the same |
You learn something new from every job. If you plan ahead and use good tools, you make fewer mistakes and keep your welds safe.
Tips for proper weld spacing
Planning and layout
Planning ahead helps you avoid weld spacing problems. Look at your workspace before you start. Decide where to put your materials and tools. Use clear layouts to keep work safe and easy. The table below shows some ways to plan and what they help with:
| Strategy | Benefits |
|---|---|
| Back-to-Back Configuration | Saves space, shares ventilation, helps move materials |
| Cluster Configuration | Makes teamwork easier, keeps handling in one spot, helps supervision |
| Space Planning | Keeps aisles open, lets people move safely, gives space for tools, helps in emergencies |
| Ventilation Optimization | Makes air move better, keeps maintenance simple |
| Planning for Growth | Lets you expand, helps you change things later |
| Infrastructure Considerations | Plans for power and air, helps with future changes |
Tip: Always check your layout for clear paths and emergency exits. This keeps everyone safe and helps work go faster.
Tools and techniques
You need good tools to measure weld spacing. Digital weld controls and layout templates help you keep spacing right. These tools use software and hardware to lower mistakes. Automation helps make welds the same every time.
Here are some tools and what they do:
| Tool | Accuracy | Application |
|---|---|---|
| Hi-Lo Gauge | ±0.01-inch tolerance | Checks pipe alignment and gap before welding |
| Pipe Pit Gauge | ±0.005-inch accuracy | Measures pipe wear, good for repairs |
| Calipers | ±0.001-inch accuracy | Measures small gaps and thickness |
| Laser Measuring | ±1/16-inch at 100 feet | Good for big layouts and long distances |
| Smart Gauges | ±0.01-inch accuracy | Connects to apps for tracking in real time |
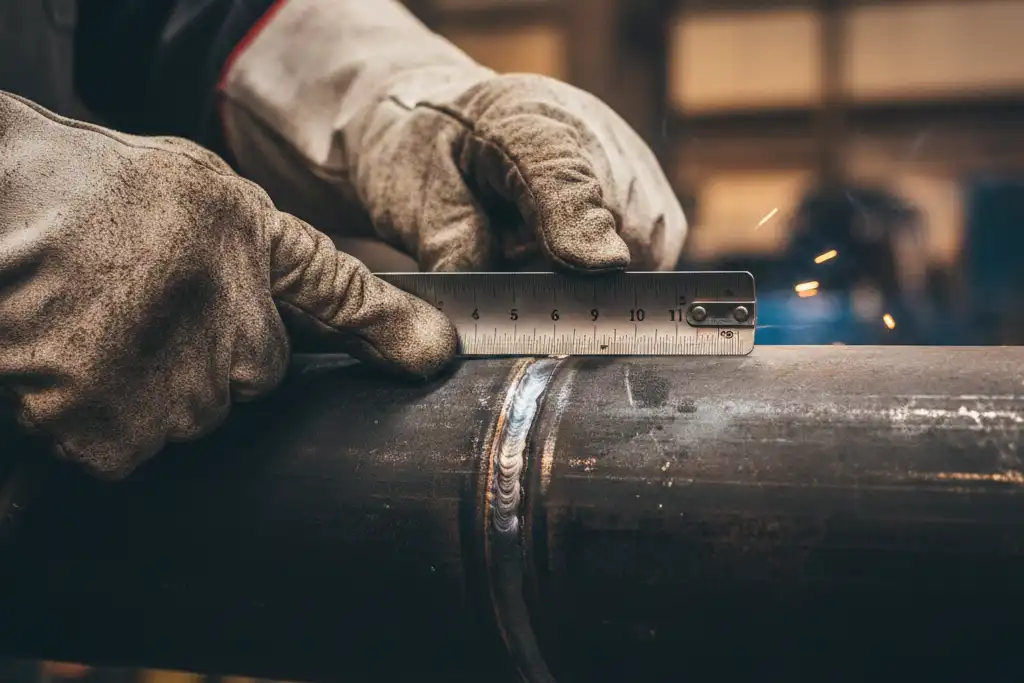
Always measure joint size with approved gauges. Make sure your joint matches the Welding Procedure Specification. Check the root opening, bevel angle, and land before welding.
Field vs. shop welding
It is easier to control weld spacing in a shop. In a shop, you have steady power and good lights. You can be precise and follow the rules closely. In the field, you deal with weather, dirt, and power problems. You may need portable tools and work in small spaces.
| Aspect | Shop Welding (Fabrication) | Field Welding (Erection) |
|---|---|---|
| Environment | Controlled, quality checked | Unpredictable, real-world problems |
| Focus | Precision, following rules | System fit, leak-tight joints |
| Activities | Spool making, NDT, material checks | On-site fit-up, welding, pressure tests |
| Challenges | Only shop processes | Weather, access, alignment problems |
Change your techniques for each place. In the field, watch for temperature changes, dirt, and weak power. These things can hurt weld quality and spacing. Always plan ahead and use the best tools you have.
You keep yourself and your work safe by following weld spacing rules. Some codes, like ASME Section VIII and AWS D1.1, tell you what spacing you need:
| Code Reference | Minimum Spacing Requirement |
|---|---|
| ASME Section VIII | 3× thickness of thinner part, or ≥25 mm |
| AWS D1.1 | 4× thickness of thinner part, or ≥25 mm |
| BS 4515 | Toe-to-toe spacing = 4× pipe wall thickness |
| API 650 | Vertical welds = 5× shell thickness |
| EN 15085 | HAZ separation ≥50 mm for thickness >20 mm |
| AS 4041 | Minimum spacing = 4× thickness or ≥40 mm |
| PD 5500 | Longitudinal welds staggered by 4× thickness or ≥100 mm |
Welders share advice to help you avoid expensive errors:
- Clean the metal before you weld.
- Pick the right electrode size for the job.
- Move at a steady speed when welding.
- Hold the torch at the correct angle.
- Watch the heat for each weld.
- Line up joints to make them strong.
- Try new ways to weld and learn more.
Always look at your job’s rules and talk with other welders. Sharing what you know helps you get better and keeps your work safe.
FAQ
What is the minimum distance you should keep between welds?
You should keep at least 75 mm or five times the thickest wall thickness between welds. Always check your project specs. Codes like ASME B31.3 often suggest one pipe diameter or 25 mm, whichever is greater.
Why does weld spacing matter for safety?
Weld spacing stops heat-affected zones from overlapping. This keeps the metal strong and lowers the risk of cracks. Good spacing helps you pass inspections and keeps everyone safe.
Can you fix welds that are too close together?
Yes, you can fix close welds. You may need to grind out the weld and redo it with proper spacing. Always check for cracks and test the area before welding again.
What tools help you measure weld spacing?
You can use calipers, hi-lo gauges, and laser measuring tools. These tools help you check gaps and thickness. Digital gauges give you fast and accurate results.
Do codes always tell you the exact spacing?
No, codes do not always give an exact number. You must follow company standards and use your judgment. Always read your project specs and ask your supervisor if you are unsure.
How material thickness affects the size of the heat affected zone
What is the average width of the heat affected zone for steel welding
Which welding process has the smallest heat affected zone?
What you should know about CNC machine tools and laser cutting