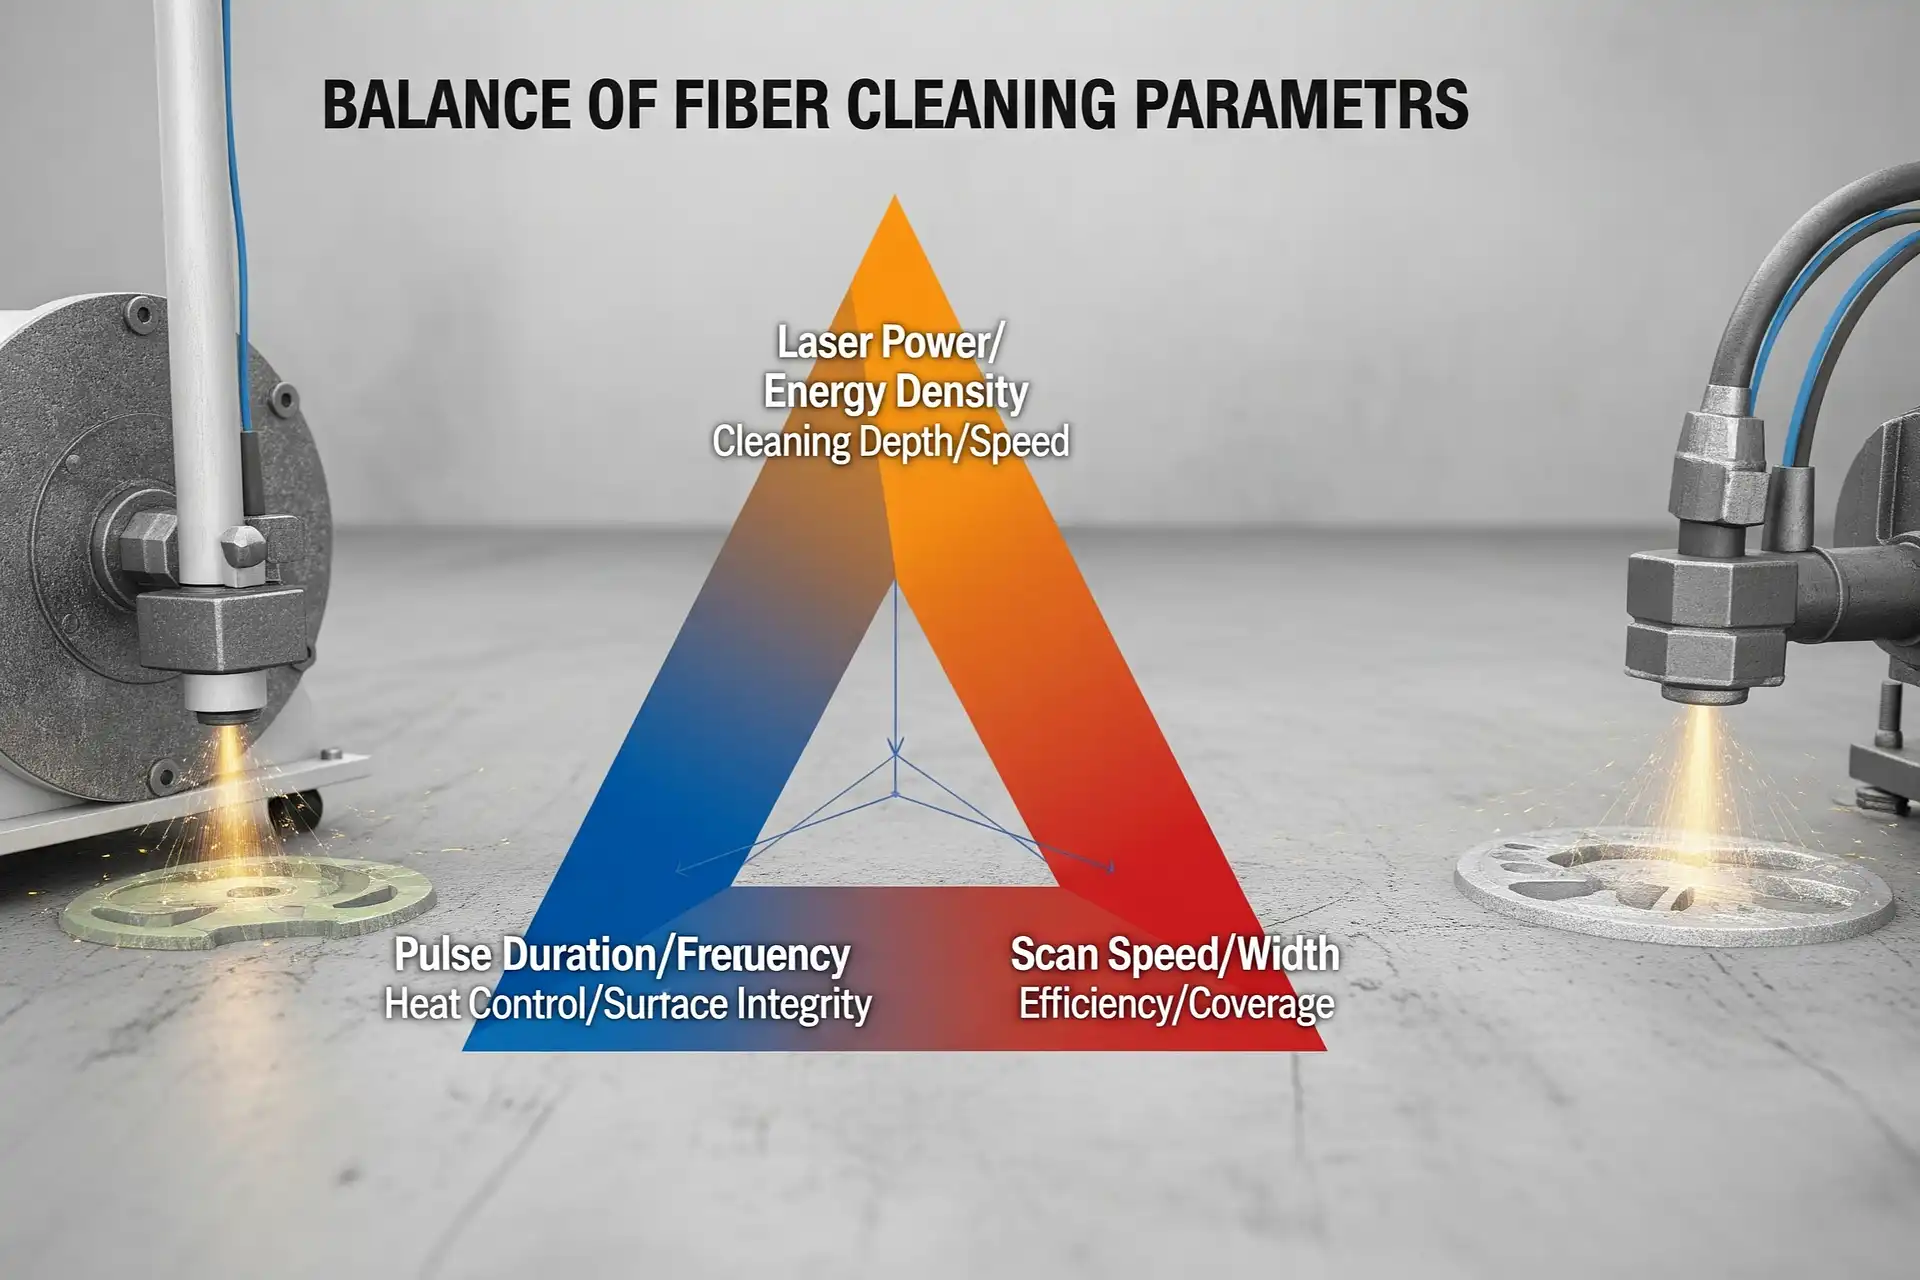
You need to set the right parameters for fiber laser cleaning. The main parameters are laser power, frequency, pulse width, scan speed, wavelength, scan width, and power density. Each one changes how the laser removes rust, paint, or dirt. For example, changing the laser power makes the cleaning stronger or weaker. Scan speed changes how much area you clean and how clean it gets.
The table below shows how some key parameters affect cleaning:
| Parameter | Effect on Cleaning |
|---|---|
| Laser Power | More power cleans tough dirt but can hurt surfaces. |
| Pulse Duration | Short pulses clean small spots; long pulses remove more stuff. |
| Frequency | High frequency cleans faster but with less energy each time. |
| Scanning Speed | Fast scanning covers more area but can miss spots. |
Balancing these settings helps you clean the right way for your material and job.
Key Takeaways
- Pick the correct laser power for your cleaning job. Begin with low power and slowly raise it. This helps you not harm the surface.
- Change the frequency depending on the material. Metals need higher frequencies. Non-metals need lower frequencies.
- Use short pulse widths for gentle materials. This helps stop heat damage. Use longer pulses for strong coatings.
- Match scan speed with power. Fast speeds clean more area but can miss spots. Slow speeds clean deeper but may cause overheating.
- Always follow safety rules. Wear safety gear. Make sure your workspace has no flammable things.
Key Fiber Laser Parameters
Laser Power
Laser power is very important in fiber laser cleaning. You can pick different power levels for your job. If you need light cleaning, use regular power between 20W and 100W. For tough jobs, high-power lasers go from 200W to 1,000W. Some very strong lasers reach up to 3,000W. Most machines give you power from 50W to 2,000W.
| Type of Fiber Laser | Power Range |
|---|---|
| Regular Power Fiber Laser | 20W – 100W |
| High-Power Fiber Laser | 200W – 1,000W |
| Ultra-High-Power Fiber Laser | 500W – 3,000W |
More laser power helps you clean hard dirt faster. But too much power can hurt the surface. For example, 3,300W removes all oxides from aluminum. If you use more power, you might crack or melt the surface. Less power may not clean well. You need to find the right balance for good results.
Tip: Begin with low power and slowly turn it up. Check the surface for damage as you clean.
Frequency Range
Frequency means how many laser pulses hit each second. The best frequency depends on what you are cleaning. For metals, use continuous wave fiber lasers with 1,000W to 3,000W. For non-metals, CO₂ lasers with 10W to 500W work better.
| Material Type | Laser Type | Power Range |
|---|---|---|
| Metals | Continuous Wave | 1,000W–3,000W |
| Non-Metals | CO₂ Laser | 10W–500W |
Changing frequency changes cleaning speed and surface quality. High repetition rates over 50kHz clean thin layers fast and make surfaces smooth. Low repetition rates under 10kHz give more energy per pulse. This helps remove thick dirt but can make the surface rough.
| Repetition Rate | Material Removal Rate | Surface Finish Quality |
|---|---|---|
| High (>50kHz) | Cleans thin layers fast | Smoother surfaces |
| Low (<10kHz) | Removes thick layers | Rougher surfaces |
Pulse Width
Pulse width is how long each laser pulse lasts. Short pulse widths help you clean with more care. They work well for soft materials like wood or thin metal. Short pulses lower the risk of heat damage. Long pulse widths put more energy in each pulse. This helps remove tough coatings but can cause more heat and stress.
- Narrow pulse width makes cleaning and cutting easier.
- Less energy per pulse means less chance of damage.
- Longer pulse width adds heat and can cause stress or damage.
Note: Use short pulse widths for gentle surfaces to stop heat problems.
Scan Speed
Scan speed is how fast the laser moves over the surface. If you go too fast, the laser may not clean well. If you go too slow, the surface can get too hot and melt or get rough.
- Faster scan speed at first makes the surface smoother, but too fast leaves dirt.
- Slow scan speed can cause melting and buildup.
- The best scan speed is often about 500 mm/s.
Change scan speed and laser power together for the best cleaning and safety.
Wavelength
Wavelength affects how well the laser cleans different things. Most fiber laser cleaning uses infrared wavelengths from 700 nm to 1064 nm. This range works well for metals, rust, and coatings because they absorb IR light easily.
| Laser Wavelength | Application | Details | Advantages |
|---|---|---|---|
| IR 700-1064nm | Metal Cleaning | Removes rust, oxides, and coatings from steel, aluminum | High absorption, good for thick layers, efficient |
- Metals like steel and aluminum clean best at 1064 nm.
- Plastics and glass may need other wavelengths, like 355 nm or 532 nm, to avoid damage.
Picking the right wavelength helps you clean faster and keeps the material safe.
Scan Width
Scan width is how wide the laser cleans in one pass. For big surfaces, a wide scan width like 150 mm cleans faster. For small or careful jobs, use a narrow scan width for better control.
| Task Type | Recommended Scan Width |
|---|---|
| Large Surface Area | 150 mm |
| Precision Cleaning | N/A |
Tip: Use wide scan width for big jobs. Use narrow scan width for careful or small work.
Power Density
Power density is how much laser energy hits a small spot. It is important for removing oxides and coatings. Good cleaning needs power density around 7.96 × 10⁶ W/cm². Higher power density cleans faster but can crack or roughen the surface.
- High power density makes cleaning quick but can cause rough spots.
- Low power density may not clean everything.
| Energy Density (J/cm²) | Effect on Surface Roughness | Observations |
|---|---|---|
| < 2.21 | Decreased | No significant damage |
| ≥ 2.21 | Increased | White cracks from heat accumulation |
Always change power density to match the material and dirt you want to remove.
Parameter Effects
Material Removal
You can change how much material the laser takes away by changing the main settings. Laser power, pulse duration, scanning speed, and energy density all matter. If you turn up the power or energy density, you will take off more dirt or rust. If you slow down the scanning speed, the laser stays longer on each spot. This helps clean deeper. You should think about how deep you want to clean, if the surface is sensitive to heat, and how smooth you want it to look. Changing these settings helps you clean tough stains but not harm the main material. You get better results when you match the settings to the surface and how dirty it is.
- How deep you need to clean
- If the surface is sensitive to heat
- How smooth you want the finish
- How fast and efficient you need to work
Tip: Change the settings a little at a time and look at the surface often. This helps you stop damage and get the best cleaning.
Surface Quality
How good the cleaned surface looks depends on the laser settings you use. Shorter pulse durations make less heat and give a smoother surface. Longer pulses can make the surface rough because of extra heat. A small spot size lets you clean with more care. High beam quality gives even cleaning and less roughness. The way the material moves heat also matters. Metals that move heat well stay smooth because they spread heat fast. If the material soaks up too much energy, you might see rough spots or cracks.
| Parameter | Effect on Surface Quality |
|---|---|
| Pulse Duration | Short pulses make less heat and smoother surfaces; long pulses make more roughness. |
| Pulse Smoothness | High smoothness means less roughness; low smoothness can make uneven heat and more roughness. |
| Spot Size | Small spots are good for careful cleaning; big spots are better for large areas. |
| Beam Quality | High quality gives even results and less roughness; low quality can make the cleaning uneven. |
| Thermal Conductivity | High conductivity stops melting and roughness; low conductivity can make more roughness. |
| Absorption Coefficient | High absorption cleans better but can make more roughness if too high. |
Cleaning Efficiency
You can clean faster and better by picking the right settings. Pulse duration, energy density, scanning speed, and the type of material all change how fast you finish. The right pulse duration and energy density help you take off more dirt in less time. Scanning speed changes how much area you clean. Different materials need different settings. Metals may need more energy, but plastics need less energy so they do not get hurt.
| Parameter | Description | Impact on Cleaning Efficiency |
|---|---|---|
| Pulse Duration | How long the laser works during each pulse. | Changes how much energy goes into the material. |
| Energy Density | How much energy hits each area of the surface. | Shows how well dirt and stains come off. |
| Scanning Speed | How fast the laser moves over the surface. | Changes how long cleaning takes and how well it works. |
| Material Type | Each material needs its own settings. | Helps you clean well without hurting the surface. |
Note: Always set your fiber laser to match the job. This helps you clean faster and keeps the surface safe.
Balancing Parameters
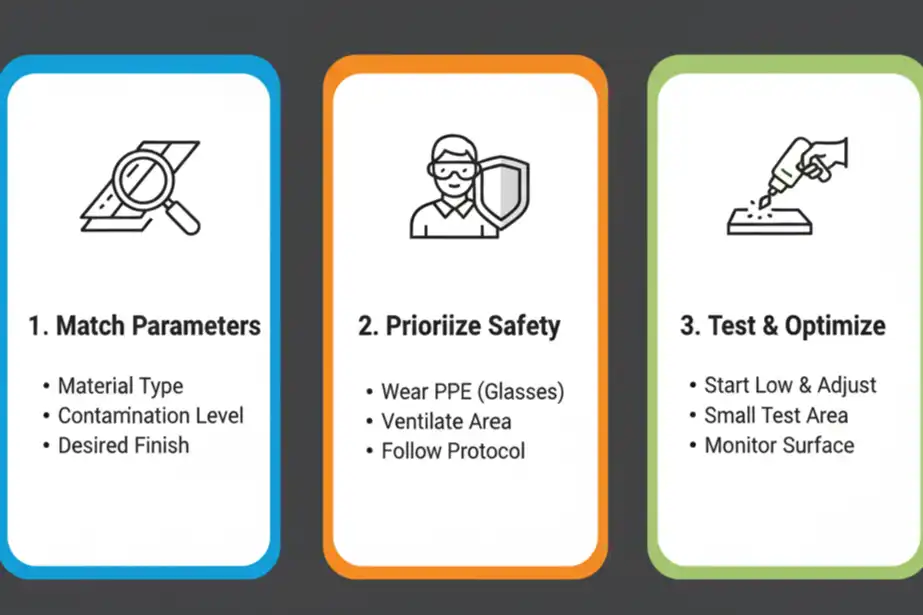
Adjusting for Material Type
You need to match your cleaning settings to the material. Each material reacts to laser energy in its own way. Metals like aluminum and copper move heat fast. You can use higher frequencies for these metals. This helps make the surface smoother. Plastics and painted surfaces do not move heat well. Use lower frequencies and shorter pulses for these materials. This stops damage from too much heat.
- Change frequency for each material. Higher frequencies make smoother cuts but may slow cleaning.
- Check if the material can handle heat. Metals that move heat well work best with higher frequencies.
- Set the laser focus carefully. Good focus puts energy where you need it. Bad focus means poor cleaning.
Tip: Test your settings on a small spot first. This helps you avoid mistakes and keeps the material safe.
Rust Removal Settings
When you clean rust from steel, you must balance power, frequency, pulse duration, and scanning speed. Too much power can hurt the steel. Too little power may leave rust behind. The table below shows how each setting affects rust removal and gives tips for best results.
| Parameter | Definition | Function | Tips |
|---|---|---|---|
| Laser Power | How much power the laser gives, in watts (W) | More power cleans tough rust but can hurt surfaces. | Use just enough power to clean without harming steel. |
| Laser Frequency | Number of laser pulses each second, in kilohertz (kHz) | High frequency cleans faster but with less energy per pulse. | Pick frequency based on the material and cleaning goal. |
| Pulse Duration | How long the laser is on for each pulse, in nanoseconds (ns) | Short pulses clean with care; long pulses remove thick rust but may hurt surfaces. | Change pulse duration for sensitive materials. |
| Scanning Speed | How fast the laser moves over the surface | Fast scanning covers more area but may miss spots. | Find a speed that cleans well and covers everything. |
Start with low power and short pulses. Slowly increase them until rust comes off but steel stays safe. Keep scanning speed steady so you do not miss spots or overheat the steel.
Paint and Coating Removal
Paint and coatings need careful control of settings. Too much energy can burn or bend the base material. Too little energy leaves paint behind. Use medium laser power and change pulse duration for coating thickness. Thin coatings come off with short pulses and high frequencies. Thick coatings need longer pulses and lower frequencies.
- Use medium power for most paint jobs.
- Change pulse duration for coating thickness. Short pulses for thin layers, long pulses for thick layers.
- Adjust scanning speed to stop overheating. Move the laser steadily for even cleaning.
Note: Always wear safety gear when removing paint. Some coatings make fumes when heated.
Fine vs. Heavy Cleaning
You must change your settings for fine cleaning and heavy cleaning. Fine cleaning needs gentle energy and careful control. Heavy cleaning uses more power and longer pulses to remove tough dirt or thick coatings. The table below shows good settings for each job.
| Cleaning Task | Recommended Parameters |
|---|---|
| Fine Cleaning | Lower pulse energy, shorter pulse duration, higher pulse repetition rate, precise scanning patterns |
| Heavy-Duty Cleaning | Higher pulse energy, longer pulse duration, lower pulse repetition rate, broader scanning patterns |
For fine cleaning, use short pulses and high repetition rates. Scan slowly and carefully. For heavy cleaning, use more pulse energy and longer pulses. Scan wider areas to clean faster.
Tip: Always change your fiber laser settings for each job. Start gentle and only use more power if you need it.
Practical Tips for Fiber Laser Cleaning
Gradual Adjustment
You can get good cleaning by changing settings slowly. Start with low pulse energy and a medium scan speed. This helps you keep the workpiece safe. Follow these steps to adjust your settings:
- Use low pulse energy and a medium scan speed first.
- Look at the surface with a microscope or a clear camera.
- Try new settings in small steps and write down what happens.
- Keep testing until you find the best settings for your material.
- Always wear safety gear and use a strong exhaust to remove dust and gases.
- If cleaning is hard, ask experts or the manufacturer for help.
Tip: Small changes can make a big difference. Go slow and check the surface often.
Manufacturer Guidelines
Always read and follow the instructions from your fiber laser manufacturer. These rules help you set the right parameters for your machine and material. Most manufacturers say to start with a frequency between 10 and 100 Hz. Many jobs work best at 50 Hz. They also tell you how to use and care for your machine safely. If you have questions or tough cleaning jobs, call the manufacturer’s support team. Their advice helps you avoid mistakes and keeps your machine working well.
| Manufacturer Advice | Benefit |
|---|---|
| Recommended settings | Safer and better cleaning |
| Safety instructions | Stops accidents |
| Technical support | Fixes hard problems |
Avoiding Common Mistakes
Many people make mistakes when setting fiber laser parameters. You can stop these problems by remembering a few important things:
- Change pulse duration to control heat and protect soft materials.
- Pick the right pulse energy; too little leaves dirt, too much can hurt the surface.
- Match repetition rate and wavelength to the material for better cleaning.
- Use a smooth beam profile to stop marks and overheating.
- Do not use too much power density or the wrong scan width, or you might get cracks or uneven cleaning.
Note: Careful setup and regular checks help you avoid expensive mistakes and get the best results.
Safety and Troubleshooting
Laser Safety
You have to follow safety rules when using fiber laser cleaning equipment. Lasers can start fires or cause injuries if not used right. Always look at your workspace before starting. Take away anything that can burn. Wear laser safety goggles to keep your eyes safe. Keep a fire extinguisher close by. Only trained people should use the laser. Never fix the machine while it is on.
| Safety Protocols | Description |
|---|---|
| Fire Risk Management | Find and control things that might catch fire near the laser. |
| Fire Extinguishing Equipment | Make sure fire extinguishers are easy to reach and meet NFPA 10 rules, especially Class C CO2. |
| Training and Preparedness | Give everyone full training and practice emergency drills often. |
| Laser Product Regulations | Follow rules that sort lasers by danger and use the right safety steps. |
| Personal Protective Equipment (PPE) | Wear laser safety goggles to protect your eyes from the laser. |
| Maintenance Safety | Only do repairs when the laser is off to stop accidents. |
Tip: Always check your safety gear and tools before you start cleaning.
Preventing Damage
You can keep your workpiece safe by taking the right steps. Keep your workspace tidy and remove things that can burn. Use fire-resistant covers if you need them. Control heat by using cooling systems and moving the laser smoothly. Watch the temperature of your material. Do not put shiny or reflective things near the laser. Use barriers or matte covers to block stray reflections.
| Preventive Measure | Description |
|---|---|
| Fire Prevention | Keep your workspace safe by removing things that burn and using fire-resistant covers. |
| Heat Control | Use cooling systems, move the laser right, and check the temperature to stop overheating. |
| Reflection Management | Use dull surfaces, set up barriers, and take away shiny things to stop stray reflections. |
Note: Setting up your workspace carefully helps you avoid mistakes and keeps your materials safe.
Troubleshooting Issues
If cleaning does not work well or you see damage, you can fix most problems by checking your equipment and settings. Try these steps:
- Clean the optics and look for cracks or dirt. Replace them if needed.
- Check the protection window before and after each use.
- Look at the fiber hose for damage and make sure all connections are tight.
- Take care of the chiller system. Change coolant and filters every six months.
- Check and change filters every three months.
If you still have trouble, ask your manufacturer or a laser expert for help.
You must set fiber laser parameters carefully for good cleaning. Each setting, like power or scan speed, changes how well you clean. These settings also help protect your material. Studies show spot overlap and laser power are very important for cleaning. You can look at the table below to see what researchers found:
| Study | Key Findings |
|---|---|
| Yang et al. | Spot overlap is most important for cleaning. Laser power is next. |
| Ding et al. | Math models help make cleaning carbon black layers better. |
| Sun et al. | The right settings clean corrosion but do not melt surfaces. |
| Liu et al. | Changing settings helps clean composite paint layers better. |
| Zhang | Looking at parameters helps remove paint and makes surfaces nicer. |
Change your settings for each job. Use helpful tips, be safe, and ask experts if you need help.
FAQ
What happens if you use too much laser power?
Too much laser power can damage your material. You might see cracks, melting, or rough spots. Always start with low power and increase slowly. Watch the surface as you clean.
How do you choose the right scan speed?
You should match scan speed to your cleaning job. Fast speeds cover more area but may miss dirt. Slow speeds clean deeper but can overheat the surface. Test different speeds to find the best result.
Can you use fiber laser cleaning on all materials?
You can clean many metals and some coatings with fiber lasers. Some plastics, glass, or delicate surfaces may get damaged. Always check your material type and test a small area first.
Why does pulse width matter in fiber laser cleaning?
Pulse width controls how long the laser hits the surface. Short pulses reduce heat and protect sensitive materials. Long pulses remove thick coatings but may cause more heat damage.
What safety gear do you need for fiber laser cleaning?
Always wear laser safety goggles. Use gloves and a mask if you clean paint or rust. Keep a fire extinguisher nearby. Only trained people should use the laser.
See also
What must be checked before starting the laser cleaning machine
Why Are Laser Cleaning Machines Priced So Differently
What You Need to Know About Laser-Removable Paints
Application of laser cleaning in the restoration of historical relics


