
You can find and fix a laser welding machine malfunction quickly if you know the signs. Troubleshooting helps you avoid long breaks and keeps welds strong. All operators can use step-by-step fixes. When you check the beam path, match the laser wavelength to materials, secure joints, watch gas flow, and set power correctly, you enhance efficiency and improve weld quality. Performing regular maintenance and using the machine carefully helps you prevent most issues related to laser welding machine malfunction.
Key Takeaways
- Check and clean your laser welding machine often. This helps stop problems and makes welds strong.
- Change power settings and look at the laser beam focus. This can make welds better and stop problems like shallow penetration.
- Watch the cooling system and shielding gas flow. This stops the machine from getting too hot and keeps welds clean and strong.
- Look for signs of machine problems early, like uneven welds or error codes. This helps you fix issues fast.
- Do daily maintenance, like checking connections and updating software. This keeps your machine working well.
Laser Welding Machine Malfunction Overview
A laser welding machine malfunction means the machine is not working right. You may see bad welds, hear odd sounds, or see error codes. These problems can slow your work and make welds weak. It is important to spot these signs early. This helps your machine work well. This part shows you what to look for and how to start fixing problems.
Common Symptoms
You can find a laser welding machine malfunction by looking for warning signs. Here is a table with common symptoms and what they mean:
| Warning Sign | Problem Description | Suggested Solution |
|---|---|---|
| Beam Quality Issues | Welds look uneven or have defects. | Check and align the laser beam path. Clean optics. |
| Material Compatibility Issues | Welding does not work well on some materials. | Use the right laser wavelength for your material. |
| Joint Fit-Up and Fixturing | Welds do not line up or hold together. | Secure joints and fixtures before welding. |
| Gas Flow and Shielding | Welds show contamination or dark seams. | Adjust gas flow and check nozzles. |
| Power and Energy Settings | Welds are too shallow or too deep. | Calibrate power settings for each job. |
| Cooling System Issues | Machine overheats or shuts down. | Check coolant levels and clean the system. |
| Fiber Optic Cable Problems | Laser transmission weakens. | Inspect and clean cables. Replace if damaged. |
| Software and Control System Glitches | Machine acts unpredictably. | Update software and calibrate controls. |
Initial Troubleshooting Steps
If you see a laser welding machine malfunction, follow these steps:
- Check the power supply. Make sure the machine is plugged in.
- Look at the cooling system. Check for leaks and coolant levels.
- Check the optics. Clean and align the lenses and mirrors.
- Review the machine settings. Make sure power and speed are correct.
- Look for error codes. Read the control panel and use the manual.
Tip: Clean your machine and check all connections every day to stop many problems.
If you do these steps, you can fix most problems fast. You will also be ready to fix other faults in the next parts.
Power Supply Issues
Signs of Power Failure
You may notice power supply issues when your laser welding machine does not start or stops working during a weld. Sometimes, the control panel shows no lights or displays error codes. You might hear clicking sounds or see the machine reset by itself. Welds can look weak or incomplete if the power drops. These signs tell you that the machine is not getting enough electricity.
Here is a table to help you spot power supply problems:
| Sign | What It Means |
|---|---|
| No lights on control panel | Power is not reaching the machine |
| Sudden shutdowns | Power supply is unstable |
| Error codes on display | Electrical fault detected |
| Weak or incomplete welds | Power output is too low |
| Strange noises | Power supply is failing |
Tip: Always check the power cord and plug first. Loose connections can cause many problems.
Quick Fixes
You can fix most power supply issues with simple steps. Start by turning off the machine and unplugging it. Look at the power cord for cuts or damage. Plug the cord into a working outlet. If you see a blown fuse, replace it with a new one. Check the circuit breaker and reset it if needed. Clean dust from the power supply area to prevent overheating.
Follow these steps to solve power problems:
- Inspect the power cord and plug for damage.
- Test the outlet with another device.
- Replace blown fuses.
- Reset the circuit breaker.
- Clean dust from vents and fans.
If you still see signs of laser welding machine malfunction, call a technician. Power supply faults can damage your machine if you ignore them. You keep your machine safe and your welds strong when you fix power issues quickly.
Unstable Laser Output
Detecting Output Fluctuations
You might see unstable laser output if welds look uneven or weak. This can cause a laser welding machine malfunction and make welds bad. Watch for sudden changes in the weld seam or if the weld does not go deep enough. Sometimes, the control panel gives warnings about power levels.
To find output changes, try these steps:
- Use a steady power supply to stop voltage changes.
- Check the grounding system often to keep it safe.
- Add a UPS to protect your machine from losing power.
- Watch the laser output power curve on the screen. Look for drops or jumps.
- Change old laser sources if you notice weaker performance.
- Watch for control signals that flicker and make the laser unstable.
If the laser output changes, welds may look rough or have gaps. You might see rough edges or holes in the weld. Old laser sources, bad power, or control signal problems can cause this. You can fix these by using a steady power supply and changing old parts.
Tip: Always check the power supply and control signals before you start a job. This helps you find problems early.
Adjusting Power Settings
You can fix unstable laser output by changing power settings. Each setting controls a part of welding. Here are the main settings to check:
- Laser Power: Set the power in watts (W) for your job. More power melts metal faster, but too much can burn through.
- Pulse Frequency: Change the frequency in hertz (Hz) to control how often the laser fires. Lower frequencies give stronger pulses. Higher frequencies make smoother welds.
- Duty Cycle: Change how long the laser stays on during each pulse. A higher duty cycle adds more heat. This can help with deeper welds but may cause overheating.
Test these settings on scrap metal before welding your real piece. If you see unstable output, lower the pulse frequency or duty cycle. This helps stop overheating and keeps the weld smooth.
| Setting | What It Controls | How It Affects Welds |
|---|---|---|
| Laser Power | How much energy is used | How deep and fast the weld is |
| Pulse Frequency | How many pulses each second | How smooth and even the weld is |
| Duty Cycle | How long the laser stays on | How much heat and depth |
Note: Small changes in power settings can change weld quality a lot. Always adjust slowly and watch what happens.
Beam Focusing Problems
Inconsistent Welds
Sometimes, welds look different when the laser beam is not focused right. You might see seams that are not even or beads that look strange. If the beam is not focused, energy does not hit the weld the same everywhere. Here are some things you might notice:
- The weld seam does not get the same energy everywhere.
- Beads look odd or are not the same size.
- The weld gets deeper or wider all of a sudden.
These problems can make welds weak or not safe. Bad beam focus is a common reason for a laser welding machine malfunction. Always look for these signs if your welds do not look normal.
Many things can make the beam focus wrong:
- The focus distance is not set right.
- Lenses are burnt or broken.
- The QBH connector is loose and messes up the beam.
- Lenses are not put in right or are the wrong kind.
If you see these problems, fix the focus before you keep welding.
Focusing the Laser Beam
You can fix most focus problems by doing a few easy things. Good focus helps you get strong and neat welds. Try these steps:
- Make the laser beam wider and shape it for focusing.
- Use a special lens to make the beam small.
- Pick the best lens for your job.
- Change the focus distance to get the right spot.
- Line up the beam with the weld joint.
A small spot gives more energy and makes deeper welds. You need to put the beam in the right place for this. A big spot spreads the energy and is good for surface welds. If you move the focus, you can stop spatter and holes. This helps make welds look the same.
Tip: Check your lenses and connectors before every job. Clean or change them if you see damage.
If you do these things, you can stop most focus problems and keep welds strong.
Cooling System Failure
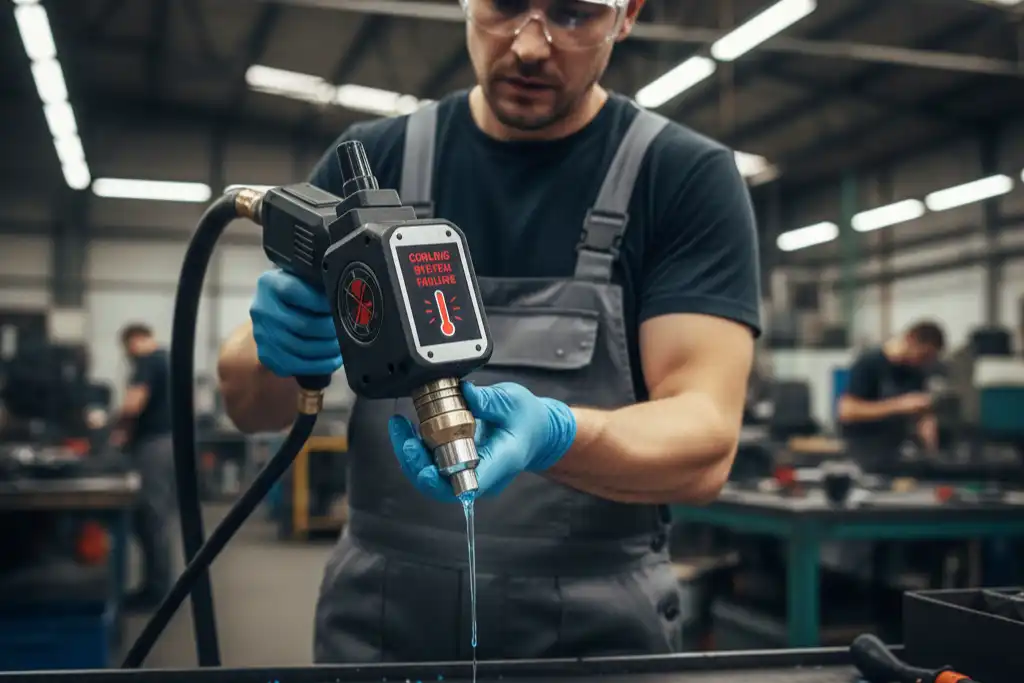
Overheating Signs
You can spot cooling system failure by watching for overheating signs. The machine may shut down suddenly or show warning lights on the control panel. Welds may look burnt or uneven. You might hear loud fan noises or notice hot surfaces when you touch the machine. Sometimes, coolant leaks onto the floor or you see puddles near the base. If you ignore these signs, you risk damaging the laser source and other parts.
Here is a table to help you recognize overheating signs:
| Overheating Sign | What You Notice | What It Means |
|---|---|---|
| Sudden shutdowns | Machine stops working | Cooling system failed |
| Warning lights | Control panel flashes alerts | High temperature detected |
| Burnt welds | Welds look dark or rough | Excess heat at weld point |
| Loud fan noises | Fans run at high speed | System tries to cool down |
| Coolant leaks | Puddles under machine | Broken or loose pipes |
Tip: Always check for leaks and listen for strange noises before you start welding.
Cooling System Solutions
You can fix most cooling system failures by following a few steps. Regular cleaning and maintenance keep your machine safe from overheating. Here are the most effective solutions:
- Clean cooling pipes and radiators often. Remove dust and dirt to keep coolant flowing.
- Check coolant levels. Replace old coolant with fresh liquid for better cooling.
- Inspect the water pump. Make sure it works well and does not make odd sounds.
- Check all pipes and connections for tightness. Fix any loose or broken parts to stop leaks.
- Watch for leaks and fix them right away. Leaks can cause a laser welding machine malfunction.
- Schedule regular maintenance. Repair or replace worn parts to keep the system strong.
If you follow these steps, you protect your machine from overheating. You also improve weld quality and avoid costly repairs.
Note: Clean and check the cooling system every week. This simple habit helps prevent most failures.
Shielding Gas Faults
Black Weld Seams
You might see black seams when using a laser welding machine. This usually means there is a problem with the shielding gas. Shielding gases keep air away from the weld pool. If the gas does not work right, the weld can turn black. This happens because the metal mixes with air and forms black oxides. When the metal gets too hot, it can turn black even faster. Small weldments can overheat and get black seams. Using too much heat or welding too slowly can make it worse. Sometimes, the shielding gas has impurities that let air in. This can also cause black seams. If you use poor welding materials, you might see black seams, but this is not common with good supplies.
Here are some reasons for black weld seams:
- Air gets to the weld during welding.
- Small weldments get too hot.
- Too much heat or slow welding speed.
- Shielding gas has impurities.
- Bad welding materials.
Tip: Check your shielding gas before you start. Clean gas helps stop black seams.
Adjusting Gas Flow
You can fix shielding gas problems by changing the gas flow. Shielding gases are important for good welds. They make a safe area around the weld pool. This keeps out oxygen, nitrogen, and hydrogen. Shielding gases help the metal stay clean and strong. Pick the right gas for your metal. Argon and nitrogen work well for carbon steel, aluminum, and stainless steel.
You can use different ways to send gas:
- Side blowing sends gas across the workpiece. It works for big areas but is not good in wind.
- Coaxial shielding sends gas through the welding head. It gives steady and careful coverage for small welds.
- Backshielding protects the back of the weld. Use this for metals that turn black easily.
- Counter-flow pushes gas against the weld direction. This helps in tricky places.
- Direct flow sends gas right to the weld. It gives fast and good protection.
If you set the gas flow right, you stop many problems. You keep welds clean and stop black seams. You also stop holes that can make welds weak and cause a laser welding machine malfunction.
| Gas Flow Method | Best Use Case | Protection Level |
|---|---|---|
| Side Blowing | Large workpieces | Moderate |
| Coaxial Shielding | Intricate welds | High |
| Backshielding | Oxidation-sensitive metals | High |
| Counter-Flow | Complex environments | Good |
| Direct Flow | Quick, efficient welds | Good |
Note: Always use the right gas and method for your job. This helps you get strong and clean welds every time.
Focusing Lens Contamination
Lens Damage Symptoms
You can tell if the lens is damaged by looking for certain signs. The laser might start strong but then gets weak. This means the lens could be dirty or broken. Sometimes, the laser cannot melt the filler wire because the power drops. You might see sparks or flames at the copper nozzle when welding. These are clear signs that something is wrong.
Here is a table that shows what to look for and what it means:
| Indicator | Description |
|---|---|
| Weakening laser output | The laser starts strong but loses power and cannot melt wire. |
| Flame at nozzle | You see a flame at the copper nozzle while welding. |
You may notice spots or marks on the lens. Black spots show up if you do not clean or change the lens soon enough. White spots can appear in the middle if the laser beam is too sharp. Sometimes, the lens moves oddly or the red light is not in the center. This can burn the sealing ring. Dirt can cause black spots on the curved part. White spots on the flat part come from light bouncing around.
Tip: If you see any of these signs, stop welding and check the lens right away. This helps stop a laser welding machine malfunction.
Cleaning and Inspection
You can keep your lens working well by cleaning and checking it often. Use special cleaning fluid or pure alcohol with a soft cotton cloth to clean the lens. Do not touch the lens with your hands. Oil or fingerprints can hurt the lens. Look at the lens every day for dust or dirt. If you see dirt, use an air blower to get rid of it before cleaning.
Follow these steps for the best results:
- Clean the lens in circles, starting from the middle and moving out.
- Use soft cotton balls made for labs to clean gently.
- Change the lens for one just like it if you see a lot of dirt or damage.
Cleaning and checking the lens often helps you avoid problems. You keep your machine safe and make welds better by taking care of the lens.
Incomplete Penetration
Causes of Shallow Welds
You may notice shallow welds when the laser does not melt the material deep enough. This problem can make your welds weak and easy to break. Several factors can cause incomplete penetration in laser welding. You should watch for these common issues:
- High welding speeds can make the laser move too fast, so it does not have time to melt the metal deeply.
- Inadequate laser power means the energy is not strong enough to fuse the materials.
- Improper beam focus can cause the laser to miss the right spot, leading to poor bonding.
- Material type and thickness affect how well the laser can penetrate. Thicker metals need more power.
- Dirty surfaces block the laser and stop it from reaching full depth.
Low power or high speed often lead to lack of fusion. Poor focusing also makes the weld shallow. If you see weak joints or gaps, you might have a laser welding machine malfunction.
Tip: Always clean your workpiece and check the machine settings before you start welding.
Increasing Penetration
You can improve penetration by adjusting several key settings and techniques. Try these steps to get deeper, stronger welds:
- Increase the laser power. Higher power levels help the laser melt the metal more deeply. You can use power from 1 kW up to 10 kW or more, depending on your material.
- Adjust the welding speed. If you slow down the travel speed, the laser has more time to heat and penetrate the metal. Do not go too slow, or you risk overheating.
- Use a smaller focal spot size. A tighter beam concentrates energy and helps you reach deeper into the material.
- Choose the right shielding gas. Argon or helium protect the weld pool from air and keep the weld clean.
- Select the best joint design. Butt joints and lap joints work differently with each material. Pick the design that matches your job.
You can use a table to help you remember these techniques:
| Technique | How It Helps |
|---|---|
| Laser Power | Deeper melting |
| Welding Speed | More time for penetration |
| Focal Spot Size | Focused energy |
| Shielding Gas | Clean weld pool |
| Joint Design | Stronger welds |
If you follow these steps, you will see better welds and fewer problems with penetration.
Weld Cracks
Identifying Cracks
You can spot weld cracks by looking closely at the weld seam. Cracks often appear as thin lines or breaks along the weld. Sometimes, you see them right after welding. Other times, they show up later when the weld cools. You may notice uneven or rough surfaces where the crack runs.
Many experts use special tools to find cracks. Visual inspection works well for most jobs. You can use point cloud data to rebuild the weld shape and find any size problems. Some people use structured light to see changes on the weld surface. This helps you measure the weld seam and spot cracks. Feature point extraction also helps you find the exact spot where a crack starts or ends.
Here are common ways to identify cracks:
- Look for thin lines or breaks on the weld.
- Check for rough or uneven surfaces.
- Use point cloud data to see the weld shape.
- Try structured light to spot surface changes.
- Use feature point extraction to find crack locations.
Tip: Always inspect your welds after each job. Early detection helps you fix problems before they get worse.
Fixing Settings and Materials
You can prevent or fix weld cracks by changing your welding settings and choosing the right materials. Cracks often happen when the weld cools too fast or gets too much heat. Different metals react in their own way. Some materials, like those with low-melting phases, crack more easily because they form weak spots as they cool.
Here are some steps you can take:
- Control the cooling rate. Adjust the welding interval and change the shielding gas flow to slow down cooling.
- Lower the power a bit. This stops too much heat from building up.
- Move the focus position to spread heat more evenly.
You should also:
- Pick metals and filler materials that work well together.
- Use low-hydrogen electrodes and wires for low alloy steels.
- Check for material contaminants like sulfur and phosphorus.
- Keep interpass temperatures below critical points.
- Use low heat input and small weld beads with enough overlap.
Metallurgical studies show that cracks often form when liquid films stay at grain boundaries during solidification. Materials with high shrinkage, like aluminum alloys, can crack more because they pull apart as they cool. If you see a weld crack, you may have a laser welding machine malfunction that needs quick attention.
Note: Good quality control and the right welding settings help you avoid most weld cracks.
Optical Path Misalignment
Alignment Issues
You may notice problems with your welds if the laser beam does not travel in a straight path. Optical path misalignment happens when the mirrors or lenses inside your machine shift out of place. Even a small change can cause big problems. The laser energy may not hit the right spot, which leads to weak or uneven welds. Sometimes, you see cracks or holes in the weld. You might also find that the weld depth changes from one spot to another.
Misalignment in your laser welding machine can lower performance. The energy delivery becomes unstable. This makes the weld quality go up and down. You may see defects like porosity or cracks. Accurate alignment keeps the beam strong and steady. If the optical path is off, you may also notice mode instability and lower efficiency.
Common causes of misalignment include:
- Reflector angles that are not set right
- Vibrations from nearby machines or movement
- Loose mounts or worn parts
Tip: Regular checks help you catch misalignment early. This prevents a laser welding machine malfunction and keeps your welds strong.
Realignment Steps
You can fix optical path misalignment by following a few simple steps. Start by turning off your machine and letting it cool. Wear safety glasses to protect your eyes. Next, open the machine panels to reach the mirrors and lenses.
Follow this checklist to realign your optical path:
- Inspect all mirrors and lenses for dust or damage.
- Tighten any loose mounts or screws.
- Use a laser alignment tool or a piece of thermal paper to check the beam path.
- Adjust the mirrors until the beam hits the center of each lens.
- Test the machine with a low-power setting before welding at full power.
You can also use anti-vibration mounts to keep the optical system steady. Schedule regular inspections to make sure everything stays in place. When you keep the optical path aligned, you get better welds and avoid costly repairs.
Daily Maintenance Practices
Cleaning and Inspection
Cleaning your laser welding machine every day keeps it working well. Dust and dirt can block the laser beam. This makes welds look bad. Wipe the machine with a soft cloth. Use special cleaning fluid for the lenses and mirrors. Always look for oil, fingerprints, or spots on the optics. If you see dirt, use an air blower first. Then clean with a cloth. Check the cooling system for leaks or puddles. Look at the power cords and plugs for any damage.
Here is an easy checklist for daily cleaning and inspection:
- Wipe the machine surfaces
- Clean lenses and mirrors with the right fluid
- Use an air blower to remove dust
- Check the cooling system for leaks
- Look at power cords and plugs
- Check for loose screws or mounts
Tip: Clean the lens in circles. Start in the center and move out. This helps stop scratches.
Preventive Measures
You can stop most problems before they happen by using good habits. Taking care of your machine helps you avoid a laser welding machine malfunction. Check the laser beam alignment every day. Use a laser alignment tool or thermal paper. Make sure the beam hits the right spot. Tighten any loose mounts or screws. Watch the coolant level and add more if it is low. Test the shielding gas flow. Make sure it covers the weld area. Update the machine software when there is a new version.
Here is a table of preventive measures and what they do:
| Preventive Measure | Benefit |
|---|---|
| Beam alignment check | Strong and even welds |
| Tighten mounts/screws | Stable machine performance |
| Coolant level check | Prevent overheating |
| Shielding gas test | Clean weld seams |
| Software updates | Reliable machine operation |
Note: You protect your machine and make welds better when you do these things every day.
You keep your laser welding machine working well when you check for problems often. Quick action helps you avoid a laser welding machine malfunction and makes your welds stronger. Try the solutions and daily tips from this guide. If you find a fault you cannot fix, ask a professional for help.
- Inspect your machine every day
- Use the right settings for each job
- Call an expert for complex issues
FAQ
What should you do if your laser welding machine keeps shutting down?
Check the cooling system first. Make sure the coolant level is correct. Clean the fans and vents. If the problem continues, inspect the power supply and call a technician.
How often should you clean the focusing lens?
You should clean the focusing lens every day. Use a soft, lint-free cloth and special cleaning fluid. Always check for dust or fingerprints before you start welding.
Why do welds sometimes look black or dirty?
Black or dirty welds often mean the shielding gas flow is too low or has impurities. Check the gas supply and adjust the flow. Use the right type of gas for your material.
Can you fix optical path misalignment yourself?
Yes, you can realign the optical path. Turn off the machine. Wear safety glasses. Use a laser alignment tool to check and adjust the mirrors and lenses. If unsure, ask a professional.
What is the best way to prevent most laser welding faults?
Regular maintenance is key. Clean the machine daily. Check all settings before each job. Inspect cables, optics, and cooling systems. Quick checks help you avoid most faults and keep your welds strong.
Essential Tips for Maintaining Your Laser Welding Equipment
How to Match Laser Welding Machine Power to Your Needs
Step-by-Step Guide to Selecting the Right Laser Welding Machine
The application advantages of laser welding in thin material welding


