Key Takeaways
- Timing is very important. Keep paint remover on for 20 to 45 minutes for the best results.
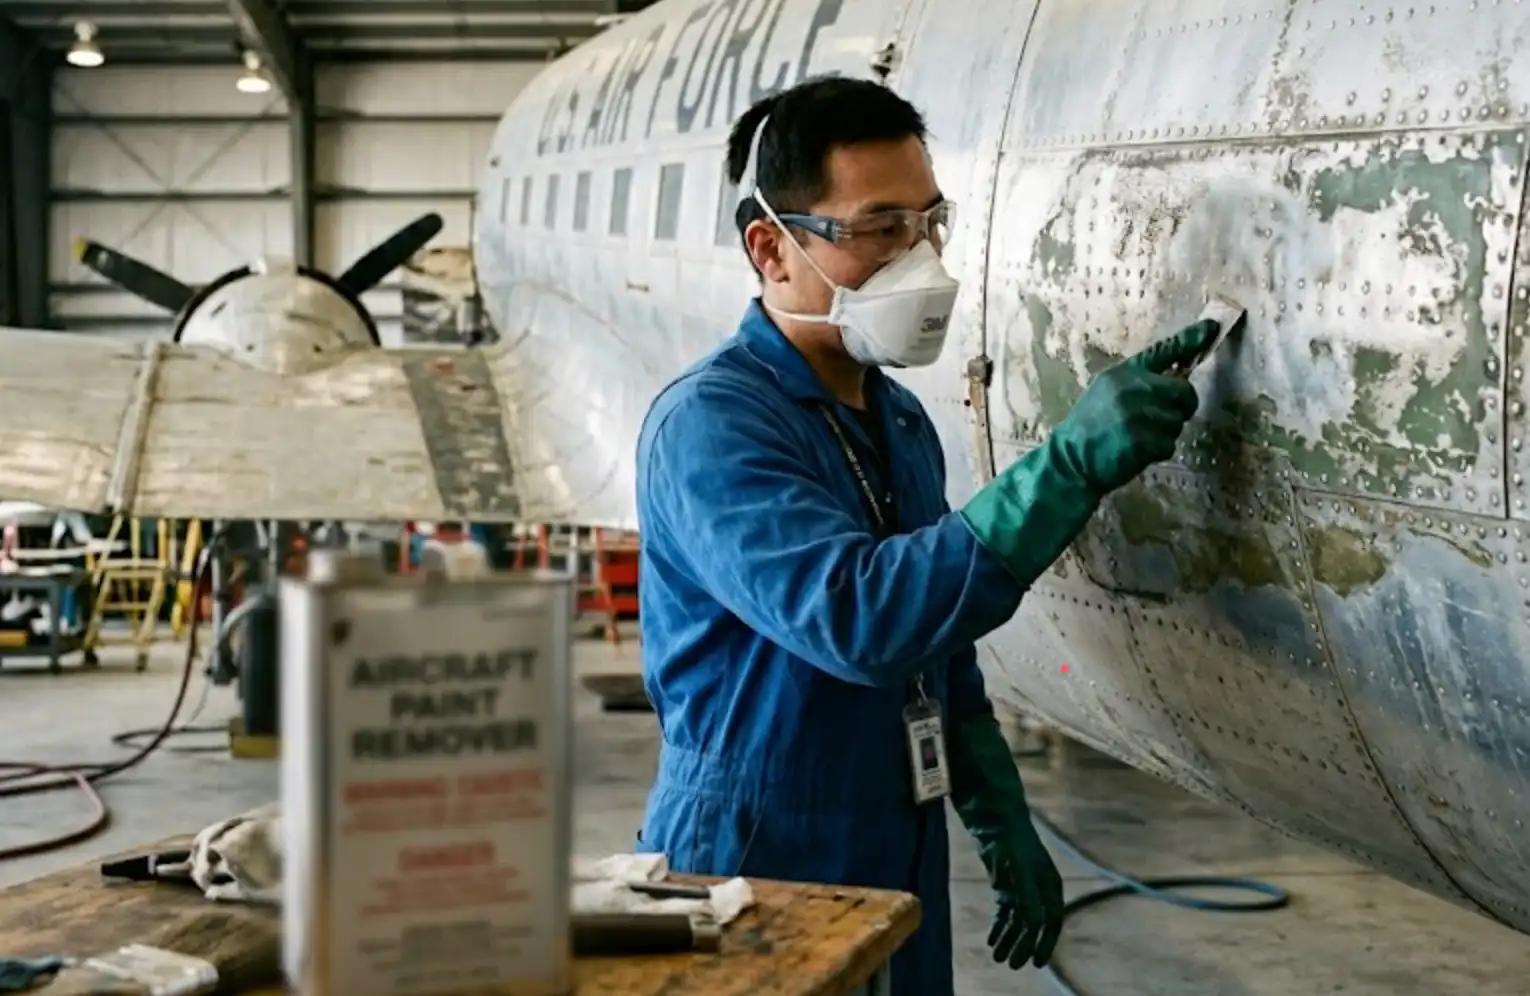
- Always wear safety gear like gloves and goggles. This keeps you safe from dangerous chemicals.
- Make sure the remover works with your airplane’s surface. This helps you avoid damage.
- Clean the surface well before you use remover. This makes paint stripping work better.
- Watch the paint for blisters or bubbles. This tells you when to take it off.
- Use a plastic scraper to gently lift the paint. Do not use metal tools so you do not hurt the surface.
- Cover sensitive areas with tape. This stops the remover from causing damage.
- Read and follow the manufacturer’s instructions. This keeps you safe and helps the remover work well.
Airplane Paint Remover Effectiveness
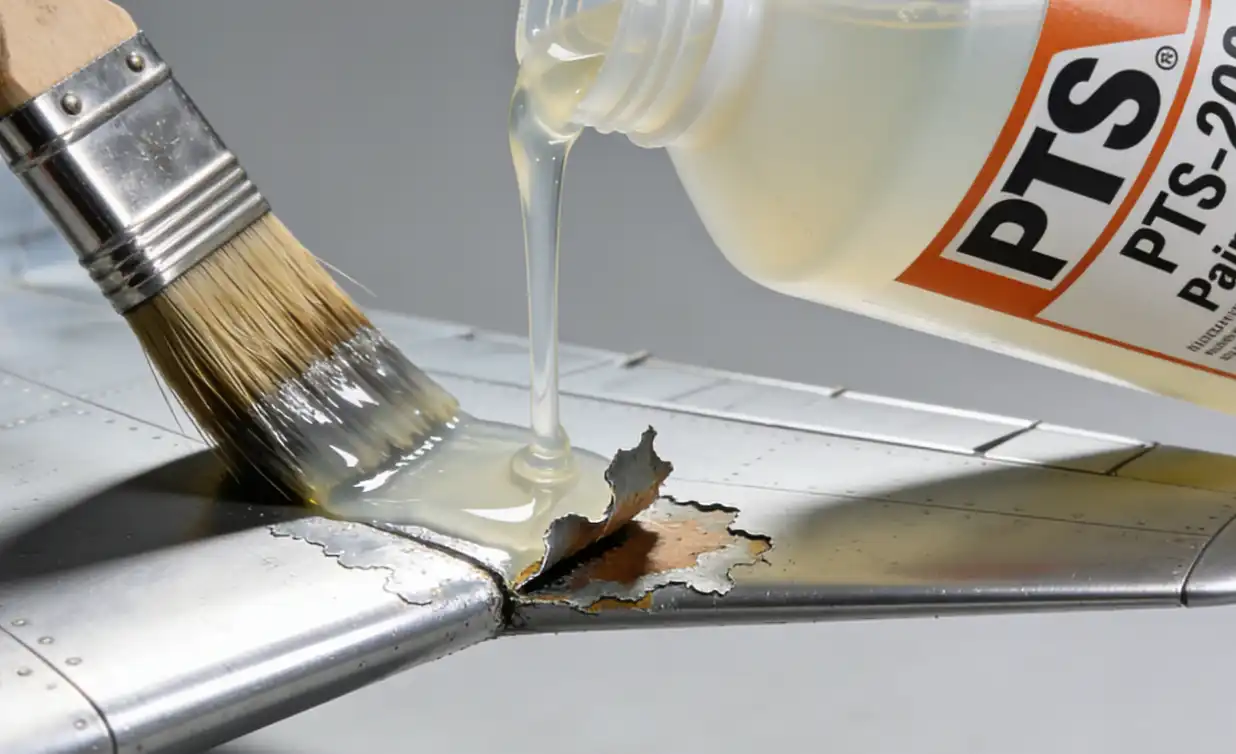
Image 2: Close-up of the remover causing old paint to blister on an aluminum panel.
What Makes Paint Remover Effective
Chemical Formula
It is important to know why a paint remover works well. Most strong removers use chemicals that break down hard coatings. Many products, like Klean-Strip and PTS-202, do not have methylene chloride. Methylene chloride was used a lot before because it worked fast, but it is not safe for people. Now, safer formulas use other chemicals, like phenol. Phenol breaks the paint apart at a tiny level. This makes the paint easier to take off.
Here is a table that lists key things about good airplane paint removers:
| Property | Description |
|---|---|
| Viscosity | Sticks to surfaces that go up and down, so it does not drip. |
| Compatibility | Safe to use on metals like aluminum, magnesium, and titanium. |
| Chemical Composition | Has no chlorinated parts, no peroxides, is not acidic, and will not catch fire. |
| Evaporation Rate | Does not dry up fast, so it works longer. |
| Temperature Requirement | Works best when it is warmer than 76°F (24°C). |
Surface Compatibility
You need to make sure the remover is safe for your airplane’s surface. Some removers can hurt some metals or coatings. Always read the label to check if it works with aluminum, magnesium, or titanium. Klean-Strip and PTS-202 are made for these metals. If you use the wrong remover, you could damage the surface or cause rust.
Factors Affecting Effectiveness
Surface Type
The kind of surface you have changes how well the remover works. Smooth and clean metal helps the remover spread out. If the surface is rough or dirty, the chemicals might not reach the paint. Always clean the area before you start.
Temperature
Temperature is very important for how well the remover works. Most products, like Klean-Strip and PTS-202, work best when it is warmer than 76°F (24°C). If it is too cold, the remover might not break down the paint. If it is too hot, the remover can dry up or go away too fast.
Remover Type
You should pick the right remover for your job. Some removers have methylene chloride, which works fast but is not safe. Others use safer chemicals but may take more time. Always follow the instructions for how long to leave it on. If you leave the remover on too long, it might stop working and even hurt the surface. If you take it off too soon, the paint might not come off all the way.
Tip: Try the remover on a small spot first to see how it works with your airplane’s surface.
Timing for Paint Remover Application
Ideal Application Window
20-45 Minute Range
You need to know the right time to let the paint remover sit. Most airplane paint removers work best if you leave them on for 20 to 45 minutes. This window gives the chemicals enough time to break down the paint. If you use Klean-Strip or PTS-202, you should check the label for the exact timing. These products often recommend starting to check the surface after 20 minutes.
Tip: Set a timer on your phone or watch. This helps you avoid forgetting when to check the remover.
Up to 8 Hours for Some Products
Some paint removers let you wait longer. You can leave certain products on for up to 8 hours. This works well if you need to remove thick or stubborn paint. Always read the instructions for your remover. Some products dry out if you wait too long. If the remover dries, it stops working and can leave a mess.
Here is a quick table to help you remember:
| Product Type | Typical Timing |
|---|---|
| Standard Remover | 20-45 minutes |
| Heavy-Duty Remover | Up to 8 hours |
Signs of Incorrect Timing
Blistering and Liquefying
You can watch for signs that the remover is working. The paint should start to blister or bubble. This means the chemicals are breaking the bond between the paint and the metal. If you see the paint turning soft or starting to liquefy, you know it is time to remove the paint. Do not wait too long after you see these signs. If you do, the remover can dry out or damage the surface.
Residue and Surface Damage
If you leave the remover on too long, you may see sticky residue or even surface damage. The paint might not come off cleanly. You could also see stains or rough spots on the metal. If you remove the paint too soon, you may find patches of paint left behind. You will need to reapply the remover and try again.
Note: Always test a small area first. This helps you learn how your remover reacts with your airplane’s surface.
How to Monitor and Adjust Timing
- Check the paint every 10 minutes after the first 20 minutes.
- Use a plastic scraper to gently lift a corner of the paint.
- If the paint peels off easily, you can start removing the rest.
- If the paint does not move, wait another 5-10 minutes and check again.
- Do not leave the remover on longer than the label says.
By watching the paint and following these steps, you can avoid mistakes. You will get better results and protect your airplane’s surface.
Hazards and Health Hazards of Paint Remover
When you use airplane paint remover, there are many dangers. These dangers can hurt your health and your airplane’s surface. You should know what risks to look for and how to stay safe。
Common Hazards
Chemical Exposure
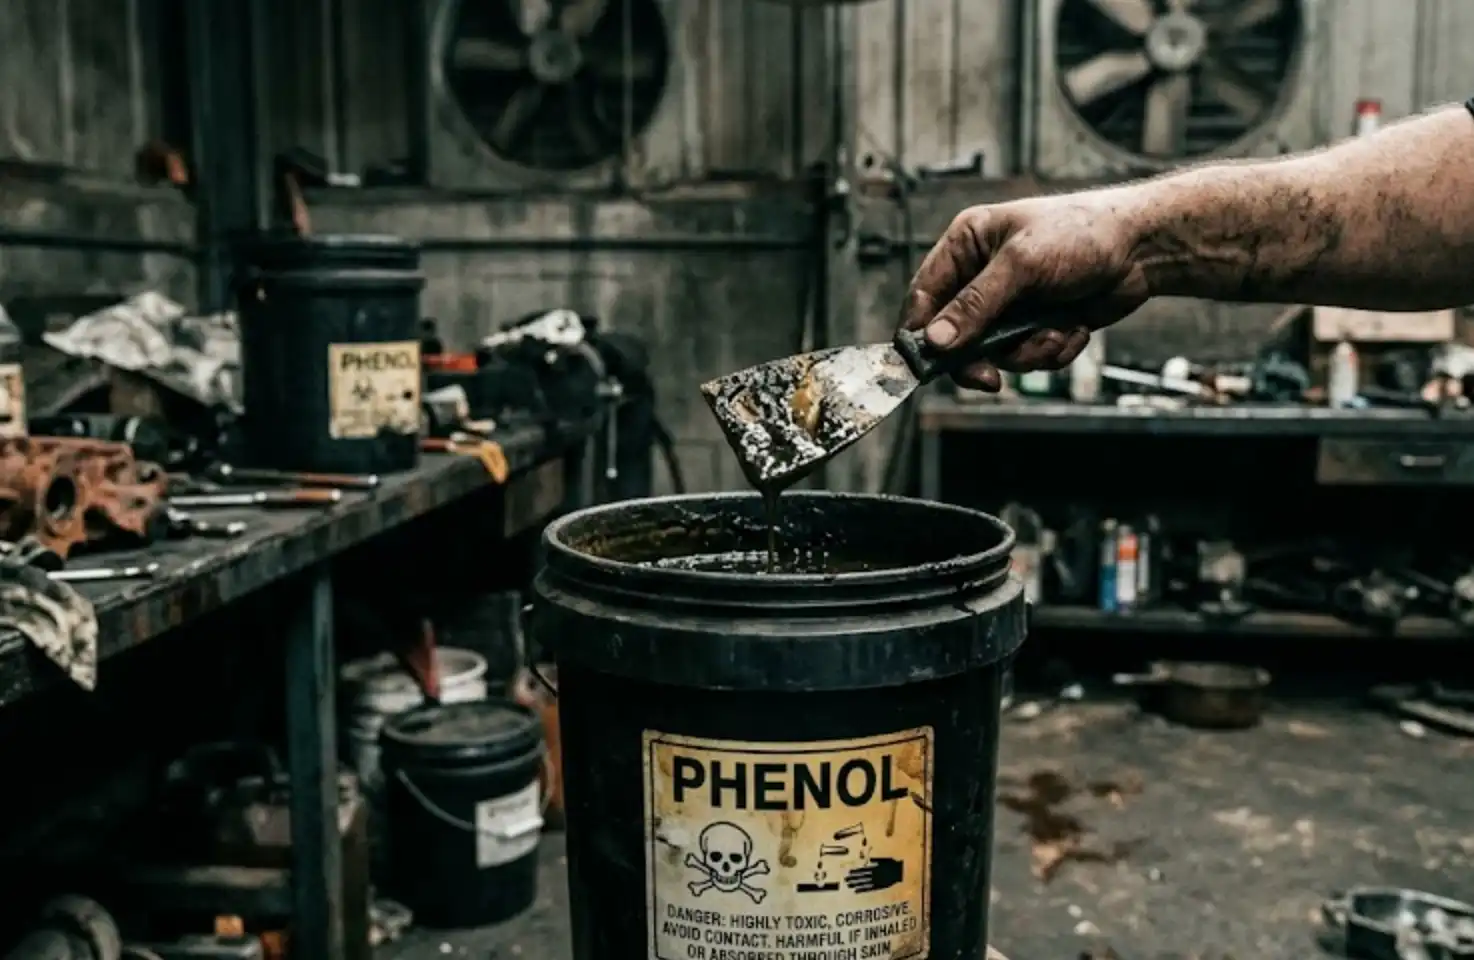
A lot of airplane paint removers have strong chemicals. Two common ones are methylene chloride and phenol. Methylene chloride can cause cancer. If you breathe in these vapors or get them on your skin, you might get sick or have skin problems. Some removers, like BioSafe 1025, were stopped because they caused bad eye and skin problems, breathing trouble, and even hurt the environment and people’s health.
Here is a table that lists the main dangers you might face:
| Hazard Type | Description |
|---|---|
| Skin Irritation | Too much contact can make your skin hurt or itch. |
| Mucous Membrane Irritation | Breathing in fumes can bother your nose and throat. |
| Eye Irritation | The chemicals can make your eyes sting or water. |
| Respiratory Irritation | Breathing the vapors can make it hard to breathe. |
| Reproductive Toxicity | These chemicals can hurt your ability to have children. |
| Environmental Toxicity | The chemicals can also harm plants and animals. |
| Cancer Risk | Being around these chemicals for a long time can cause cancer. |
Surface Damage
Paint remover can also hurt your airplane’s surface. If you leave it on too long, it can damage the metal or leave marks. Some chemicals can make the metal rust or get weak. Always read the label to see if the remover is safe for your airplane.
Health Hazards
Protective Equipment
You need to wear the right safety gear every time you use paint remover. Gloves, goggles, and long sleeves keep chemicals off your skin and out of your eyes. A respirator helps you not breathe in bad vapors. Many people get hurt when they do not use this gear. In the past, workers who did not wear protection got very sick, and some even died from methylene chloride. OSHA says you should use safety tools and gear to keep yourself safe.
Tip: Always check your gloves and goggles before you start. If you see any holes or cracks, get new ones.
Ventilation
Good airflow is very important for safety. Always work where there is lots of fresh air. Open windows and use fans to blow fumes away from you. If you do not have enough air, you could get a headache, feel dizzy, or get very sick. Many people got sick because they did not have enough fresh air in their workspace.
You can stay safe by doing these things:
- Wear gloves, goggles, and a respirator.
- Work in a place with good airflow.
- Do not eat or drink near paint remover.
- Wash your hands and face when you finish.
Remember: Your safety is most important. Take time to set up your workspace and use the right gear. This will help you stay healthy and finish your project.
Avoiding Mistakes with Airplane Paint Remover
Surface Preparation
Cleaning and Masking
You must clean the surface before using airplane paint remover. Dirt, dust, and grease stop the remover from touching the paint. If you do not clean, you might see holes, bumps, or peeling after stripping. These problems waste time and money. Use a gentle cleaner and a cloth that does not leave lint. Wipe the area well. Make sure the surface is dry before you start.
Cover parts you do not want to touch with remover. Use tape and plastic to protect windows, rubber seals, and instruments. This keeps these areas safe from harm. Masking helps you control where the remover goes.
Tip: Do not rush cleaning and masking. Taking your time helps you avoid mistakes that cost money.
Application Techniques
Even Coverage
Put airplane paint remover on in a thick, even layer. Use a brush or roller for best results. Do not leave thin spots. Thin spots may not strip well. Overlap your strokes to cover everything. If you miss a spot, you will need to do it again.
Product Usage
Read the label to know how much remover to use. Using too little makes stripping slow and uneven. Using too much wastes remover and causes drips. Always test a small area first. This shows how the remover works with your airplane’s surface. If you use an eco-friendly aircraft stripper, follow the same steps.
Following Instructions
Manufacturer Guidelines
Always follow the instructions from the maker. These tell you how long to leave the remover on and how to clean up safely. If you skip steps, you might lose effectiveness or damage the surface. You could also hurt your health. Not following instructions can expose you to harmful chemicals. You might breathe in vapors that hurt your organs or cause cancer. You could also harm the environment by letting out dangerous pollutants. Many people miss these risks because they do not read safety sheets or hazard sections.
Not following instructions can cause:
- Health problems from chemicals
- Damage to your airplane’s surface
- Harm to the environment
Note: Always check the Material Safety Data Sheet (MSDS) before you start. This helps you stay safe and avoid mistakes.
If you prepare the surface, apply remover evenly, and follow instructions, you can avoid mistakes. You will get better results and protect yourself and your airplane.
Step-by-Step Paint Remover Guide
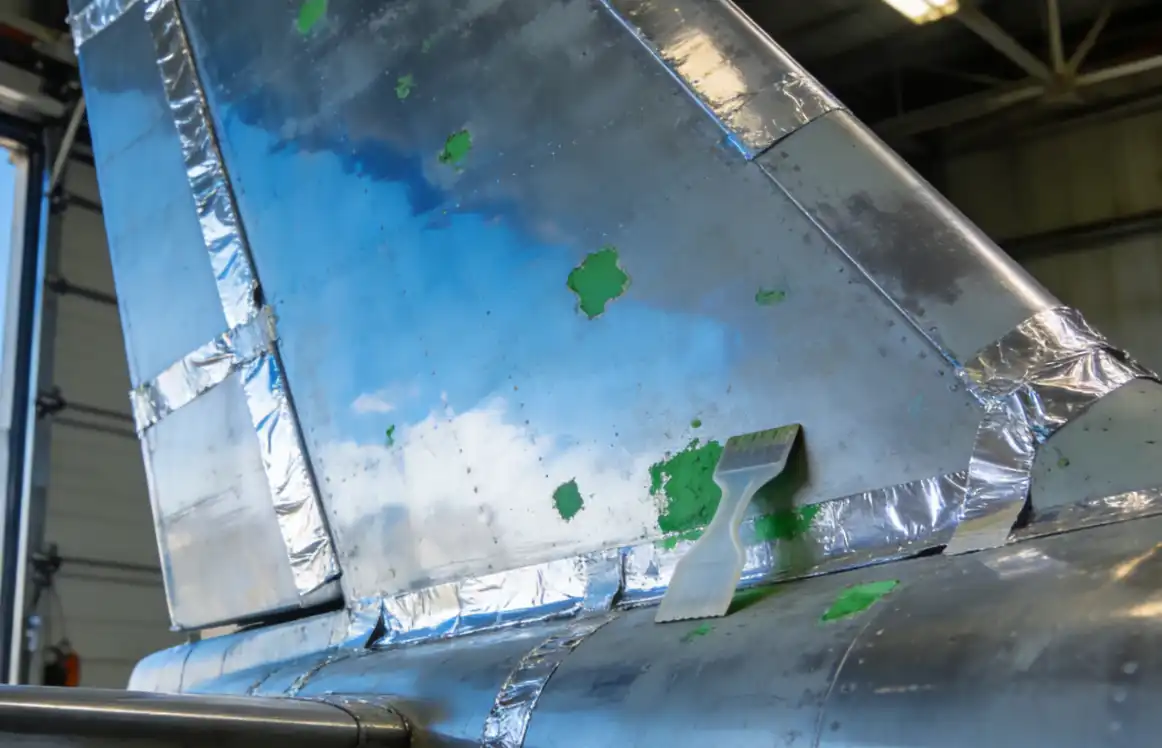
Image 4: Post-stripping inspection reveals clean surfaces and areas needing second application.
Preparation Checklist
Tools and Safety
Before you start, gather all the tools and safety gear you need. This helps you work faster and keeps you safe from harm. Here is a checklist to follow:
- Personal Protective Equipment (PPE):
- Heavy-duty rain suit
- Steel toe boots
- Shin guards
- Rubber gloves
- Full-face respirator
- Safety goggles
- Surface Protection:
- Aluminum or foil tape for masking bondlines and sensitive areas
- Plastic drop cloths to cover wet surfaces
- Tyvek drop cloths for the floor
- Application and Removal Tools:
- Spray gun or brush for applying remover
- Plastic scrapers (avoid metal to protect the surface)
- Scotch Brite pads (green, grey, red) for removing paint haze
- Cleaning Supplies:
- Soapy water
- Sponges and paper towels
- Containers for used remover and paint disposal
Tip: Always check your PPE for damage before you begin. Replace any broken or worn items.
Application Process
Applying Remover
You need to prepare the surface by cleaning off dirt, oil, and dust. This step makes sure the remover touches the paint directly. Use a gentle cleaner and a lint-free cloth. Dry the area well.
Next, mask off any parts you do not want to touch with chemicals. Use aluminum tape to cover bondlines, windows, and other sensitive spots.
Now, apply the paint remover. Use a spray gun for large areas or a brush for small spots. Aim for a thick, even layer—about 1000 microns (µm) thick. This helps the remover stick to vertical and overhead surfaces. Brush in one direction to keep the layer smooth. For best results, cover the remover with plastic drop cloths. This stops it from drying out too fast.
Monitoring Progress
After you apply the remover, let it sit. The time depends on the product and the thickness of the paint. Most removers need between 20 minutes and 8 hours. Check the label for the exact time.
Watch for signs that the remover is working. The paint should start to blister, bubble, or liquefy. Use a plastic scraper to lift a small corner. If the paint comes off easily, you can move to the next step. If not, wait a little longer and check again.
“Safety is paramount when handling these chemicals, requiring workers to be properly trained and equipped with personal protective equipment (PPE).”
Here is a table to help you remember key safety steps during the process:
| Safety Measure | Description |
|---|---|
| Chemical Coverage | Mask off all areas to prevent chemical intrusion. |
| Personal Protective Equipment | Wear rain suits, boots, gloves, and a full-face respirator. |
Removal and Cleanup
Paint and Residue Removal
Once the paint blisters, use a plastic scraper to remove paint and primer. Scrape gently to avoid scratching the metal. Collect all removed paint and residue in containers for safe disposal.
If you see any leftover paint or haze, use a Scotch Brite pad soaked in remover. Rub the area until the surface looks clean. For stubborn spots, you can use a high-pressure water sprayer. This helps remove any last bits of paint.
Wash the surface with soapy water and a sponge. This step removes all chemical residue. Dry the area with paper towels. Remove the tape from bondlines and protected areas. Sometimes, paint will come off with the tape.
Surface Inspection
After you finish the paint removal process, inspect the surface carefully. Look for any defects, rough spots, or leftover residue. Use a magnifying glass to check for small problems. For hard-to-see areas, use a borescope or UV light.
Check that the surface feels smooth and matches the surrounding areas. Make sure there are no visible steps or color changes. Measure the surface roughness and gloss if you have the right tools. This helps you know the surface is ready for new paint.
Note: Always inspect for corrosion or damage before you repaint. Fix any problems right away to keep your airplane safe.
By following these steps, you can remove paint safely and get the best results. This process protects your health, your airplane, and the environment.
Troubleshooting Paint Remover Issues
When you use airplane paint remover, you might have problems. Sometimes paint will not come off, or you need to keep some parts safe. You can fix these problems if you use the right tools and steps.
Stubborn Paint
Secondary Application
The first coat of paint remover might not get all the paint off. You could see spots where paint stays stuck. Do not worry if this happens. Put another layer of remover on those spots. Clean the area before you add more remover. Take off any loose paint or leftover remover. Spread a thick and even coat over the tough spots. Wait as long as the label says. Watch for bubbles or blisters on the paint. Use a plastic scraper to lift the paint off. If the paint still will not come off, try something else.
Alternative Methods
If regular remover does not work, you have other choices. You can use a high-speed polisher for hard paint or heavy oxidation. A tool like a Milwaukee heavy-duty polisher works well for this. Use a polishing compound to help break down the paint. Put a cotton bonnet on your buffer. This helps you cover big areas fast. Work on small spots, about four feet at a time. This way, you have more control and better results. Always check your work as you go.
Tip: Do not use steel brushes on aluminum. Steel can leave bits behind that cause rust and hurt new paint.
Protecting Sensitive Areas
Masking
You need to keep important airplane parts safe before you use remover. Masking stops chemicals from hurting these areas. Use aluminum tape to cover things like radomes, windows, and wheel wells. Tape all windows, pitot and static ports, and any openings. This keeps chemicals out and stops damage.
Here is a quick lookup for masking steps:
| Step | Description |
|---|---|
| 1 | Close and mask any openings and sensitive areas such as composites or polycarbonate parts. |
- Tape all windows, pitot and static ports, and other sensitive spots or openings so you do not get damage or water inside.
Corrosion Prevention
You must stop rust when you use paint remover on metal. Keep your airplane in a dry hangar to keep water away. Wash the surface often to get rid of dirt and bad stuff. When you finish taking off paint, put on a corrosion inhibitor like ACF-50. This keeps the metal from rusting. Before you paint again, use a primer that stops rust, like zinc-chromate. Do not use steel brushes because they can leave steel bits in the aluminum. These bits can make rust worse.
Before you start, always cover sensitive spots with aluminum tape. This keeps chemicals out and helps stop rust. Careful masking and cleaning keep your airplane safe and ready for new paint.
Note: If you take time to protect your airplane now, you will not have bigger problems later.
You can take off airplane paint safely if you follow each step. Always put on safety gear before you start. Pick a remover that works with your airplane. Spread the remover in a thick, even layer. Watch the time so you do not leave it on too long. Use plastic tools so you do not scratch the surface. The table below shows important safety steps:
| Safety Measure | Description |
|---|---|
| Personal Protection | Wear gloves, goggles, and a respirator. Make sure there is fresh air. |
| Application Technique | Brush in one direction. Cover with plastic so it does not dry out. |
If you follow these rules, you will keep yourself and your airplane safe.
See also
Do I need to spray paint immediately after rust removal?
How to Remove Paint from Aluminum: Fast Field Guide


