The EPA estimates that indoor mold can begin colonizing a damp wood surface in as little as 24 to 48 hours — and once it takes hold, it doesn’t just sit there. It sends root-like structures called hyphae deep into wood fibers, which is exactly why surface wiping alone rarely solves the problem. If you’re figuring out how to remove mold from wood, the approach depends on two things: whether the wood is finished or raw, and how deep the growth has penetrated. This guide walks through every scenario — from a mild surface bloom on a sealed bookshelf to aggressive black mold embedded in structural framing — with specific solutions, safety steps, and prevention methods that actually hold up long-term.
How to Remove Mold from Wood — Quick Answer
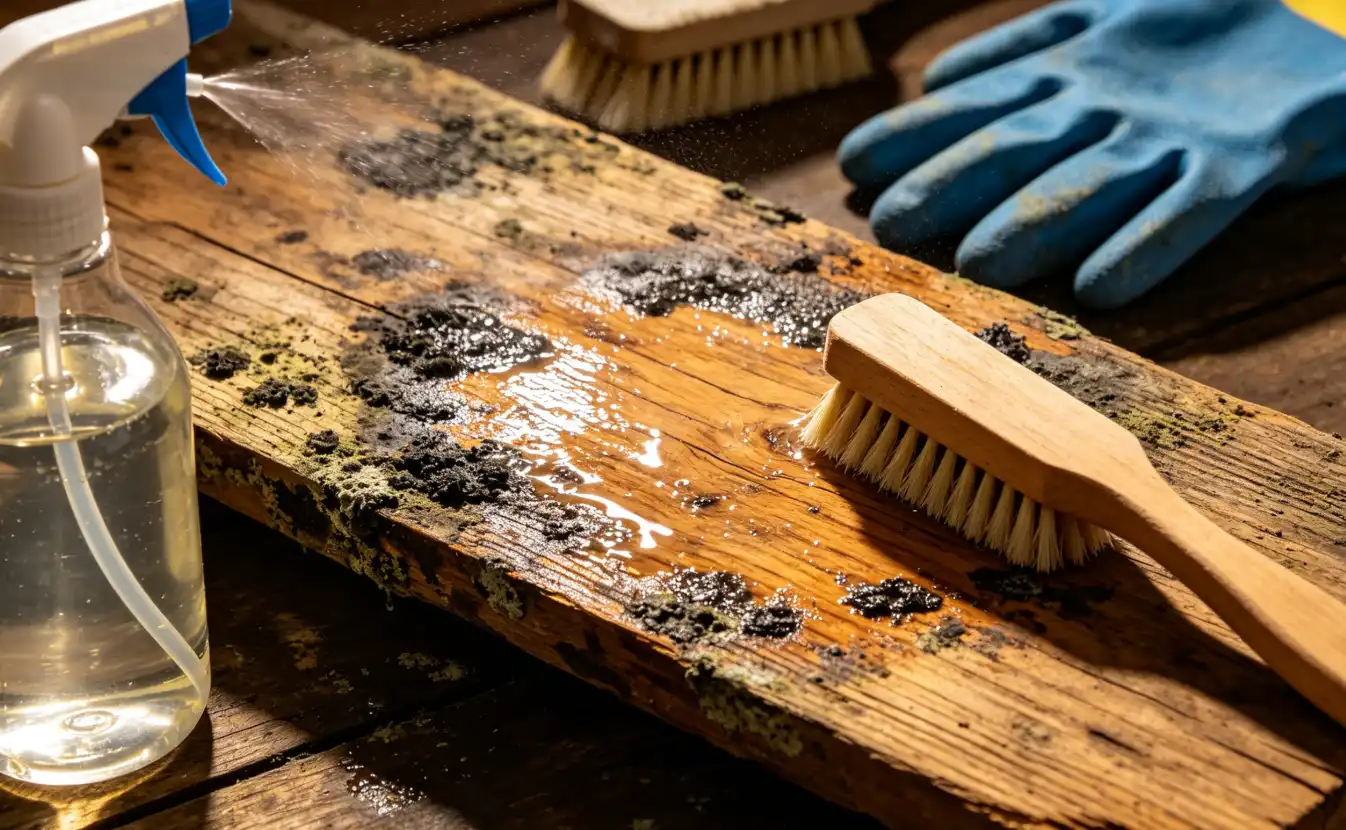
Here’s the short version. Grab white distilled vinegar, a spray bottle, a stiff-bristle brush, and sandpaper (100–220 grit). You’ll also need rubber gloves, safety goggles, and an N95 respirator mask — mold spores are no joke for your lungs.
- Ventilate the area. Open windows or set up a fan pointing outward. You want airflow pushing spores away from you, not deeper into the room.
- Vacuum loose mold. Use a vacuum with a HEPA filter to pick up surface spores before they scatter. Skip this step and you’ll spread the problem.
- Spray undiluted white vinegar directly onto the moldy wood. Let it sit for 60 minutes — vinegar’s acetic acid kills roughly 82% of mold species, according to research cited by the EPA’s mold resource page.
- Scrub with a stiff brush. Work along the wood grain to avoid gouging the surface. For stubborn patches on raw wood, follow up with 100-grit sandpaper.
- Wipe clean and dry completely. Use a damp cloth to remove residue, then dry the wood with towels or a fan. Moisture left behind invites regrowth within 24–48 hours.
That’s the core process for how to remove mold from wood safely. If the mold covers more than about 10 square feet, or if it’s black mold penetrating deep into the grain, stop — that’s professional territory. The sections below break down each step in detail, cover different wood types, and explain which cleaning agents actually work versus which ones waste your time.

Essential supplies for removing mold from wood including vinegar, brush, respirator mask, gloves, and sandpaper
What Causes Mold to Grow on Wood and Why It Spreads Fast
Mold needs three things to colonize wood: moisture, warmth, and an organic food source. Wood checks that last box automatically — its cellulose fibers are literally a buffet for mold spores. So the real triggers come down to water and air conditions. According to the U.S. Environmental Protection Agency, mold can begin growing on damp surfaces within 24 to 48 hours when conditions align.
The critical moisture threshold sits around 20% wood moisture content. Below that, spores stay dormant. Above it, they activate fast. A leaky pipe behind a wall, condensation on a window frame, or even a basement with 60%+ relative humidity — any of these can push wood past that 20% line without you noticing for weeks. Humidity above 55% indoors is already risky territory.
Poor ventilation accelerates the problem dramatically. Stagnant air traps moisture against wood surfaces, creating micro-climates where mold thrives even when the rest of the room feels dry. Closets, crawl spaces, cabinet interiors, and the underside of wooden decks are classic hotspots precisely because airflow is restricted there.
Here’s what makes mold so aggressive on wood specifically: a single mold colony can release thousands of spores per day into the surrounding air. Those spores land on adjacent surfaces, find moisture, and start new colonies within two days. This chain reaction is why learning how to remove mold from wood only solves half the equation. If you skip the root cause — the moisture source, the ventilation gap, the humidity problem — you’ll be scrubbing the same spot again in a month. Fix the water issue first. Then kill the mold. That order matters.

Mold growing on damp wood surface in a basement with poor ventilation
How to Identify the Type of Mold on Your Wood Surface
Before you figure out how to remove mold from wood effectively, you need to know exactly what you’re dealing with. Not all mold behaves the same way, and misidentifying the type can lead you down the wrong removal path — or worse, leave hidden growth festering beneath the surface.
Surface Mold (Mildew) vs. Penetrating Mold
Mildew is the easy one. It sits on top of the wood as a flat, powdery patch — usually white, gray, or light green. Wipe it with a damp cloth, and it comes off without much resistance. The wood underneath looks normal. That’s your signal: this is a surface-level problem with a straightforward fix.
Black mold — often Stachybotrys chartarum — is a different animal entirely. It appears as dark greenish-black clusters with a slimy or slightly fuzzy texture, and it carries a strong musty odor that smells like wet dirt left in a sealed container. According to the EPA’s mold guidance, color alone isn’t enough to confirm species, but dark, slimy growth combined with a persistent earthy smell warrants serious caution.
The Poke Test for Structural Damage
Grab a screwdriver or awl. Press the tip into the affected wood. If it sinks in easily — more than 1/4 inch with light pressure — the mold has likely broken down the wood fibers internally. Healthy wood resists penetration firmly. Soft, crumbly, or spongy spots mean the structural integrity is compromised, and no amount of surface scrubbing will solve the problem. That wood may need partial or full replacement.
Also pay attention to discoloration depth. Sand a small inconspicuous area lightly. If dark staining persists well below the surface layer, the mold’s hyphae have burrowed into the grain. Superficial staining that disappears after light sanding? You’re in good shape for a DIY approach.

Comparison of surface mildew and black mold on wood with structural damage poke test
Safety Gear and Preparation Before You Start Removing Mold
Skipping protective gear is the single fastest way to turn a weekend cleanup into a medical problem. Mold spores are microscopic — between 3 and 40 microns — and scrubbing or sanding launches millions of them into the air within seconds. Before you learn how to remove mold from wood, you need to gear up properly.
Essential Protective Equipment
Start with an N95 respirator at minimum. A standard dust mask won’t cut it; the N95 filters 95% of airborne particles down to 0.3 microns, which captures most mold spores. For black mold or large infestations exceeding 10 square feet, the EPA recommends upgrading to a half-face respirator with P100 cartridges. Pair that with non-vented safety goggles — not glasses, goggles — because spores irritate eyes fast. Long rubber gloves that extend to mid-forearm protect your skin from both mold contact and cleaning solutions. Wear old long-sleeve clothing you can bag and wash immediately afterward in hot water.
Preparing the Workspace
Containment matters more than most people realize. Close HVAC vents in the room and seal them with plastic sheeting and painter’s tape. This prevents spores from entering your ductwork and spreading to every room in the house. Open windows on the opposite side of the work area and position a box fan blowing outward to create negative pressure — air flows toward the fan and out, carrying spores with it.
Cover adjacent furniture and unaffected surfaces with 6-mil plastic sheeting. Lay drop cloths on the floor. Keep a spray bottle of water nearby; lightly misting moldy wood before scrubbing reduces the number of spores that go airborne by a significant margin. Have sealed garbage bags ready so contaminated rags and debris go straight in, tied off, and out the door.

Safety gear for mold removal including N95 respirator, gloves, goggles, and plastic sheeting
How to Remove Mold from Finished Wood Without Damaging the Seal
Finished wood — varnished tabletops, painted cabinets, polyurethane-sealed hardwood floors — gives you a major advantage. The sealant acts as a barrier, meaning mold typically sits on top of the finish rather than penetrating the wood grain underneath. That makes cleanup far less aggressive than dealing with raw lumber. But the wrong cleaner or too much scrubbing pressure will cloud a glossy varnish, strip paint, or leave permanent swirl marks in polyurethane.
The Gentle Cleaning Method That Works
Mix one tablespoon of liquid dish soap into a spray bottle filled with warm water. Spray the moldy area lightly — enough to dampen, not drench. Let it sit for 2 to 3 minutes so the soap loosens the mold’s grip on the finish. Then wipe with a soft microfiber cloth using straight, even strokes in the direction of the wood grain. Circular motions create micro-scratches on glossy surfaces.
For stubborn spots that soap alone won’t budge, switch to a solution of one part white distilled vinegar and one part water. Vinegar’s acidity (around pH 2.5) kills roughly 82% of mold species according to research cited by the EPA’s mold resource page. Apply it sparingly with a cloth — not a spray bottle — to avoid excess moisture pooling in seams or edges where the finish may have worn thin.
What to Avoid on Sealed Surfaces
- Bleach: Strips color from stained wood and can dissolve certain lacquer finishes within minutes.
- Abrasive pads or steel wool: Scratch through clear coats permanently.
- Leaving moisture standing: Even sealed wood absorbs water at joints and edges. Dry the surface completely with a clean towel immediately after cleaning.
Knowing how to remove mold from wood that’s already sealed really comes down to restraint. Gentle solutions, minimal moisture, and soft cloths protect the finish while eliminating surface mold entirely. Once dry, inspect the area under bright light — if dark staining remains beneath the clear coat, the mold has breached the seal, and you’ll need the raw wood techniques covered in the next section.
How to Remove Mold from Unfinished or Raw Wood
Raw wood is a different beast. Without a protective seal, mold hyphae burrow directly into the grain — sometimes 1/16″ or deeper into softwoods like pine and spruce. Surface wiping won’t cut it here. You need to physically remove the contaminated layer to actually eliminate the colony.
Sanding: Your First Line of Attack
Start with 80-grit sandpaper on a random orbital sander. Work in the direction of the grain, removing material until no visible discoloration remains. Then switch to 100-grit for a smoother finish. Critical detail: sand at least 1/8″ beyond the visible mold boundary, because hyphae extend further than the stain suggests. Bag and dispose of all sanding dust immediately — it’s loaded with spores.
Oxygen Bleach for Deep Penetration
After sanding, mix sodium percarbonate (oxygen bleach) at roughly 6 oz per gallon of warm water. Flood the affected area and let it dwell for 15–20 minutes. Oxygen bleach breaks down mold proteins below the surface without degrading wood fibers the way chlorine bleach does. Scrub with a stiff nylon brush, rinse thoroughly, and allow 48 hours of drying time before sealing. The EPA’s mold cleanup guide recommends against using chlorine bleach on porous materials for exactly this reason — it can’t reach embedded growth.
When Media Blasting Makes Sense
For structural framing or large subflooring areas with deep contamination, soda blasting or dry-ice blasting strips mold from the wood surface far faster than hand sanding. This is how to remove mold from wood at scale — professional remediation crews use it on crawl spaces and attic trusses where manual methods would take days. Expect to pay $3–$8 per square foot for professional media blasting, but the results are thorough enough to pass post-remediation air testing.
DIY Mold Removal Solutions — Vinegar, Baking Soda, Hydrogen Peroxide, and Borax
Not all DIY solutions perform equally on wood. Here’s an honest breakdown so you pick the right one.
White Distilled Vinegar
Undiluted white vinegar (5% acetic acid) kills roughly 82% of known mold species, according to research cited by the EPA’s mold resource page. Spray it on, let it sit for 60 minutes, then scrub. It’s cheap, non-toxic, and safe for both finished and raw wood. The smell dissipates within a few hours.
Baking Soda
Mix one tablespoon into a spray bottle of water. It won’t kill mold as aggressively as vinegar, but it excels at deodorizing and mild surface cleaning. Best used as a follow-up after vinegar — the two complement each other well. Spritz, scrub gently, wipe clean.
Hydrogen Peroxide (3%)
Stronger than vinegar. Pour standard 3% pharmacy-grade peroxide into a spray bottle, apply to the moldy area, and wait 10 minutes before scrubbing. It’s antifungal, antibacterial, and breaks down into water and oxygen — no toxic residue. One caution: peroxide can lighten dark-stained wood, so test a hidden spot first.
Borax Solution
Dissolve one cup of borax in one gallon of warm water. This is the heavy hitter for how to remove mold from wood that’s deeply stained. Borax doesn’t emit fumes, and it leaves behind a residual alkaline layer that discourages regrowth. Apply with a brush, let it dry completely, and don’t rinse — that residue is doing work.
Why Chlorine Bleach Fails on Wood
Bleach seems logical. It isn’t — at least not for porous materials. The sodium hypochlorite molecule is too large to penetrate wood grain, so it kills surface mold while the roots survive underneath. Worse, the water content in bleach actually feeds remaining spores deeper in the fibers. Stick with the four options above.
When to Use Commercial Mold Removers or Call a Professional
DIY methods have a ceiling. The EPA draws a clear line: if the affected area exceeds 10 square feet — roughly a 3×3-foot patch — you should seriously consider professional remediation. That threshold exists because larger colonies often indicate hidden moisture problems behind walls, under subfloors, or inside HVAC ductwork where spores circulate through your entire home.
Call a pro immediately if you suspect Stachybotrys (black mold) or Chaetomium, both of which produce mycotoxins linked to neurological symptoms and chronic respiratory illness. Structural wood that feels soft, crumbles under pressure, or shows deep discoloration beyond the surface has likely suffered hyphae penetration too severe for scrubbing and sanding to fix. At that point, knowing how to remove mold from wood yourself won’t matter — the wood may need partial or full replacement.
Choosing a Commercial Mold Remover
Look for EPA-registered fungicides specifically labeled for porous surfaces. Products containing quaternary ammonium compounds or copper-based biocides tend to outperform bleach on wood. Avoid anything that just masks odor. Read the dwell time on the label — most effective formulas require 10–15 minutes of wet contact, not a quick spray-and-wipe.
Vetting a Remediation Company
Ask three questions before signing anything. First: do they hold IICRC S520 certification? That’s the industry standard for mold remediation protocols. Second: will they perform post-remediation air quality testing using an independent third-party lab, not their own? Third: do they provide a written scope of work with containment procedures? Any company that skips containment — negative air pressure, polyethylene sheeting — risks spreading spores to clean areas during removal. Get at least three quotes. Prices for professional mold remediation on wood structures typically range from $1,500 to $9,000 depending on severity and accessibility.
How to Prevent Mold from Coming Back on Wood Permanently
Knowing how to remove mold from wood solves the immediate problem. Keeping it gone requires changing the environment that invited it. Mold spores are everywhere — literally floating in the air you’re breathing right now — so elimination isn’t the goal. Starvation is.
Control Moisture Below the Threshold
Wood with a moisture content below 20% won’t support mold growth. Period. A pin-type moisture meter (around $25–$40 at any hardware store) lets you spot-check suspect areas in under 10 seconds. For ambient humidity, the EPA recommends keeping indoor relative humidity between 30% and 60%, though staying below 50% is far safer for wood-heavy rooms like basements and attics. A properly sized dehumidifier with an auto-shutoff humidistat handles this without babysitting.
Seal the Wood Properly
Bare wood is an open invitation. Apply a mold-resistant primer — Zinsser Mold Killing Primer is the go-to for most contractors — followed by a quality sealant or paint containing antimicrobial additives. For outdoor wood like deck framing or fence posts, penetrating oil-based sealers with mildewcide outperform film-forming products because they don’t trap moisture underneath.
Fix Ventilation Gaps
Stagnant air is mold’s best friend. Bathrooms need exhaust fans rated at minimum 1 CFM per square foot, vented to the exterior — not into the attic. Crawl spaces benefit from vapor barriers on the ground (6-mil polyethylene sheeting, overlapped 12 inches at seams) paired with foundation vents or a dedicated crawl space dehumidifier. Even something as simple as leaving a 3-inch gap between furniture and exterior walls can prevent the dead-air pockets where condensation quietly builds.
Build a Maintenance Routine
- Inspect high-risk wood surfaces every 3 months — window sills, basement joists, bathroom vanities
- Recalibrate or replace dehumidifier sensors annually
- Reseal outdoor wood every 2–3 years, or whenever water stops beading on the surface
- Clean gutters twice a year to prevent water intrusion near wood framing
Prevention isn’t glamorous. But a $30 moisture meter and 15 minutes of quarterly inspections will save you from repeating the entire removal process a year from now.
Frequently Asked Questions About Removing Mold from Wood
Can moldy wood actually be saved?
Usually, yes. Surface mold on structurally sound wood cleans up well with the methods covered above. The exception: wood that feels spongy, crumbles under pressure, or has been saturated for weeks. At that point the cellulose fibers have broken down, and no amount of scrubbing restores structural integrity. Replace it.
Are leftover mold stains dangerous after cleaning?
Not typically. Dark stains that remain after thorough cleaning are usually melanin pigments left behind by dead mold — not active colonies. The EPA’s mold guide confirms that discoloration alone doesn’t indicate a health risk once the mold is killed and the moisture source is eliminated. Sanding or oxalic acid can lighten these stains if appearance matters.
Does vinegar kill mold roots (hyphae)?
White vinegar penetrates porous surfaces better than bleach, and lab studies show it kills roughly 82% of mold species on contact. But “kills” and “removes” aren’t the same thing. Dead hyphae still sit inside the wood grain. That’s why scrubbing or sanding after a vinegar treatment matters — you’re physically extracting what the acid already neutralized.
How do I get rid of mold smell in wood?
That musty odor comes from microbial volatile organic compounds (MVOCs). Clean the mold first. Then apply a baking soda paste, let it sit for 24 hours, and wipe it off. For persistent smells in enclosed spaces like drawers or cabinets, place activated charcoal inside for 48–72 hours. If the odor survives all of that, mold is likely hidden deeper than the visible surface.
Is sanding alone enough to remove mold from wood?
No. Sanding without killing the mold first launches live spores into the air — exactly the scenario you want to avoid when figuring out how to remove mold from wood safely. Always treat with a cleaning solution, let the wood dry completely, and then sand. That sequence matters more than the grit number you choose.
See also
Does Vinegar Kill Mold? What Actually Works and What Doesn’t
How to Use a Customized Laser Cleaning Solution for Better Results
How to Fix Insufficient Air Pressure During Welding for Better Results
Weld Cleaning Machine vs Pickling Paste — Which One Should You Use


