Roughly 40% of pressure vessel inspection rejections trace back to improper weld surface preparation — not weld defects themselves, but contamination, heat tint, and residual oxide left behind after welding. Weld cleaning for pressure vessels involves removing discoloration, embedded iron, flux residue, and oxide scale from completed welds to restore corrosion resistance and meet code-mandated surface finish requirements under ASME Section VIII, PED 2014/68/EU, and client specifications. This guide breaks down the specific methods, code thresholds, and step-by-step procedures that separate a weld joint that passes third-party inspection from one that gets ground out and redone.
Why Weld Cleaning Is Critical for Pressure Vessel Integrity
A weld bead on a pressure vessel might look structurally sound, but the real threat is often invisible. During welding, temperatures exceeding 400°C create a heat-affected zone (HAZ) where the chromium in stainless steel and nickel alloys reacts with atmospheric oxygen in an uncontrolled way. The result is a layer of heat tint — those familiar blue, gold, and purple discolorations — that signals a depleted chromium oxide passive layer beneath. Without that protective barrier, the metal is exposed to the very chemicals and environments the vessel was designed to contain.
Here’s the metallurgy in plain terms. Stainless steel resists corrosion because chromium atoms at the surface bond with oxygen to form a self-healing film roughly 1–5 nanometers thick. Welding disrupts this film and pulls chromium out of solution in the grain boundaries, a phenomenon called sensitization. According to research published by TWI Global, sensitized zones in austenitic stainless steels like 304L and 316L are highly susceptible to intergranular corrosion — cracks that propagate along grain boundaries under stress. In a vessel operating at 15 bar or higher, that’s a failure path waiting to activate.
Proper weld cleaning for pressure vessels removes the thermally degraded oxide layer and restores the conditions needed for a uniform passive film to regenerate. Skip this step, or do it poorly, and you’re left with localized anodic sites that accelerate pitting corrosion. Pits as shallow as 0.3 mm can act as stress concentrators under cyclic pressure loading, eventually initiating stress corrosion cracking (SCC). The vessel doesn’t leak gradually — it ruptures.
This isn’t a cosmetic concern. Catastrophic pressure vessel failures traced back to inadequate post-weld surface treatment appear repeatedly in incident reports across petrochemical, pharmaceutical, and food-processing industries. Getting weld cleaning right is the difference between a vessel that lasts 20 years and one that fails during its first hydrostatic test.

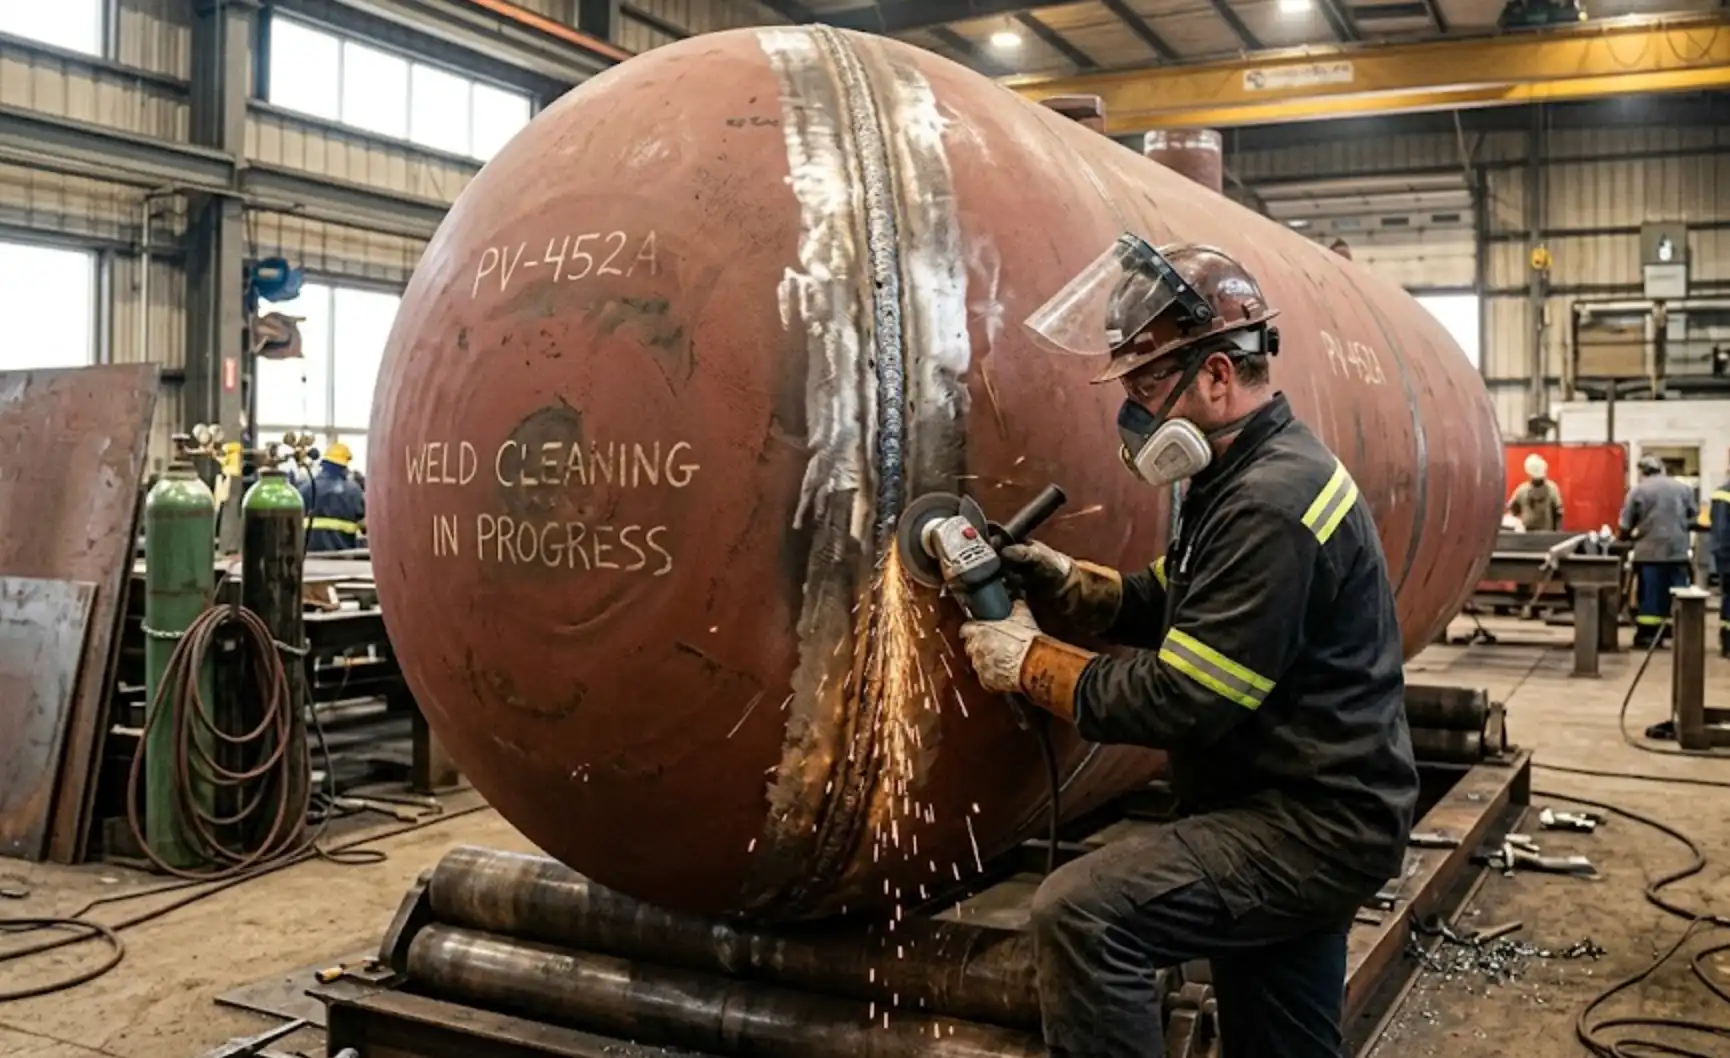
Heat tint discoloration on stainless steel pressure vessel weld compared to a cleaned and passivated weld surface
ASME Section VIII and PED Code Requirements for Weld Surface Finish
Code compliance isn’t optional. It’s the legal and engineering backbone of every pressure vessel project, and the requirements around weld surface condition are more specific than many fabricators realize.
ASME BPVC Section VIII — What It Actually Demands
ASME Section VIII Division 1 (UW-32, UW-33) requires that weld surfaces be free of coarse ripples, grooves, overlaps, and abrupt ridges. Division 2, which applies to vessels designed by analysis rather than rules, goes further — Part 6 mandates that finished welds shall be “substantially flush” with the base metal surface unless otherwise specified. For corrosive service environments, fabricators often must meet a surface roughness of 125 µin Ra or better on wetted surfaces. Weld cleaning for pressure vessels under ASME jurisdiction isn’t just about aesthetics; it directly affects the validity of NDE examinations like liquid penetrant and radiographic testing.
European PED 2014/68/EU
The Pressure Equipment Directive takes a risk-based approach. Annex I, Section 3.1.2 explicitly states that all joints shall be free from surface or near-surface defects detrimental to equipment safety. For Category III and IV vessels, a Notified Body reviews fabrication procedures — including post-weld surface preparation. PED doesn’t prescribe exact Ra values the way some ASME interpretations do, but it holds manufacturers legally liable for demonstrating that their cleaning methods achieve a corrosion-resistant finish consistent with the intended service fluid and temperature.
NACE and SSPC Relevance
When vessels enter sour gas or high-chloride service, NACE International standards like SP0472 come into play, requiring heat tint removal and verified passivation on austenitic stainless steels. SSPC surface preparation grades (SP 1 through SP 10) also get referenced in fabrication specs, particularly for carbon steel vessels requiring coating after weld cleaning for pressure vessels destined for offshore or chemical plant duty. Ignoring these layered requirements is a fast path to rejected inspections and costly rework.

Inspector checking weld surface finish on a pressure vessel against ASME Section VIII code requirements using a surface comparator
Surface Finish Standards and Acceptance Criteria
Inspectors don’t guess. They measure. When evaluating weld cleaning for pressure vessels, the pass/fail decision comes down to quantifiable metrics—surface roughness, heat tint color, and ferrite content—each governed by specific reference standards.
Ra Surface Roughness Values
Surface roughness is expressed as Ra (arithmetic average roughness) in microinches or micrometers. For pharmaceutical and high-purity applications, ASME BPE specifies finishes as fine as Ra ≤ 0.5 µm (20 µin) on product-contact surfaces. General chemical service vessels typically require Ra ≤ 3.2 µm (125 µin), though the exact threshold depends on the process fluid’s corrosivity. A profilometer reading that exceeds the specified Ra value means rework—no exceptions.
Heat Tint Discoloration Charts
The AWS D18.2 guide provides a numbered color scale from 1 (light straw) through 9 (heavy black oxide). Most pharmaceutical and semiconductor specs reject anything beyond Level 4. Bioprocessing clients often demand Level 2 or better. The color directly indicates oxide layer thickness: straw tints sit around 25 nm, while dark blue or gray signals 100+ nm of chromium-depleted oxide that compromises corrosion resistance. Weld cleaning must remove enough of this layer to bring discoloration within the acceptable range.
Ferrite Content Limits
Duplex and austenitic stainless steels require ferrite measurement post-cleaning to confirm the thermal cycle and subsequent cleaning haven’t shifted the microstructure outside acceptable bounds. NORSOK M-601 calls for 30–70% ferrite in duplex welds, measured with a calibrated ferritescope. For austenitic grades like 316L, ferrite numbers (FN) between 3 and 12 are typical acceptance windows. Too little ferrite invites hot cracking; too much reduces toughness and corrosion performance under pressure service conditions.
These three criteria—roughness, discoloration level, and ferrite balance—form the triangle that inspectors use to accept or reject weld cleaning work on pressure-rated equipment. Document every measurement. Inspectors want traceable records, not verbal assurances.
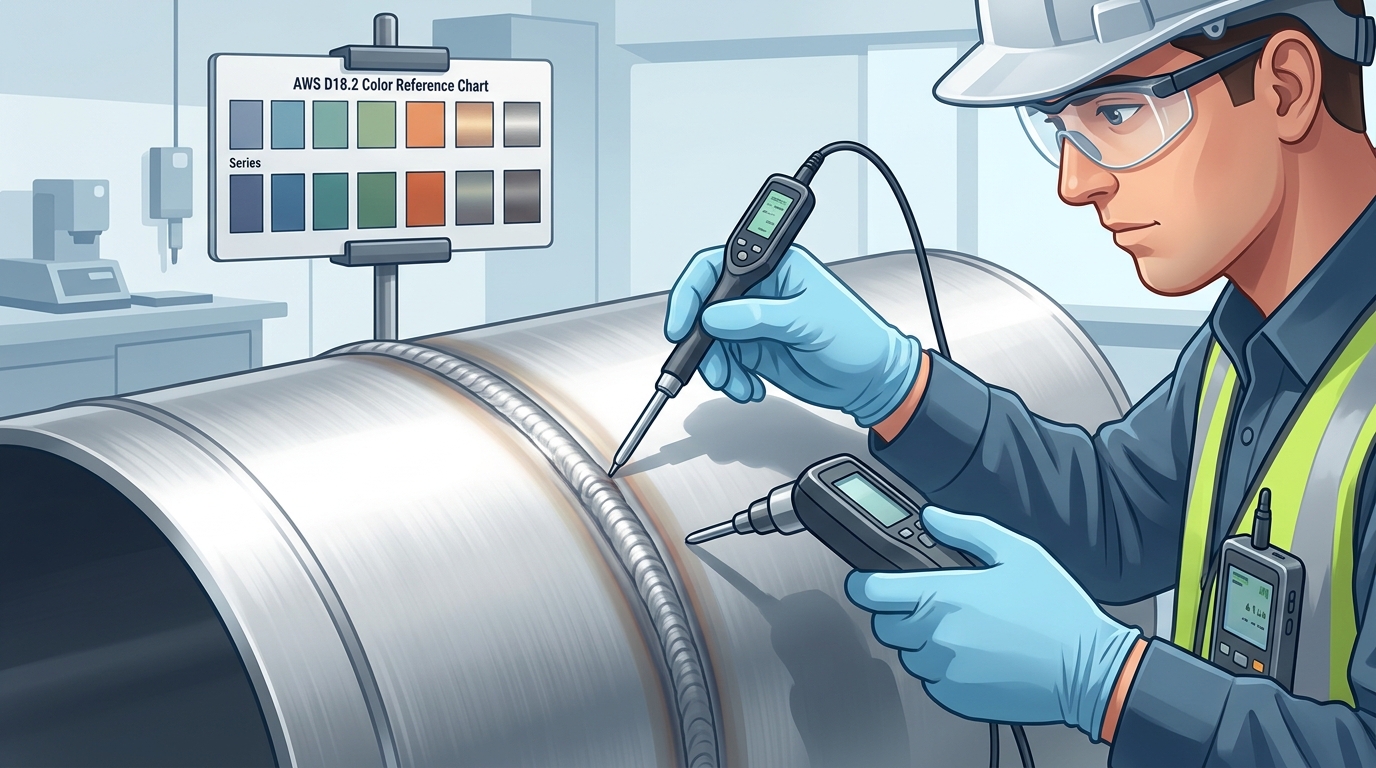
Inspector measuring surface roughness and ferrite content on a pressure vessel weld with AWS D18.2 discoloration chart
Pickling vs. Electrochemical vs. Mechanical Weld Cleaning Compared
Three methods dominate the field. Each carries distinct trade-offs, and choosing wrong can mean failed inspections, corroded welds, or blown budgets. Here’s how they actually stack up when applied to weld cleaning for pressure vessels.
| Factor | Chemical Pickling | Electrochemical | Mechanical (Abrasive) |
|---|---|---|---|
| Oxide Removal | Excellent — dissolves heat tint completely | Very good on light-to-moderate discoloration | Removes material, not oxide chemistry |
| Passivation Effect | Built-in (nitric/citric acid restores Cr₂O₃ layer) | Simultaneous passivation with proper electrolyte | None — separate passivation step required |
| Speed per Weld Joint | 20–60 min dwell time typical | 2–5 min per linear foot | Fast grinding, but add passivation time |
| Code Compliance Risk | Low, if rinse and neutralization are documented | Low, gaining acceptance under ASME and PED frameworks | Higher — risk of embedded iron, altered grain structure |
| Surface Finish Impact | Preserves original Ra; no material removal | Minimal surface alteration | Can reduce Ra below spec or create directional scratches |
| Safety Hazard | HF/HNO₃ mixtures are acutely toxic | Mild acidic electrolytes; lower exposure risk | Dust, sparks, noise; carbon steel contamination possible |
| Waste Disposal | Hazardous — heavy metal–laden acid rinsewater | Small volumes, easier neutralization | Solid waste (discs, dust); less regulated |
| Typical Cost per Joint | $8–$15 in chemicals, plus labor and disposal | $3–$7 in consumables; higher equipment investment (~$3,000–$8,000) | $1–$4 in abrasives, but hidden rework costs |
Chemical pickling remains the gold standard for full-immersion scenarios — large vessels, internal surfaces, batch processing. The ASTM A380 standard outlines cleaning and descaling procedures that most fabricators reference when building their pickling protocols. But handling hydrofluoric acid demands serious PPE, ventilation, and hazmat-trained personnel. That overhead is real.
Electrochemical weld cleaning has carved out a growing niche, especially for field work and localized heat-tint removal. A technician with a brush-style unit can clean and passivate a circumferential weld seam in minutes, not hours. The limitation? Deeply oxidized or multi-pass welds with heavy discoloration sometimes need a second pass or a hybrid approach.
Mechanical methods — flap discs, wire wheels, sanding belts — are fast and cheap upfront. They’re also the riskiest for pressure vessel applications. Grinding with a carbon steel brush on austenitic stainless introduces free iron contamination that accelerates pitting. Even stainless-dedicated abrasives can smear the surface and mask incomplete oxide removal. Without a follow-up passivation and ferroxyl test, you’re guessing.

Comparison of pickling, electrochemical, and mechanical weld cleaning results on stainless steel pressure vessel coupons
When to Use Each Method Based on Vessel Material and Service Conditions
Material dictates method. A cleaning approach that works beautifully on 304 stainless can destroy a duplex weld or leave carbon steel CRA overlays vulnerable to undercut corrosion. Here’s how to match the technique to the job.
Austenitic Stainless Steels (304/316)
These are the most forgiving substrates. Electrochemical weld cleaning handles most 304/316 applications efficiently—food-grade vessels, pharmaceutical reactors, and chemical storage tanks all respond well. For vessels entering corrosive chemical service (concentrated chlorides above 60°C, for instance), acid pickling with a nitric-HF paste still delivers the deepest chromium oxide restoration. If the spec calls for Ra ≤ 0.8 µm and the vessel will contact WFI (Water for Injection) in pharma service, electrochemical cleaning followed by mechanical polishing is the standard combination.
Duplex and Super Duplex Stainless
Duplex grades like 2205 and 2507 demand caution. Prolonged pickling with HF-based solutions can preferentially attack the ferrite phase, weakening the very microstructure that gives duplex its strength. Electrochemical cleaning at controlled amperage (typically 3–5 A for duplex) is the safer path. The International Molybdenum Association notes that maintaining the austenite-ferrite phase balance is critical during any post-weld treatment—aggressive chemistry disrupts it.
Inconel and Nickel Alloys
Inconel 625 overlays and solid nickel alloy vessels used in high-temperature or sour gas service present a different challenge. Mechanical methods—flap discs followed by fine abrasive finishing—often outperform chemical approaches here, because nickel alloys form tenacious oxides that resist standard pickling chemistry. When chemical cleaning is required, specialized formulations with lower HF concentrations (under 2%) and shorter dwell times prevent intergranular attack.
Carbon Steel with CRA Overlay
Weld cleaning for pressure vessels with corrosion-resistant alloy (CRA) cladding requires a two-zone mindset. The overlay weld gets treated as the alloy it is—usually 316L or Inconel—while adjacent carbon steel must be masked or protected from any acid contact. Electrochemical cleaning shines here because the operator can target the weld zone precisely without risking the base metal. Sloppy technique leads to flash rust on exposed carbon steel within minutes.
Service Conditions That Override Material Preferences
- Oxygen service: Zero hydrocarbon residue required—mechanical cleaning only, no chemical films left behind.
- Hydrogen service: Surface finish below Ra 3.2 µm to prevent hydrogen-assisted cracking initiation at rough weld toes.
- Food/pharma contact: Electrochemical cleaning preferred for traceability and repeatability; pickling residue rinsing must be validated.
The right method is never just about the alloy. It’s the intersection of material, service environment, and code specification—get one wrong and the vessel fails inspection or, worse, fails in operation.
Step-by-Step Weld Cleaning Process for Stainless Steel Pressure Vessels
Start before you even touch a cleaning tool. Pre-cleaning inspection means visually checking every weld for spatter, slag inclusions, arc strikes, and grinding marks that could trap contaminants beneath the cleaned surface. On austenitic grades like 304L and 316L, look for heat tint bands — those straw-yellow to dark blue oxide layers extending 15–25 mm from the weld centerline. Duplex grades (2205, 2507) demand even closer scrutiny because their ferritic-austenitic microstructure is more sensitive to intermetallic precipitation if cleaning chemistry or dwell time goes wrong.
Surface Preparation
Degrease the weld zone with acetone or isopropyl alcohol to remove oils, marking pen residue, and fingerprints. Skip this step, and your cleaning agent won’t contact bare metal uniformly. Then mask adjacent surfaces — gasket faces, machined sealing grooves — with chemical-resistant tape rated for the acid concentration you’re about to apply.
Cleaning Agent Application and Dwell Time
For electrochemical weld cleaning for pressure vessels in stainless steel, apply the electrolyte solution (typically phosphoric acid–based, pH around 1.5–2.0) using a carbon fiber brush at 20–40 volts AC. Move the brush steadily at roughly 10–15 mm per second. Dwell time matters enormously: 3–5 seconds per pass on austenitic grades, but duplex stainless requires shorter exposure — closer to 2–3 seconds — to avoid selective phase attack on the ferrite. Two to three passes usually removes all visible heat tint.
If you’re using gel pickling instead, apply a mixed acid paste (typically 8–20% nitric acid plus 1–5% hydrofluoric acid per ASTM A380 guidelines) at 1.5–3 mm thickness. Minimum dwell: 30 minutes at ambient temperatures above 15°C. Below that, extend to 60 minutes.
Neutralization, Rinsing, and Drying
Neutralize acid residues with a sodium bicarbonate solution (roughly 50 g/L concentration). Then rinse thoroughly with deionized or low-chloride water — chloride content below 50 ppm is the standard target to prevent pitting initiation. Rinse until pH paper reads between 6.0 and 8.0 on the surface. Dry immediately with oil-free compressed air or clean lint-free cloths; standing water on duplex stainless is an invitation for crevice corrosion.
Final step: verify passivation. A ferroxyl test or copper sulfate test confirms the chromium oxide layer has reformed. This verification bridges directly into post-cleaning inspection protocols covered next.
Post-Cleaning Passivation Verification and Testing
Cleaning the weld is only half the job. Without verification, you have no proof that a stable chromium oxide layer actually formed. Inspectors and code auditors expect documented evidence—not assumptions—that passivation was achieved after weld cleaning for pressure vessels.
Ferroxyl Testing (ASTM A380)
This is the most widely used field test. A solution of potassium ferricyanide and nitric acid is applied to the cleaned surface. If free iron is present, the solution turns blue within 15 to 30 seconds. No color change means the surface is clean and passivated. The test is cheap, fast, and sensitive enough to detect iron contamination at levels as low as 1 ppm on the surface. One critical detail: the test solution itself is mildly corrosive, so it must be thoroughly rinsed off immediately after evaluation per ASTM A380 guidelines.
Copper Sulfate Testing (ASTM A967)
This method works differently. A copper sulfate solution is swabbed onto the surface for six minutes. If free iron or an inadequate passive layer exists, copper deposits as a pinkish-red film. A clean surface stays unchanged. ASTM A967 Practice A specifies a solution concentration of approximately 4 g CuSO₄ per liter with a small addition of sulfuric acid. It’s particularly useful for verifying passivation on austenitic stainless steels like 304 and 316.
Electrochemical Testing
For higher-stakes applications—think lethal service or high-purity pharmaceutical vessels—electrochemical methods measure the open circuit potential (OCP) of the passive layer directly. A properly passivated 316L surface typically shows an OCP above +200 mV vs. a saturated calomel electrode. This approach gives quantitative data rather than a subjective color judgment, which makes it easier to defend during third-party audits.
Documenting Results for Code Compliance
Every test must be recorded with the test method used, location on the vessel (referenced to weld map numbers), date, result, and the technician’s name. Photographs of ferroxyl or copper sulfate results add a layer of traceability that auditors appreciate. For weld cleaning for pressure vessels governed by PED or ASME Section VIII, these records become part of the permanent Manufacturer’s Data Report. A failed test isn’t the end—it triggers re-cleaning and retesting of that specific zone, not the entire vessel.
Common Weld Cleaning Mistakes That Cause Inspection Failures
Most inspection rejections don’t stem from bad welding. They come from bad cleaning. The frustrating part is that these failures are almost always preventable — the same handful of errors show up repeatedly across fabrication shops, costing thousands in rework and schedule delays.
Carbon Contamination from Grinding Discs
This one tops the list. A fabricator grabs a standard carbon steel grinding disc — maybe the same one used on a mild steel job earlier that shift — and runs it across a stainless weld. The result: free iron particles embedded directly into the surface. A copper sulfate test per ASTM A380 will flag it immediately. Inspectors see this constantly, and it’s an instant rejection. The fix is simple but requires discipline: dedicated stainless-only tools, clearly labeled and stored separately.
Insufficient Pickling Paste Dwell Time
Rushing the paste is tempting, especially under production pressure. Manufacturers typically specify 30–60 minutes of dwell time depending on ambient temperature and alloy grade. Pulling the paste off at 15 minutes because the surface “looks clean” leaves residual oxide and heat tint intact. The chromium-depleted layer beneath hasn’t been fully dissolved. Ferroxyl testing will catch it every time.
Embedded Iron from Tooling and Handling
Carbon steel clamps, lifting chains, and even workshop tables transfer iron particles onto stainless surfaces during handling. These micro-deposits are invisible to the naked eye but create localized corrosion cells within weeks. Proper weld cleaning for pressure vessels means controlling contamination throughout the entire fabrication chain — not just at the cleaning stage.
Incomplete Rinsing After Chemical Treatment
Acid residue left on the surface after pickling or passivation causes its own form of attack. Hydrofluoric and nitric acid residues concentrate in crevices around weld toes and create pitting. Thorough rinsing with deionized water — verified by pH testing to confirm a neutral reading between 6 and 8 — eliminates this risk. Skipping the pH check is a gamble that experienced inspectors won’t tolerate.
Safety and Environmental Considerations for Pressure Vessel Weld Cleaning
Pickling acids kill. That’s not hyperbole. Traditional HF/HNO3 mixtures used in weld cleaning for pressure vessels are acutely toxic — hydrofluoric acid penetrates skin on contact and binds calcium in the bloodstream, potentially causing cardiac arrest from exposures covering as little as 2% of body surface area. Nitric acid fumes attack lung tissue. Every facility handling these chemicals needs a written hazard communication plan, calcium gluconate gel immediately accessible, and personnel trained specifically on HF emergency protocols.
PPE requirements go well beyond standard shop gear. Workers need acid-resistant gloves (neoprene or butyl rubber, not latex), full-face shields with chemical splash protection, acid-resistant aprons or suits, and rubber boots. Ventilation is non-negotiable: local exhaust systems must maintain airborne HF concentrations below OSHA’s permissible exposure limit of 3 ppm as an 8-hour TWA. Confined spaces inside partially assembled vessels demand supplied-air respirators, not just cartridge-type masks.
Waste disposal adds another layer of complexity. Spent pickle liquor is classified as hazardous waste under EPA RCRA regulations due to its corrosivity and dissolved heavy metals (chromium, nickel). Neutralization with soda ash or lime must bring pH to 6–9 before discharge, and the resulting sludge often requires manifested transport to a licensed treatment facility. Costs for proper disposal can run $2–$8 per gallon depending on metal content.
Electrochemical weld cleaning dramatically shrinks this risk profile. The phosphoric acid-based electrolytes used in most systems are far less hazardous — no HF, no toxic fume generation at room temperature, and waste volumes reduced by roughly 90% compared to immersion pickling. Operators still need gloves and eye protection, but the elimination of HF alone removes the most dangerous variable from the shop floor. For facilities performing routine weld cleaning for pressure vessels, switching methods can cut both liability exposure and environmental compliance costs substantially.
Frequently Asked Questions About Weld Cleaning for Pressure Vessels
Does electrochemical cleaning satisfy ASME Section VIII requirements?
Yes — but with a caveat. ASME doesn’t prescribe a specific cleaning method. It mandates the outcome: a surface free of detrimental oxides, contaminants, and embedded iron that could compromise corrosion resistance. If your electrochemical process achieves the required surface finish (typically ≤ 0.8 µm Ra for high-purity service) and passes passivation verification per ASTM A967, the method itself is code-compliant. Document everything. Inspectors care about measurable results, not brand names on equipment.
How do you clean welds inside confined vessel interiors?
Tight spaces change the equation dramatically. Acid pickling inside a closed vessel creates lethal fume accumulation — even with forced ventilation, HF concentrations can spike above IDLH thresholds within minutes. Electrochemical wand systems are the practical choice here. They’re portable, generate minimal fumes, and let an operator work in awkward positions. For vessels under 24 inches in diameter, some fabricators use extended-reach electrode tips rated for internal seam access. Confined space entry permits, continuous atmospheric monitoring, and a dedicated safety attendant remain non-negotiable regardless of cleaning method.
Is mechanical cleaning alone ever sufficient for code compliance?
Rarely on stainless steel. Grinding and wire brushing remove visible discoloration, but they don’t restore the chromium oxide passive layer. Worse, using a carbon steel brush introduces free iron contamination that accelerates pitting. Mechanical prep works as a first step — removing heavy scale or spatter before chemical or electrochemical treatment. On carbon steel vessels destined for painting or lining, mechanical cleaning to SSPC-SP 11 can meet specifications. For any austenitic or duplex stainless application, you’ll need a chemical passivation step afterward.
What about weld cleaning on mixed-material joints?
Dissimilar metal welds — say, 316L to carbon steel with an ERNiCr-3 filler — demand careful segregation during weld cleaning for pressure vessels. Acid pickling solutions formulated for stainless can aggressively attack the carbon steel side, causing pitting or hydrogen embrittlement. The safest approach is masking the carbon steel with acid-resistant tape or paste, then treating only the stainless and nickel alloy zones. Electrochemical cleaning offers better precision here because you control exactly where the current flows.
Best Practices Checklist for Code-Compliant Weld Cleaning
Print this. Tape it to the shop wall. Every step below maps directly to the code requirements, methods, and failure points covered throughout this guide. Treat it as your final gate before calling an inspector.
- Pre-clean inspection: Visually examine every weld for spatter, arc strikes, undercut, and embedded iron particles before selecting a cleaning method.
- Match method to material: Use electrochemical cleaning for thin-wall stainless (≤3 mm), pickling for heavy carbon-contaminated welds, and mechanical methods only where codes explicitly permit them.
- Verify electrolyte compatibility: Confirm the cleaning solution is rated for the specific alloy — 316L, duplex 2205, and nickel alloys each demand different formulations.
- Control dwell time and temperature: For acid pickling, monitor bath temperature (typically 20–50 °C) and never exceed manufacturer-specified immersion times. Over-pickling causes intergranular attack.
- Rinse with DI or low-chloride water: Chloride content below 50 ppm. No exceptions. Residual chlorides cause pitting under operating pressure.
- Passivation verification: Run copper sulfate testing per ASTM A967, ferroxyl testing, or electrochemical methods. Document every result with photos and readings.
- Surface finish measurement: Confirm Ra values meet the project specification — typically ≤0.8 µm for sanitary service, ≤3.2 µm for general ASME VIII vessels.
- Prevent recontamination: Use stainless steel brushes (never carbon steel), clean gloves, and protective wrapping immediately after passivation is confirmed.
- Document everything: Log the cleaning method, operator, chemicals used (with lot numbers), dwell times, rinse water quality, and test results. Inspectors want paper trails, not verbal assurances.
- PPE and waste compliance: Ensure acid-resistant gear for pickling operations and neutralize spent solutions before disposal per local environmental regulations.
Weld cleaning for pressure vessels fails inspection for one reason more than any other: skipped steps. This checklist isn’t exhaustive theory — it’s the distilled, practical sequence that keeps rejection rates near zero when followed without shortcuts.
See also
The Complete Guide to Stainless Steel Welding Techniques
Classification of Carbon Metal Content, Steel, and Alloy Steel
How to Tell Aluminum from Stainless Steel: Shop Guide
Key Differences Between Galvanized Steel and Stainless Steel


