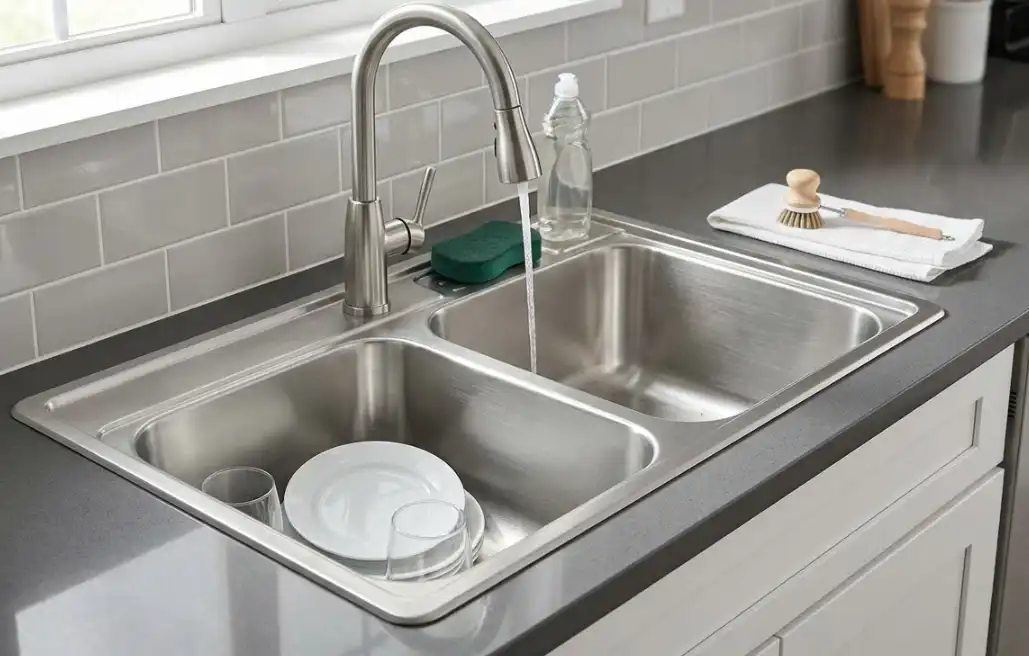
Stainless steel sinks account for roughly 70% of all kitchen sink sales in North America, and that dominance isn’t accidental. The material hits a rare sweet spot of durability, hygiene, affordability, and design flexibility that no competitor — composite, fireclay, or cast iron — has managed to dethrone. But here’s the catch most buyers miss: the gap between a great stainless steel sink and a terrible one is enormous, and the difference comes down to just a handful of specifications that rarely appear on the front of the box.
This guide breaks down every factor that actually matters when choosing a stainless steel sink — from the steel grade and gauge thickness to surface finishes, manufacturing methods, sound dampening technology, installation styles, and long-term maintenance. Whether you’re renovating a kitchen or specifying sinks for a commercial project, the goal is simple: help you buy once and never regret it.
What Makes Stainless Steel Sinks the Top Choice for Modern Kitchens
Walk into any kitchen showroom and count the sink materials on display. Composite granite, fireclay, copper, cast iron with enamel — they all look gorgeous under showroom lighting. Yet when contractors and kitchen designers spec sinks for their own homes, stainless steel wins overwhelmingly. Why?
The answer isn’t a single advantage. It’s the combination of five properties that no other material delivers simultaneously:
- Durability without brittleness. Drop a heavy pot into a fireclay sink and you risk chipping the glaze. Drop it into stainless steel and you get, at worst, a minor dent that doesn’t affect function.
- Genuine hygiene. Stainless steel is non-porous. Bacteria can’t penetrate the surface the way they can with natural stone composites. There’s a reason hospital surgical equipment is made from the same family of alloys.
- Heat tolerance. You can pour boiling pasta water directly into a stainless steel sink without any thermal shock risk. Try that repeatedly with a composite sink and micro-cracks become inevitable.
- Recyclability. Over 90% of stainless steel is recycled at end of life, according to the International Stainless Steel Forum. For environmentally conscious buyers, this matters.
- Price range flexibility. You can find a functional stainless steel sink for under $100 or invest $800+ in a premium handmade model. No other material covers that spectrum.
But — and this is the part most “buying guides” skip — not all stainless steel sinks are equal. A cheap 22-gauge sink made from 201-grade steel with no sound dampening will feel flimsy, sound like a drum, and develop rust spots within two years. The seven factors covered in the sections below are what separate a sink you’ll love for 20 years from one you’ll want to rip out in 20 months.
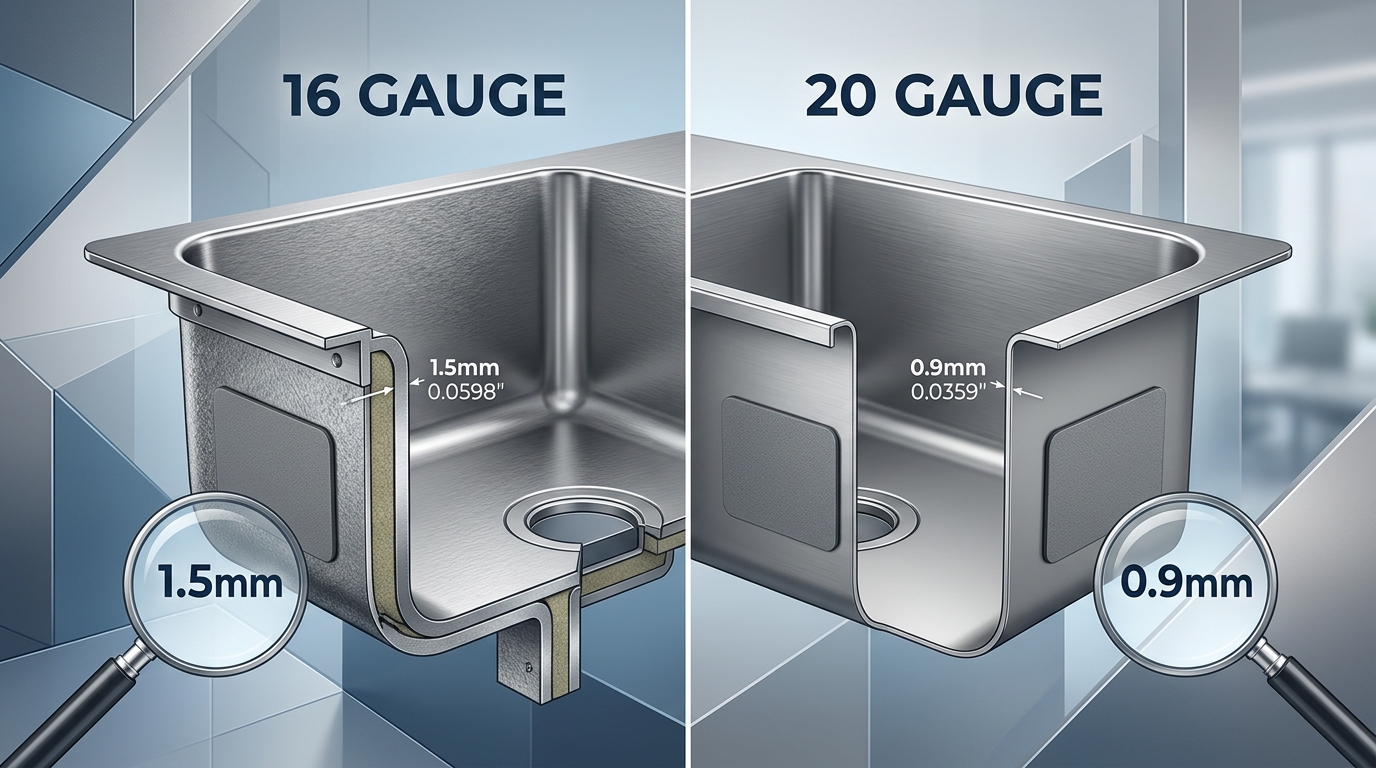
cross-section comparison of 16 gauge and 20 gauge stainless steel sink thickness
Why 304 Stainless Steel Is the Gold Standard for Kitchen Sinks
If you remember only one specification from this entire guide, make it this: insist on a 304 stainless steel sink. The grade number isn’t marketing fluff — it defines the exact chemical composition of the alloy, and that composition determines whether your sink resists corrosion or slowly falls apart.
The Chemistry Behind 304
Grade 304 stainless steel contains approximately 18% chromium and 8% nickel (which is why you’ll sometimes see it labeled “18/8” on product packaging). The chromium forms an invisible, self-healing oxide layer on the surface that blocks oxygen and moisture from reaching the iron underneath. The nickel stabilizes the crystal structure of the metal, making it more formable and significantly more resistant to acidic environments — like, say, lemon juice, vinegar, and tomato sauce that routinely splash around a kitchen sink.
This combination earns 304 its classification as a food-grade stainless steel, recognized by the FDA for direct food contact. Hospitals, commercial kitchens, and food processing plants all rely on 304 for exactly this reason.
What Happens When Manufacturers Cut Corners
Budget sinks often use grade 201 or 430 stainless steel, and the difference isn’t subtle.
| Property | Grade 304 (18/8) | Grade 201 | Grade 430 |
|---|---|---|---|
| Chromium content | ~18% | ~16% | ~16% |
| Nickel content | ~8% | ~4% (substituted with manganese) | 0% |
| Corrosion resistance | Excellent | Moderate | Low to moderate |
| Magnetic? | Slightly (after cold working) | Yes | Yes |
| Pitting risk with chlorides | Low | High | High |
| Typical price premium | Baseline | 15-25% cheaper | 20-30% cheaper |
Grade 201 replaces expensive nickel with manganese to cut costs. The result? Noticeably weaker resistance to pitting corrosion, especially in areas with chlorinated tap water. Grade 430 is a ferritic steel with zero nickel — it’s magnetic, prone to rust around weld zones, and has no business being in a kitchen sink, though it shows up in the cheapest imports.
How to Verify the Grade Before You Buy
Reputable manufacturers stamp “SUS304” or “AISI 304” directly on the sink body, usually on the underside near the drain. If a product listing only says “stainless steel” without specifying the grade, treat that as a red flag. You can also carry a small magnet — while 304 can show slight magnetism after being cold-worked during manufacturing, a sink that grabs a magnet strongly is almost certainly 430 or 201.
One more thing: some sellers advertise “18/10 stainless steel” (grade 316) for kitchen sinks. That’s overkill. Grade 316 adds molybdenum for superior saltwater resistance, which matters for marine hardware and coastal outdoor kitchens, but in a standard residential kitchen, 304 performs identically at a lower price point.
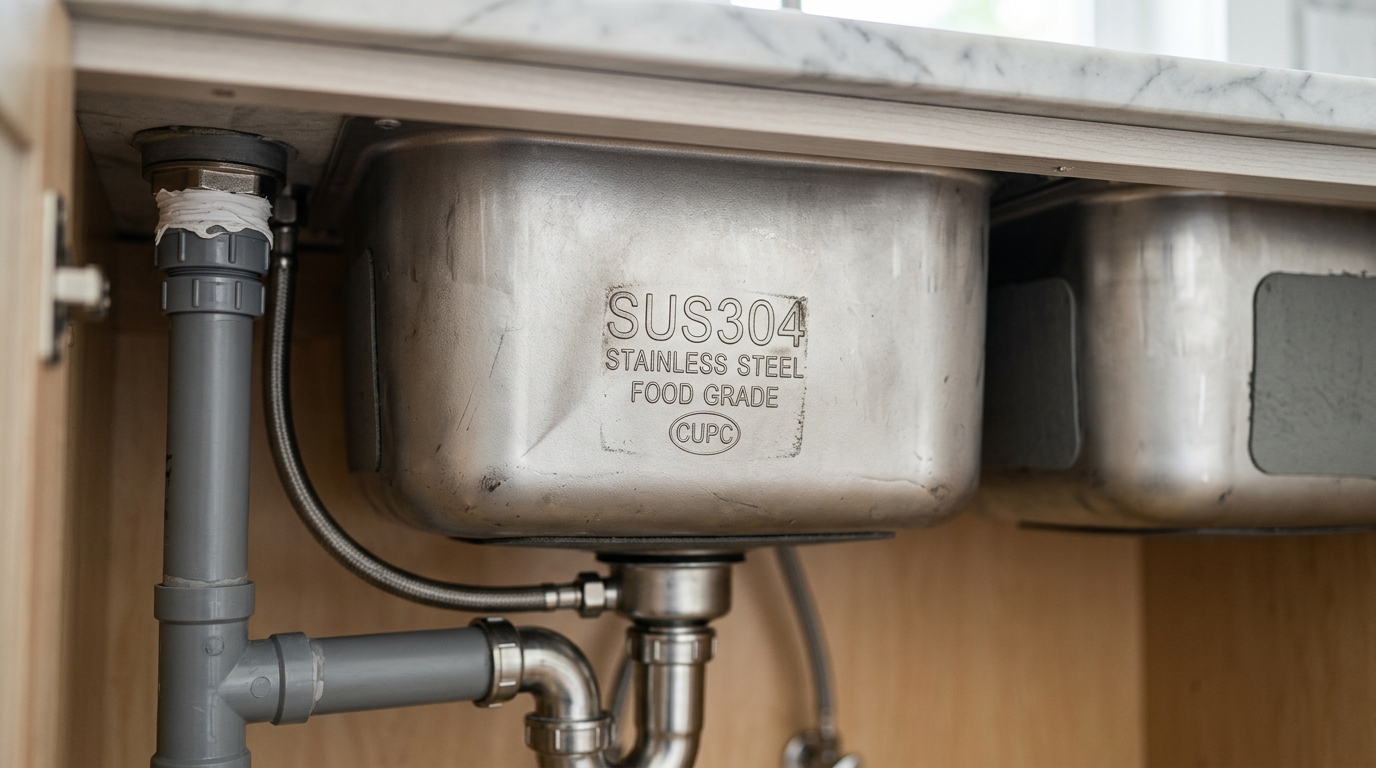
SUS304 grade stamp on the bottom of a stainless steel kitchen sink
Understanding Kitchen Sink Gauge and Why Thickness Matters
The kitchen sink gauge rating confuses almost everyone the first time they encounter it, because the numbering system runs backwards. A 16-gauge sink is thicker than an 18-gauge sink, which is thicker than a 20-gauge sink. The gauge system originated in the wire drawing industry centuries ago, and we’re stuck with it.
Here’s what the numbers actually translate to in real-world thickness:
| Gauge | Approximate Thickness | Best For |
|---|---|---|
| 16 gauge | ~1.5 mm (0.060″) | Heavy-use kitchens, premium residential, light commercial |
| 18 gauge | ~1.2 mm (0.048″) | Most residential kitchens (best value sweet spot) |
| 20 gauge | ~0.9 mm (0.036″) | Budget installs, bar sinks, laundry rooms |
| 22 gauge | ~0.76 mm (0.030″) | Not recommended for primary kitchen use |
Why Those Fractions of a Millimeter Matter So Much
The difference between 1.5 mm and 0.9 mm doesn’t sound dramatic on paper. In practice, it’s the difference between a sink that feels solid and silent, and one that flexes when you press on the bottom, booms when water hits it, and develops dents from dropped cookware.
Thicker steel resists vibration. That’s the key point. A 16-gauge sink absorbs the energy of running water and clanging dishes instead of transmitting it as noise. A 20-gauge sink acts like a resonating membrane — every splash echoes through the cabinet below.
Thicker steel also maintains flatness over decades. Thin sinks can develop a subtle “oil-canning” effect where the bottom panel warps slightly, causing water to pool unevenly instead of draining cleanly toward the drain hole.
The Practical Recommendation
18 gauge is the sweet spot for most residential kitchens. It’s thick enough to resist denting from normal use, heavy enough to dampen sound effectively (especially with proper sound dampening pads — more on that later), and typically costs $40-80 less than an equivalent 16-gauge model.
Go with 16 gauge if you cook heavily, use cast iron cookware, or simply want the most robust option available. Skip 20 gauge for a primary kitchen sink entirely — save it for a wet bar or utility room where performance expectations are lower.
One misconception worth correcting: some brands advertise “18-gauge sides with a 16-gauge bottom.” This sounds clever but is actually standard practice for stamped sinks where the drawing process naturally thins the sidewalls. What you really want is a consistent gauge rating across the entire basin, which is easier to achieve with handmade welded construction.
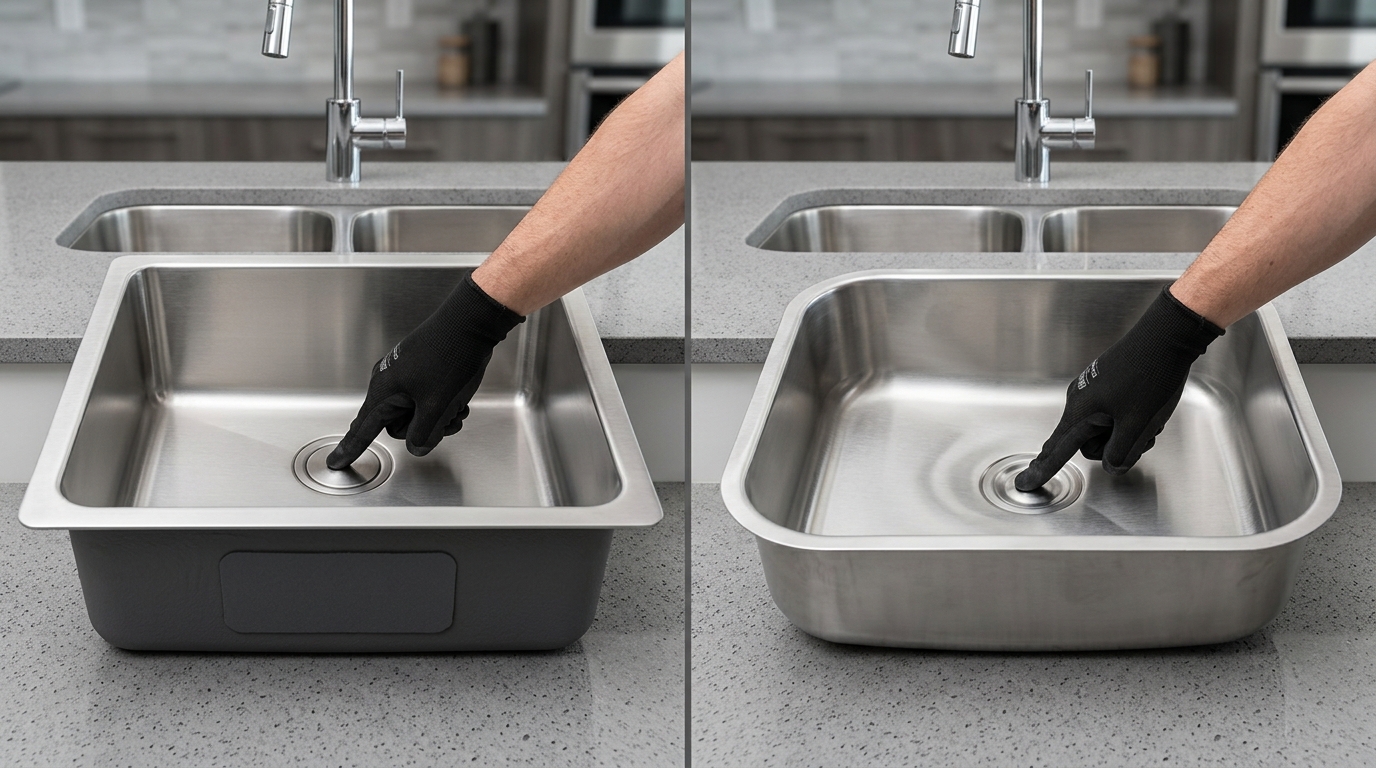
comparison of 16 gauge thick stainless steel sink versus thinner 20 gauge sink
Surface Finish Options — Brushed Finish vs Mirror vs PVD Coating
The surface treatment you choose affects how your sink looks on day one and on day one thousand. Most people pick based on aesthetics alone, which is a mistake. Each finish has dramatically different maintenance demands and wear characteristics.
Brushed Finish — The Practical Winner
A brushed finish (sometimes called “satin” or “linen”) is created by running an abrasive belt across the steel in a single, consistent direction. This produces fine, parallel lines that serve a brilliantly practical purpose: they camouflage minor scratches.
Think about it. Every scratch that occurs in the same direction as the existing grain pattern becomes virtually invisible. Since most scratching happens from sliding pots and dishes back and forth — which naturally follows the grain — a brushed sink can look nearly new after years of daily abuse.
Brushed finishes also show fewer water spots and fingerprints than polished alternatives. For a kitchen sink that gets used three to five times a day, that’s a significant quality-of-life improvement. Roughly 80% of residential stainless steel sinks sold today feature a brushed finish, and there’s good reason for that dominance.
Mirror Polish — Beautiful but Demanding
A mirror-polished sink is stunning in a showroom. It reflects light, makes a small kitchen feel brighter, and has an undeniable luxury appeal. The problem? Every single water droplet, fingerprint, and hairline scratch becomes immediately visible.
If you’re the type of person who wipes down the sink after every use, mirror polish can work. For everyone else, it becomes a source of daily frustration. The finish also shows its age faster — the reflective surface dulls over time as micro-scratches accumulate, and restoring it requires professional buffing.
My honest take: mirror polish makes sense for bathroom sinks that see lighter use. For a busy kitchen? Pass.
PVD Coating — The Premium Newcomer
PVD coating (Physical Vapor Deposition) is a vacuum-based technology that bonds an ultra-thin metallic layer to the stainless steel surface. Originally developed for industrial cutting tools and watch cases, it’s now making serious inroads in kitchen fixtures.
The advantages are compelling:
- Scratch resistance 3-5x higher than uncoated stainless steel
- Fingerprint and smudge resistance — the coating creates a surface that oils don’t adhere to easily
- Color options — PVD can produce gold, black, gunmetal, and bronze tones while retaining the underlying steel’s durability
- Chemical resistance — the coating withstands common household cleaners without degradation
The downside? Cost. A PVD-coated sink typically runs 40-70% more than an equivalent uncoated model. And while the coating is remarkably durable, it’s not indestructible — dragging a cast iron pan across it aggressively can still leave marks.
PVD is worth the premium if you want a colored finish (black stainless steel sinks have exploded in popularity) or if you’re designing a high-end kitchen where fingerprint resistance justifies the investment. For a standard brushed stainless steel sink, the base finish already performs exceptionally well without the added cost.
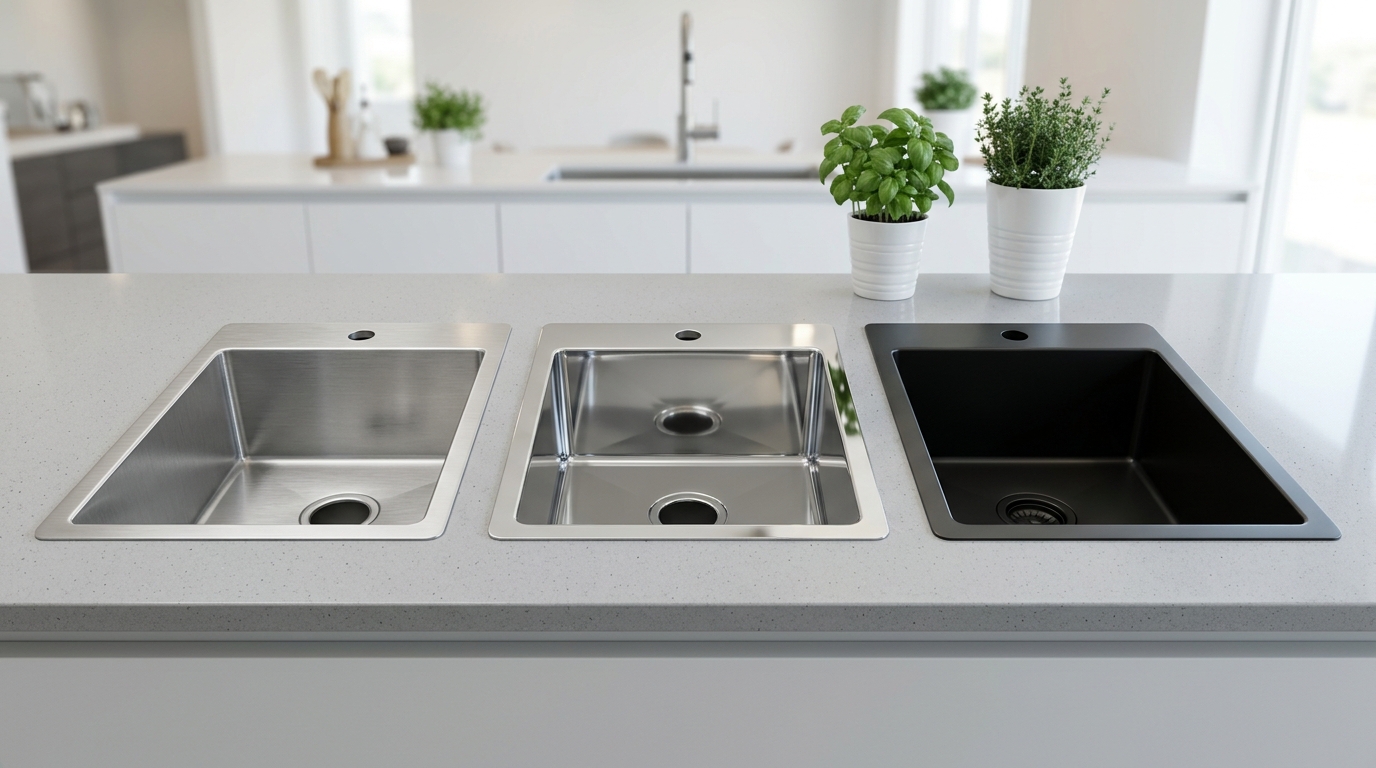
comparison of brushed finish mirror polish and PVD coated stainless steel sink surfaces
Drawn Sinks vs Handmade Welded Sinks — How Manufacturing Affects Quality
Most buyers never think about how their sink was made. They should. The manufacturing method directly impacts the sink’s shape, corner radius, gauge consistency, and price — and understanding the difference helps you evaluate whether a product is worth its asking price.
Drawn (Stamped) Sinks
A drawn sink starts as a flat sheet of stainless steel that gets pressed into a mold using a hydraulic press exerting hundreds of tons of force. The steel stretches and flows into the basin shape in a single operation, producing a seamless one-piece construction with no welds.
Advantages of drawn sinks:
- No weld seams — eliminates potential weak points where corrosion could start
- Lower production cost — once the die is made, stamping is fast and repeatable
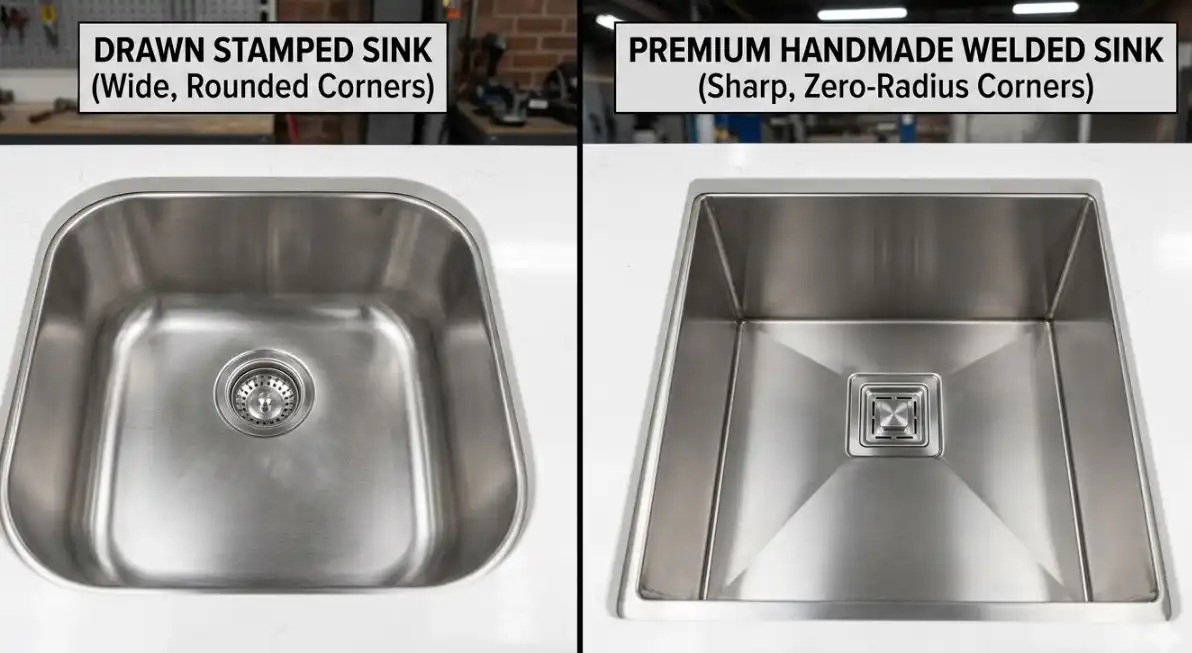
- Smooth, rounded corners — the drawing process naturally creates generous radii
The trade-off is that the stretching process thins the steel unevenly. Corners and the bottom center — where the metal stretches the most — can end up 10-20% thinner than the nominal gauge. Those large, rounded corners (typically 25-40mm radius) also reduce usable basin space and make it harder to fit large baking sheets flat on the bottom.
Handmade Welded Sinks
Handmade sinks are assembled from individually cut panels that are welded together, then ground and polished to create clean seam lines. This method allows for tight-radius corners (as small as 10mm or even 5mm) and consistent wall thickness throughout the basin.
The result is a sink with a distinctly modern, geometric appearance — sharp lines, flat bottom panels, and maximum usable interior space. These sinks have become the default choice in contemporary kitchen design.
Quality inspection tip: run your finger along the interior corners where the walls meet the bottom. On a well-made handmade sink, the weld should be completely smooth and invisible. If you can feel a ridge, bump, or see discoloration along the seam, the weld quality is substandard. Poor welds aren’t just cosmetic — they create crevices where water, food debris, and bacteria can accumulate.
Which One Should You Choose?
Drawn sinks work perfectly well for traditional kitchens, drop-in installations, and budget-conscious projects. If you’re spending under $200, a good drawn sink from a reputable brand will serve you reliably.
Handmade welded sinks are the better choice when you want tight corners, a contemporary aesthetic, undermount installation (the flat rim profile makes for a cleaner countertop transition), or maximum basin capacity. Expect to pay $250-600+ for a quality handmade model.
Sound Dampening Pads and Anti-Condensation Coating Explained
Here’s a specification that rarely appears in headline marketing but dramatically affects daily living experience: noise control.
Stainless steel is inherently resonant. Without dampening treatment, a running faucet hitting a bare steel basin produces a loud, hollow metallic sound that carries through open-plan kitchens and into adjacent living spaces. This is the number one complaint from people who buy cheap stainless steel sinks.
How Sound Dampening Pads Work
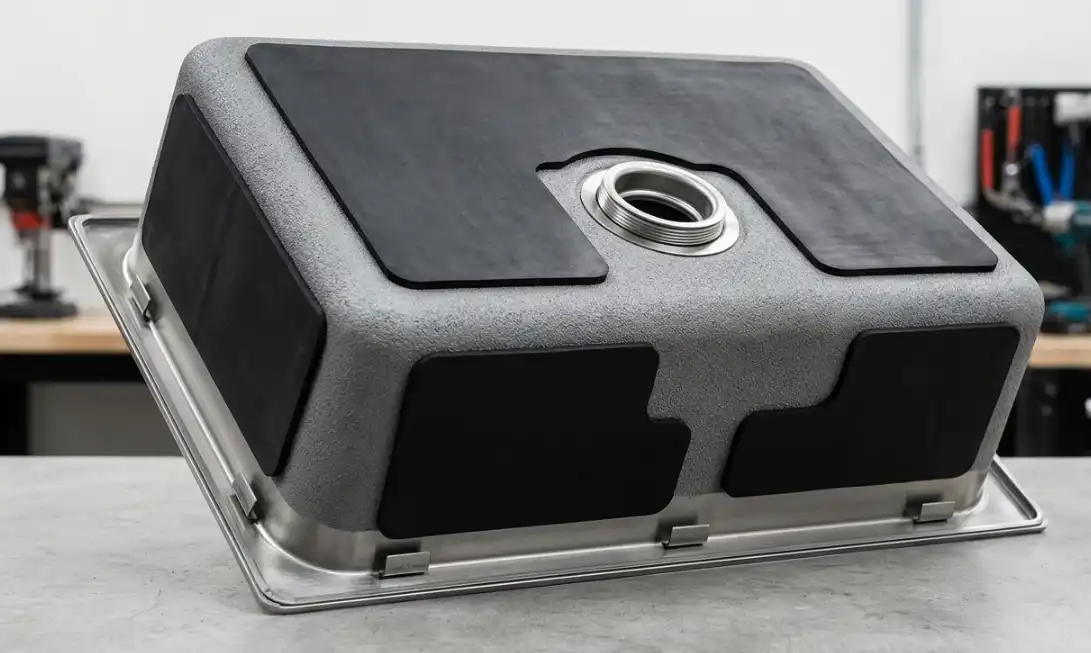
Sound dampening pads are thick rubber or butyl-based sheets bonded to the underside and sometimes the sides of the sink basin. They work by converting vibration energy into heat through internal friction within the pad material — the same principle used in automotive sound deadening.
Premium sinks use pads that cover 80-90% of the exterior surface area. Budget sinks might have a single small pad stuck to the bottom center, or nothing at all. The difference in noise reduction is dramatic — quality dampening can reduce impact noise by up to 80%, turning that metallic clang into a soft thud.
When evaluating a sink, flip it over. Full-coverage pads (the thicker, the better — look for 2-3mm minimum thickness) indicate a manufacturer that takes acoustic performance seriously. Thin, partial-coverage pads are a cost-cutting measure.
Anti-Condensation Coating — The Hidden Protector
This feature gets even less attention than sound dampening, but it’s arguably just as important for long-term cabinet preservation.
When cold water runs through a stainless steel sink, the exterior surface temperature drops below the dew point of the surrounding air. Moisture condenses on the underside — exactly like a cold glass of water on a humid summer day. Over months and years, this repeated condensation drips onto the cabinet floor below, causing swelling, mold growth, and eventual rot in particleboard or MDF cabinetry.
An anti-condensation coating (usually a sprayed-on rubberized or mineral fiber layer) insulates the sink exterior, preventing the surface temperature from dropping low enough to trigger condensation. It’s a cheap addition during manufacturing — maybe $2-3 in material cost — but its absence can lead to hundreds of dollars in cabinet damage.
Most quality sinks combine both features: sound dampening pads over an anti-condensation base coat. If a product listing doesn’t mention either feature, ask the manufacturer directly before purchasing.
Undermount vs Drop-In vs Farmhouse — Choosing the Right Installation Style
Installation style isn’t just an aesthetic choice. It determines your countertop requirements, installation complexity, cleaning ease, and budget. Get this decision wrong and you’re either paying for countertop modifications or living with a style that doesn’t suit your workflow.
Undermount Sinks
An undermount sink attaches beneath the countertop, with the counter edge overhanging the basin. This creates a seamless transition that makes wiping crumbs and water directly into the sink effortless — no rim to catch debris.
Pros:
- Cleanest look — the countertop surface flows uninterrupted
- Easiest to wipe down — sweep everything straight into the basin
- Maximizes usable counter space around the sink
Cons:
- Requires a solid countertop material (granite, quartz, solid surface). Undermount sinks cannot be installed on standard laminate countertops because the exposed particleboard edge will absorb water and disintegrate.
- Professional installation strongly recommended — the sink must be supported from below with clips and adhesive
- Typically $50-150 more expensive than equivalent drop-in models
Drop-In (Top-Mount) Sinks
Drop-in sinks sit in a cutout with a visible rim (or “lip”) resting on top of the countertop. They’re the simplest installation type — literally drop the sink into the hole, apply sealant, and tighten the mounting clips from below.
Pros:
- Works with any countertop material, including laminate
- DIY-friendly installation
- Easy to replace without modifying the countertop
Cons:
- The rim creates a seam that traps water, crumbs, and grime — requires regular cleaning around the edge
- Looks less streamlined than undermount
- The rim slightly reduces the usable countertop area immediately around the sink
Drop-in remains the most popular choice for rental properties, budget renovations, and any kitchen with laminate counters. It’s not inferior — it’s practical for different circumstances.
Farmhouse (Apron-Front) Sinks
Farmhouse sinks feature a large, exposed front panel that extends past the edge of the countertop and cabinetry. Stainless steel farmhouse sinks have surged in popularity as an alternative to the traditional fireclay versions, offering the same dramatic visual presence with better impact resistance and lighter weight.
The catch? Farmhouse sinks require a modified base cabinet with an open front to accommodate the apron. This usually means either buying a specialty sink base cabinet or modifying a standard one — adding $100-300 to the project cost. The countertop also needs a precisely sized cutout that accounts for the sink’s unique mounting geometry.
Choose farmhouse if you want a statement piece and are willing to invest in the supporting cabinetry. For pure functionality, undermount or drop-in will serve you equally well at lower total project cost.
How to Clean and Maintain Stainless Steel Sinks to Prevent Water Spots and Scratches
A well-maintained stainless steel sink can look great for 15-30 years. A neglected one starts looking tired within months. The good news is that proper maintenance takes about 60 seconds a day and costs almost nothing.
Daily Routine (30-60 Seconds)
After the last use of the day, rinse the entire basin with warm water, apply a small amount of dish soap with a soft sponge, wipe down all surfaces, and — this is the step most people skip — dry the sink with a clean towel or microfiber cloth. That final drying step prevents 90% of water spot issues.
Water spots are mineral deposits left behind when water evaporates. Hard water areas (above 120 ppm total dissolved solids) are especially problematic. Drying eliminates evaporation, which eliminates the deposits. Simple.
Weekly Deep Clean
Once a week, sprinkle baking soda across the basin and scrub gently with a non-abrasive sponge, following the direction of the grain on brushed finishes. This is critical — always scrub in the direction of the brush lines, never against them or in circles. Scrubbing against the grain creates cross-hatched scratches that are visible and impossible to reverse without professional refinishing.
For tougher stains, mineral buildup, or light discoloration, Bar Keeper’s Friend (the powder version, not the liquid) is the gold standard product recommended by virtually every sink manufacturer. Its active ingredient, oxalic acid, dissolves mineral deposits and light rust stains without damaging the chromium oxide layer that protects the steel.
What to Never Do
- Never use steel wool or metal scouring pads. They leave behind iron particles that embed in the surface and rust — creating the ironic situation of rust spots appearing on “stainless” steel.
- Never leave bleach or chlorine-based cleaners sitting in the sink. Chlorides attack the passive chromium oxide layer. If you must use bleach for sanitizing, dilute it heavily, minimize contact time, and rinse thoroughly.
- Never use the sink as a cutting board surface. Knife scratches are deep, directionally random, and immediately visible on any finish.
- Avoid leaving wet sponges or steel cans sitting on the sink surface overnight. Both create conditions for localized staining — the sponge traps moisture, and steel cans can leave rust rings.
Restoring a Neglected Sink
If you’ve inherited a sink with heavy water spots or dull patches, here’s the recovery protocol: clean with Bar Keeper’s Friend first to remove mineral deposits, then apply a thin layer of food-grade mineral oil with a soft cloth, buffing in the direction of the grain. The oil fills micro-scratches and restores the original luster. Reapply monthly for best results. Some manufacturers sell proprietary “stainless steel polish” products, but mineral oil achieves the same effect at a fraction of the price.
Frequently Asked Questions About Stainless Steel Sinks
Is 304 or 316 stainless steel better for kitchen sinks?
For a standard indoor kitchen, 304 is the right choice. Grade 316 adds molybdenum for enhanced resistance to chloride (saltwater) corrosion, which matters in marine environments or outdoor coastal kitchens. In a typical residential kitchen, 304 and 316 perform identically — you’d be paying a 30-50% premium for 316 with no practical benefit. The exception: if your home uses well water with unusually high chloride content, 316 provides an extra margin of safety.
What gauge is best for a residential kitchen sink?
18 gauge offers the best balance of durability, sound performance, and value for most households. Step up to 16 gauge if you cook frequently with heavy cookware or simply want the most solid feel possible. Avoid anything thinner than 20 gauge for a primary kitchen sink — the noise and flex issues aren’t worth the savings.
Do PVD-coated sinks scratch easily?
PVD coatings are significantly more scratch-resistant than bare stainless steel — typically rated 3-5x harder on the Vickers scale. Normal kitchen use (dishes, pots, utensils) won’t damage the coating. However, dragging cast iron cookware or using abrasive cleaners can leave marks. The coating won’t peel or flake like paint — any damage is surface-level and tends to blend in over time, especially on darker finishes.
Can undermount sinks be installed on laminate countertops?
No — at least not reliably. Standard laminate countertops have a particleboard or MDF core that absorbs water when exposed. An undermount installation leaves the raw edge of the cutout exposed to constant moisture from the sink, which causes swelling, delamination, and eventual structural failure. Undermount sinks require solid-surface countertops — granite, quartz, marble, or solid surface composites like Corian — where the exposed edge is waterproof throughout its full thickness.
How long do stainless steel sinks typically last?
A quality 304 stainless steel sink with proper maintenance will last 25-30 years or more — essentially the lifetime of most kitchen renovations. The steel itself doesn’t degrade; what typically forces replacement is cosmetic wear (accumulated scratches dulling the finish), drain fitting corrosion, or simply a kitchen remodel that calls for a different style. Many commercial kitchens run the same stainless steel sinks for 40+ years with nothing more than routine cleaning.
Are thicker sinks always worth the extra cost?
Not always. The jump from 20 gauge to 18 gauge delivers the most noticeable improvement in feel, sound, and durability — that upgrade is almost always worth it. The jump from 18 gauge to 16 gauge is more subtle. You get slightly better dent resistance and marginally less noise, but the difference is less dramatic, especially if the 18-gauge model already has quality sound dampening pads. If budget is tight, a well-built 18-gauge sink with full-coverage dampening pads will outperform a bare 16-gauge sink with no dampening in real-world noise tests.
Final Checklist for Choosing a High-Quality Stainless Steel Sink
You’ve made it through the deep dive. Here’s everything distilled into a quick-reference checklist you can pull up on your phone while shopping:
| Decision Factor | What to Look For | Red Flag |
|---|---|---|
| Material grade | 304 stainless steel (stamped “SUS304” or “18/8”) | No grade specified, or listed as 201/430 |
| Gauge thickness | 18 gauge minimum; 16 gauge for heavy use | 22 gauge or “gauge not specified” |
| Surface finish | Brushed/satin for daily practicality; PVD for premium color finishes | Mirror polish marketed for heavy-use kitchens |
| Construction method | Drawn for budget; handmade welded for tight corners and modern look | Visible or rough weld seams on handmade models |
| Sound dampening | Full-coverage pads (80%+ of underside), 2-3mm thick minimum | No pads, or a single thin pad on the bottom center only |
| Anti-condensation | Sprayed coating on underside (often combined with dampening pads) | No mention of any underside treatment |
| Installation style | Undermount for stone/quartz counters; drop-in for laminate; farmhouse for statement kitchens | Undermount marketed for laminate countertops |
| Maintenance commitment | Daily towel-dry, weekly baking soda scrub, occasional mineral oil | Products claiming “zero maintenance required” |
One final thought that most buying guides won’t tell you: the sink is one of the hardest-working surfaces in your entire home. The average kitchen sink gets used 30-50 times per day when you count every hand wash, vegetable rinse, pot soak, and glass fill. Spending an extra $100-200 to move from a mediocre sink to a genuinely good one costs you less than a dollar per month over the sink’s lifetime. Prioritize long-term value over the sticker price, and you’ll never think about your sink again — which is exactly the point.
If you’re narrowing down options, start by confirming the grade (304), picking your gauge (18 or 16), choosing your installation type based on your countertop material, and then verifying that sound dampening and anti-condensation features are included. Everything else — bowl configuration, accessory compatibility, drain placement — is personal preference. Get those core specs right, and the rest falls into place.


