Working outdoors on aluminum—on a façade, gangway, handrail, or hull fitting—means wind, tight windows, and real consequences if you mar the surface. The good news: there are field‑proven ways to remove paint and adhesive quickly while keeping the substrate intact and compliant.
This guide gives you a fast method picker, a compact field workflow, and hands‑on playbooks for blasting, gels, low heat, and more—so you can move from assessment to clean metal without guessing.
Key takeaways
- Start conservative: patch test first, then scale. You can always add pressure, dwell time, or heat—taking it back is harder.
- For large open areas, soda blasting is a quick way to remove paint from aluminum with minimal substrate risk and easy rinse‑down.
- For delicate profiles or complex geometry, neutral gel strippers designed for aluminum work well if you control dwell and keep the surface wet.
- Dry ice blasting is non‑abrasive and leaves no secondary media, ideal when waste containment is tight.
- Adhesives lift fast with controlled low heat plus a non‑marring scraper, followed by residue wipe‑down.
- Protect aluminum integrity: avoid caustic alkalis, keep steel away to prevent galvanic contamination, and watch temperature on thin sections.
Quick method picker to remove paint from aluminum
Choose the fastest safe approach based on area size, access, power/air availability, and how clean the finish must be before recoating or bonding.
| Method | Speed on large areas | Substrate risk | Waste produced | Power/air needs | Best for |
|---|---|---|---|---|---|
| Soda blasting | High | Low | Media dust, water‑soluble | Portable compressor | Broad, flat panels and handrails |
| Plastic media blasting | Medium | Low‑medium | Recoverable plastic media | Compressor | Thicker coatings, parts needing minimal profile |
| NMP‑free gel stripper | Medium | Low | Chemical gel and rinsate | None to low (airless sprayer optional) | Intricate shapes, verticals, stacked layers |
| Dry ice blasting | Medium | Very low | Virtually none | Higher CFM compressor | Sensitive finishes, strict containment |
| Low heat plus scrape | Low‑medium | Low‑medium | Adhesive ribbons, wipes | Power for heat gun/IR | Localized adhesives, stickers, tapes |
| Laser cleaning | Medium | Low with correct settings | Fume particulates | Electrical supply, fume extraction | Selective stripping with precise boundaries |
Here’s the deal: if you have air and open access, soda blasting is usually the fastest way to remove paint from aluminum without digging into the metal. If containment is the limiter, dry ice reduces cleanup. Complex geometry favors gels. Adhesives? Heat, then scrape.
Field workflow that protects aluminum and your schedule
- Survey and identify. Note coating type, thickness, adhesive presence, and any anodized or brushed finishes that must be preserved. Check power/air, access height, wind, and nearby sensitive equipment.
- Mask and contain. Lay ground sheeting and light berms, seal drains, and mask glass, seals, and adjacent metals. Set no‑smoking and exclusion zones.
- Patch test with conservative settings. Start at the low end of pressure, temperature, and dwell for the chosen method. Document what lifts, in how long, and any surface change.
- Run the method with controls. Keep nozzles moving, maintain standoff, keep gels wet with occlusion, measure heat with an IR thermometer, and ventilate or extract fumes.
- Verify cleanliness. Perform a water‑break‑free check on bare aluminum, and if you blasted with compressed air, verify air cleanliness before final blow‑downs.
- Clean up and neutralize. Rinse gels per the technical data, HEPA‑vac residuals, bag debris, and keep waste segregated until characterized.
- Protect and proceed. If recoating or bonding the same day, minimize time to primer or bond line. If not, protect with clean coverings to avoid flash oxidation and contamination.
- Record the parameters. Save PSI/CFM, media, dwell times, temperatures, and pass/fail notes for repeatability.
Method playbooks with parameters and pro moves
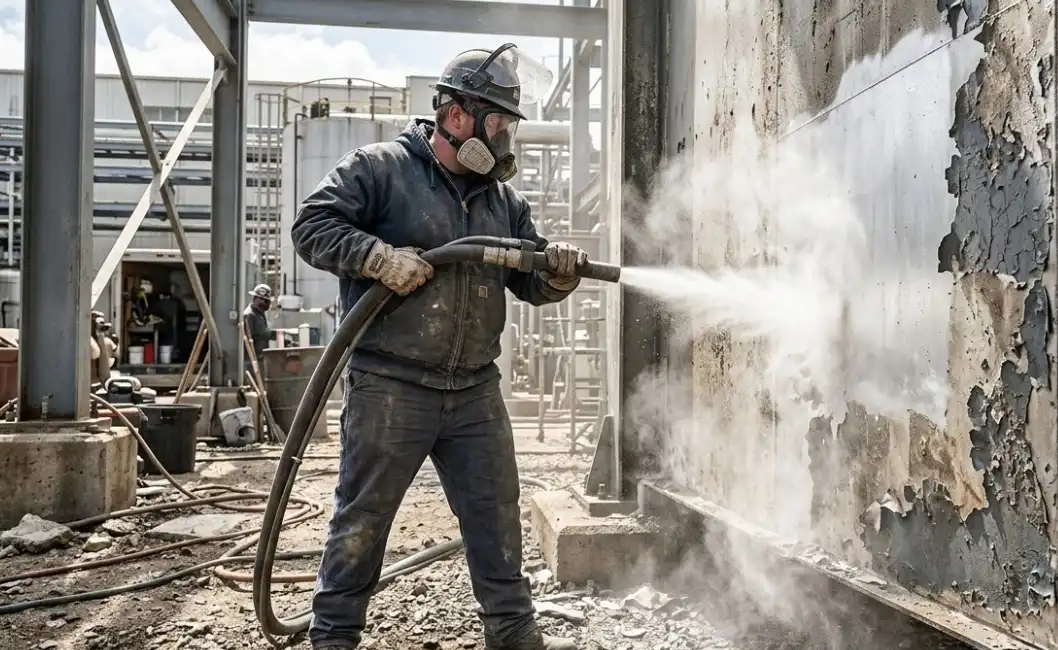
Soda blasting on aluminum
Soda media is softer than most coatings and won’t profile the metal. Industry resources describe sodium bicarbonate’s gentle hardness and suitability for delicate metals like aluminum—see the discussion of sodium bicarbonate as a softer blasting abrasive by ARMEX and their paint‑removal application overview for aluminum.
- Starting parameters: Begin around 30–40 psi and scale toward 60 psi only as needed. Use a moderate nozzle and keep a steady traverse speed. Maintain an initial standoff in the 6–12 inch range, confirmed by your patch test.
- Technique: Hold a shallow angle to reduce direct impact, overlap passes by one‑third, and avoid dwelling at edges to prevent undercutting paint boundaries.
- Cleanup: Soda is water‑soluble. Rinse and collect runoff on your sheeting. Confirm that rinsate handling meets local requirements.
Evidence: sodium bicarbonate’s low aggressiveness and aluminum suitability are outlined in ARMEX resources: the article on the softer blasting abrasive (2017) and the paint‑removal overview (2024): sodium bicarbonate—the softer blasting abrasive and paint removal applications.
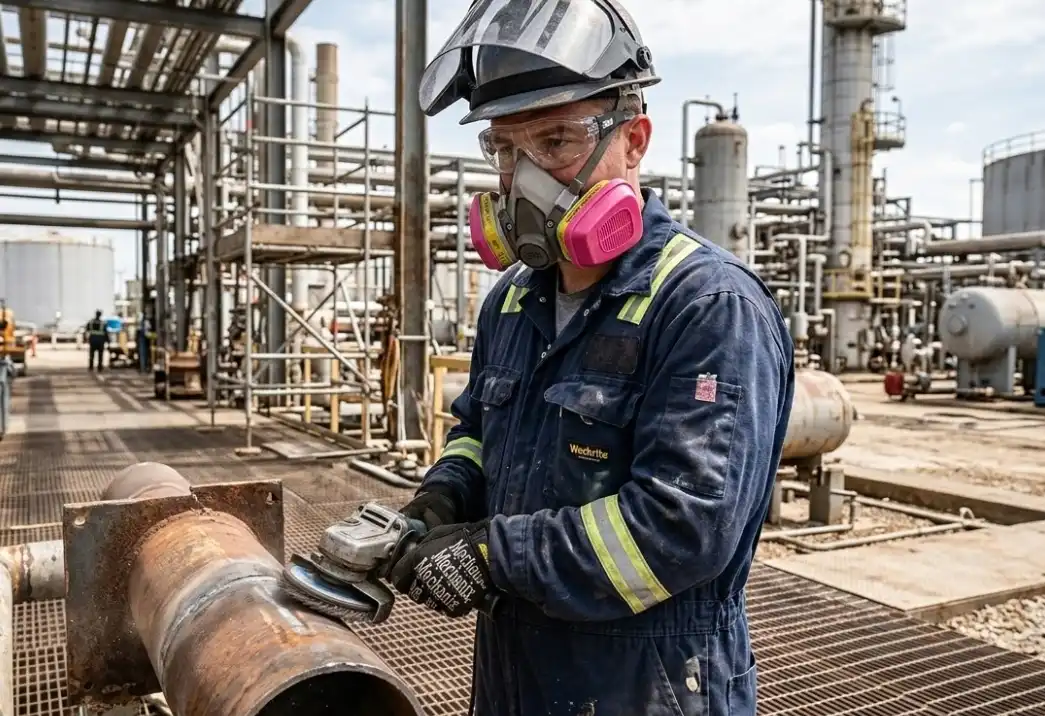
Plastic media blasting on aluminum
Use the smallest media and lowest pressure that gets the job done. Trade guidance on powder coat stripping on aluminum cites plastic media around 2040 mesh at roughly 40–60 psi with the nozzle held at an angle and a healthy standoff.
- Starting parameters: 40–50 psi with fine plastic media; increase slowly only if removal stalls. Keep nozzle 12–18 inches off the surface.
- Technique: Angle the stream to “lift” coating rather than hammer it. Keep the nozzle moving and avoid direct square hits on thin sheet.
- Cleanup: Recover media with vacuums and screens; avoid tracking plastic off the sheeting.
Evidence: finishing industry guidance notes 2040 mesh plastic media at 40–60 psi for controlled removal on aluminum: see the article on powder coat stripping on aluminum parts by Products Finishing (2014).
NMP‑free gel strippers compatible with aluminum
Neutral or near‑neutral gel strippers designed for aircraft or industrial coatings can remove multilayer paints from aluminum without caustic attack. One well‑documented example describes extended dwell under occlusion and thorough rinse steps, with neutral pH compatibility on aluminum.
- Starting parameters: Apply a uniform coat, then tent with plastic film to prevent drying. Expect dwell times from a couple of hours up to overnight depending on temperature and layer thickness. Reapply if lift is partial.
- Technique: Score thick films lightly to help penetration. Avoid steel tools. Gently scrape loosened films with plastic scrapers, then rinse and wipe down per the data sheet.
- Cleanup: Collect gels and rinsate. Neutralize per the manufacturer’s instructions and dispose according to local rules.
Evidence: a neutral pH gel stripper used in aerospace maintenance details dwell, occlusion, and rinse procedures, with aluminum compatibility in its technical data sheet: technical data sheet example (2022).
Dry ice blasting on aluminum
Dry ice blasting is non‑abrasive to aluminum and leaves virtually no secondary waste because pellets sublimate on impact. The trade‑offs are compressor capacity and noise.
- Starting parameters: Expect many pellet systems to want around 100 CFM near 80 psi, with higher CFM improving speed. Always validate with your system’s manual.
- Technique: Keep a consistent standoff and traverse. Target coatings that are embrittled or poorly adhered; very tough elastomeric layers may strip slowly.
- Cleanup: Minimal—sweep loose coating chips and manage them as paint waste. Ventilate enclosed decks for CO₂ buildup.
Evidence: manufacturer FAQs outline non‑abrasive action and typical CFM/PSI ranges for field units: see dry ice blasting FAQs.
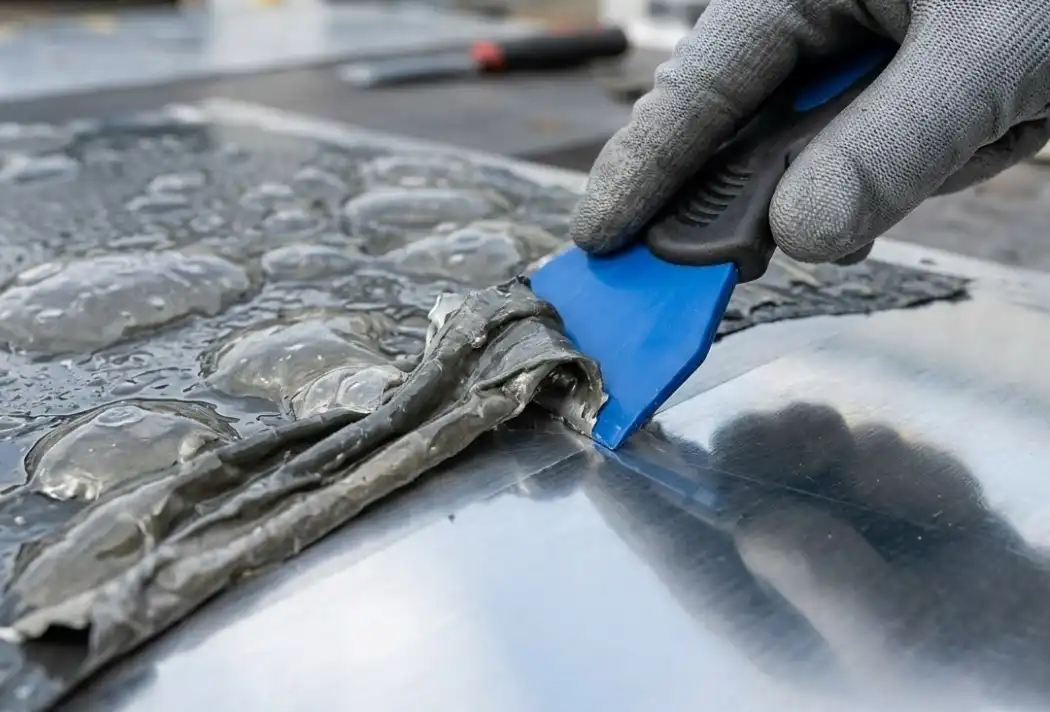
Adhesive removal with controlled low heat
Many acrylic pressure‑sensitive adhesives soften in the 150–200°F (65–93°C) surface range. Because OEMs rarely publish removal temperatures, treat this as practitioner guidance.
- Starting parameters: Set a heat gun or IR heater to achieve 150–200°F at the aluminum surface, verified with an IR thermometer. If needed, work up toward 250°F (120°C) cautiously on thicker sections.
- Technique: Keep the heat moving, lift a corner with a plastic scraper, and pull adhesive back on itself at a low angle. Finish with an adhesive remover compatible with aluminum.
- Watch‑outs: Thin sheet can warp with uneven heating. Always test on the same alloy and thickness first.
Laser cleaning in the field
Laser ablation can remove paint or oxides without contact and with tight boundary control. In the field, use trained operators, fume extraction, and eye/skin protection per applicable laser safety standards. Because parameters vary widely by coating and alloy, consult your system manual and conduct controlled patch tests before committing.
Proof you didn’t hurt the substrate and it’s ready
- Water‑break‑free check: Rinse the cleaned aluminum, then observe whether water sheets uniformly without beading. Coating inspectors reference the water‑break‑free concept for aluminum cleanliness; a KTA‑Tator overview discusses how this aligns with the ASTM F22 practice for hydrophobic films: see cleaning and painting aluminum substrates (2021).
- Air cleanliness check: If you used compressed air for blasting or blow‑downs, verify your air is free of oil and water using the white‑blotter method described in ASTM D4285 before final prep.
- Adhesion confirmation after recoat: When you’ve applied primer and topcoat, a simple crosshatch adhesion test per ASTM D3359 on a test patch confirms system bonding. This is post‑paint verification, not a bare‑metal test.
Safety and environmental essentials outdoors
- Respiratory protection: Select NIOSH‑approved respirators to match the hazard—Organic Vapor cartridges for solvent vapors and add P100 filters when particulates or aerosols are present. Tight‑fitting respirators require fit testing and user seal checks; facial hair must not break the seal. OSHA’s technical guidance explains selection, cartridge change schedules, and program basics: see the OSHA Respiratory Protection chapter (accessed 2026): https://www.osha.gov/otm/section-8-ppe/chapter-2
- Ignition control and ventilation: Prefer non‑flammable chemistries when hot‑work permits are constrained. Establish no‑smoking zones and ground equipment during blasting to minimize static.
- Containment and disposal: Ground sheeting, vertical barriers near edges, frequent debris collection, and HEPA vacuuming are common outdoor practices. EPA’s renovation work‑practice guidance outlines containment patterns and waste handling that many contractors adapt in the field: see renovation, repair, and painting program work practices (2025).
Troubleshooting fast
- Paint won’t lift with gel: Increase dwell and keep it wet with tighter tenting; lightly score thick films; reapply.
- Soda blast etches look visible: Pressure is too high or nozzle is too close; reduce PSI, increase standoff, and shallow the angle.
- Dry ice is slow: You’re air‑starved; confirm CFM and hose condition; try a different nozzle or higher pellet feed.
- Adhesive smears instead of peeling: Add mild heat and switch to a fresh scraper edge; finish with a compatible residue remover.
- Flash corrosion or fingerprints appear: Rinse and dry promptly, handle with clean gloves, and move to primer or bonding sooner.
Selected sources
- ARMEX on sodium bicarbonate’s gentle properties and paint‑removal applications (2017–2024): https://www.armex.com/resources/sodium-bicarbonate-the-softer-blasting-abrasive/ and https://www.armex.com/industry/paint-removal/
- Products Finishing article on plastic media blasting parameters for aluminum (2014): https://www.pfonline.com/articles/powder-coat-stripping-on-aluminum-parts
- Neutral pH gel stripper technical data sheet with aluminum compatibility and dwell/rinse guidance (2022): https://www.socomore.com/media/akeneo_connector/asset_files/s/p/spc_909n_na_TDS_english.pdf
- Dry ice blasting FAQ with typical compressor requirements (accessed 2026): https://www.coldjet.com/faq/
- KTA‑Tator overview of water‑break‑free checks for aluminum (2021): https://kta.com/cleaning-and-painting-aluminum-substrates/
- OSHA Respiratory Protection chapter (accessed 2026): https://www.osha.gov/otm/section-8-ppe/chapter-2
- EPA RRP outdoor work‑practice guidance (2025): https://www.epa.gov/lead/renovation-repair-and-painting-program-work-practices


