A stainless steel sink stays brilliant with nothing more than baking soda, white vinegar, and a soft cloth — no harsh chemicals needed. The secret most people miss? Always scrub along the grain of the metal, never against it, and finish with a thin coat of olive oil to repel water spots for days. This guide walks through every step of that process, from tackling stubborn hard water stains and light rust spots to buffing your sink back to a factory-fresh shine using only eco-friendly ingredients you already have in your kitchen.
Quick Answer — The Easiest Way to Clean a Stainless Steel Sink Naturally
If you only have five minutes, here is the complete method distilled into six moves:
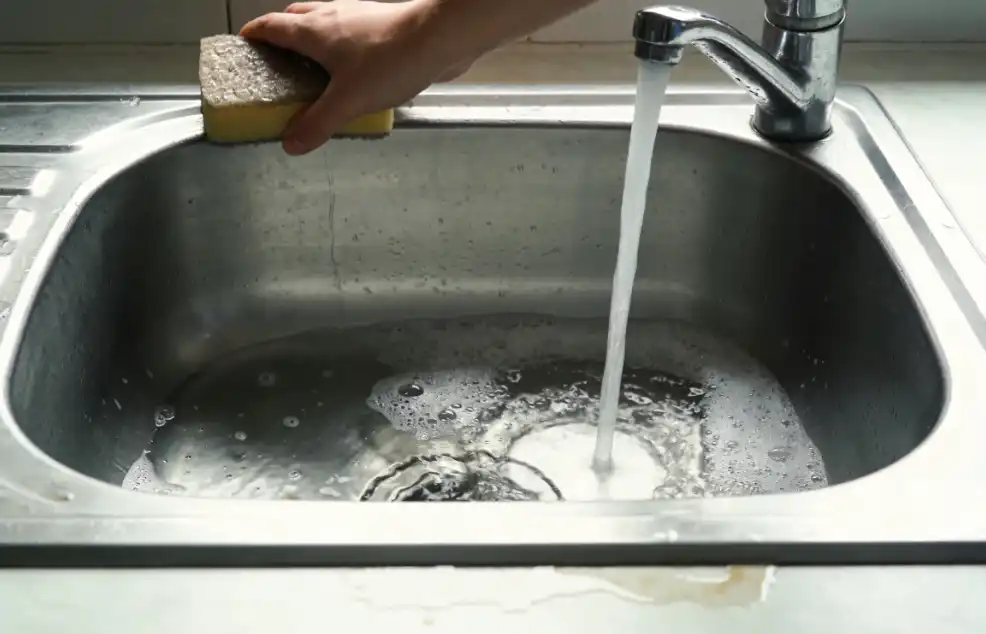
- Rinse the sink with warm water to flush away food particles and loose debris.
- Sprinkle baking soda generously across the damp basin.
- Scrub gently along the grain of the stainless steel using a soft sponge or microfiber cloth.
- Spray white vinegar over the baking soda. Let the fizzing reaction work for 2–3 minutes to dissolve grease and mineral deposits.
- Rinse thoroughly with warm water and dry completely with a clean towel.
- Polish with a few drops of olive oil on a dry cloth, buffing along the grain for a streak-free, water-repellent shine.
That is genuinely all it takes. No specialty products, no toxic fumes, no damage to the protective chromium oxide layer that makes stainless steel “stainless” in the first place. The rest of this guide digs into why each step matters, how to handle tougher problems like rust spots and scratches, and the critical mistakes that silently destroy your sink over time.
Stainless steel sink being rinsed with warm water showing visible grain lines on surface
Gather Your Natural Cleaning Supplies Before You Start
Before you touch the sink, lay everything out on the counter. Hunting for supplies mid-clean means wet hands dripping across the kitchen — and baking soda drying into a crust on the basin while you rummage through cabinets.
Here is the complete checklist:
| Item | Purpose | Why It Matters |
|---|---|---|
| Microfiber cloths (2–3) | Scrubbing, drying, and polishing | Soft enough to avoid micro-scratches; lint-free for a streak-free finish |
| Non-abrasive sponge | Applying baking soda paste | The soft side lifts grime without scoring the surface |
| Baking soda (sodium bicarbonate) | Mild abrasive cleaner and deodorizer | Hardness of ~2.5 on the Mohs scale — softer than stainless steel, so it cleans without scratching |
| White distilled vinegar | Dissolving mineral deposits and grease | The acetic acid (typically 5%) breaks down calcium and lime buildup safely |
| Spray bottle | Applying vinegar evenly | Prevents over-saturation and waste; gives you control over coverage |
| Warm water | Rinsing | Warm water dissolves grease faster than cold |
| Olive oil or food-grade mineral oil | Final polish and protective barrier | Fills micro-abrasions and creates a hydrophobic layer that repels water spots |
| Old toothbrush | Cleaning crevices around the drain and faucet base | Reaches tight spots a sponge cannot |
Notice what is not on this list: bleach, abrasive powdered cleansers, steel wool pads, or anything with “industrial strength” on the label. You do not need them. Baking soda and vinegar handle 95% of residential sink cleaning challenges, and the remaining 5% (deep rust, severe scratches) requires specific techniques covered later in this guide — still no harsh chemicals.
One quick tip on the baking soda itself. Buy it in bulk. A standard 16-ounce box costs about a dollar and will last you roughly 8–10 deep cleans. Compare that to a $7 bottle of branded stainless steel cleaner that does essentially the same job with added fragrance and a marketing budget. The economics are not close.
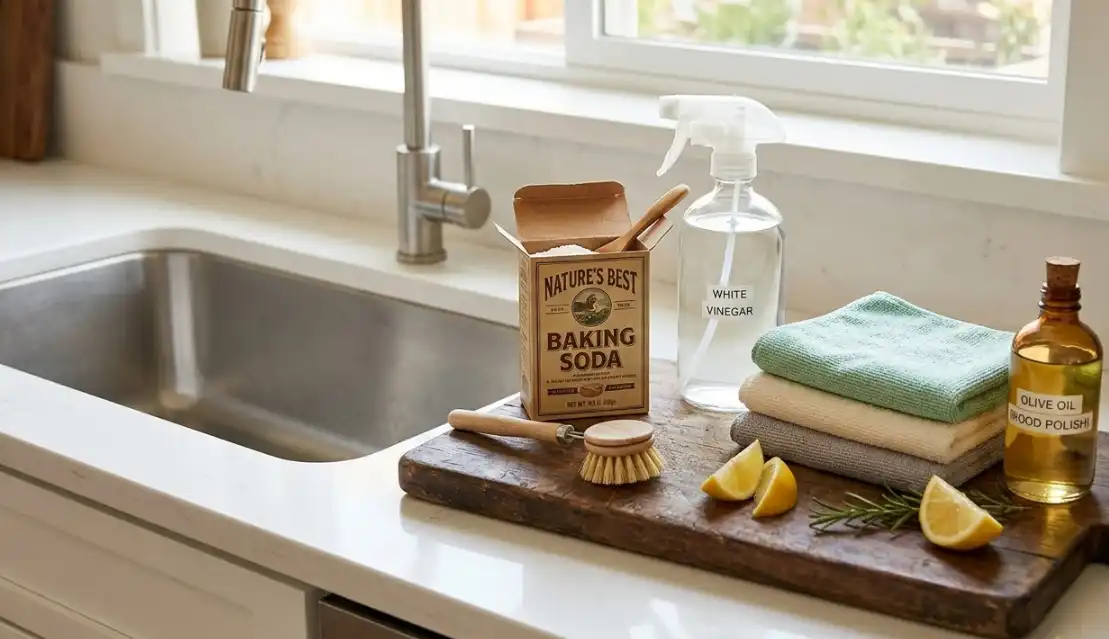
Natural stainless steel sink cleaning supplies baking soda vinegar spray bottle microfiber cloths and olive oil on cutting board
Step-by-Step Natural Cleaning Method Using Baking Soda and Vinegar
This is the core routine. Once you have done it twice, the whole process takes under ten minutes.
Clear the Sink and Rinse Away Debris
Remove dishes, sponges, and any drain catchers. Turn on warm water and use your hand or a soft cloth to sweep away food particles, coffee grounds, and soap residue. You want a clean canvas. Scrubbing baking soda over stuck-on food just pushes debris around and can actually cause scratches — the food particles act like sandpaper between your cloth and the steel.
Dampen the Basin and Apply Baking Soda
Leave the sink slightly wet. Sprinkle baking soda liberally across the entire surface — the bottom, the walls, up around the rim. Do not be stingy. You want a visible white layer coating the steel. For a standard 33-inch double-bowl sink, roughly 3–4 tablespoons does the job.
Let it sit for about 60 seconds. This gives the baking soda time to start loosening grease and absorbing odors before you add any mechanical action.
Scrub Gently — Along the Grain, Always
Grab your soft sponge or microfiber cloth. Find the direction of the grain (those faint parallel lines brushed into the steel surface) and scrub in the same direction. Long, steady strokes. Not circular motions. Not random zigzags.
Work from the top of the basin walls downward toward the drain. This naturally pushes loosened grime toward the lowest point where it will rinse away easily. Spend a little extra time around the drain opening and the upper rim where soap scum tends to accumulate.
For the area around the faucet base and the drain flange, switch to the old toothbrush. Dip it in baking soda, and use short strokes to clean those tight crevices.
Spray Vinegar and Let the Chemistry Work
Fill your spray bottle with undiluted white vinegar and mist it evenly across the baking soda-coated surface. You will hear — and see — the satisfying fizz. That reaction is carbon dioxide gas being released as the acetic acid in vinegar reacts with sodium bicarbonate. More importantly, the effervescent action lifts embedded grime and dissolves mineral deposits that the baking soda alone could not budge.
Let it fizz for 2–3 minutes. No longer. Vinegar is safe on stainless steel in short bursts, but leaving acidic solutions sitting for extended periods (30+ minutes) can potentially dull the finish. Two to three minutes is the sweet spot.
Rinse Thoroughly and Dry Immediately
Turn on warm water and rinse every trace of baking soda and vinegar out of the sink. Run your fingers across the surface — it should feel smooth, almost slippery. If you feel any gritty residue, rinse again.
Now the step that separates a clean sink from a gleaming sink: dry it completely. Use a fresh, dry microfiber cloth and wipe the entire basin. Air-drying is the enemy here. Every water droplet that evaporates on its own leaves behind a tiny mineral deposit. Multiply that by hundreds of droplets, day after day, and you get the cloudy film people mistake for permanent damage. It is just hard water buildup — and it is entirely preventable by spending 30 seconds with a towel.
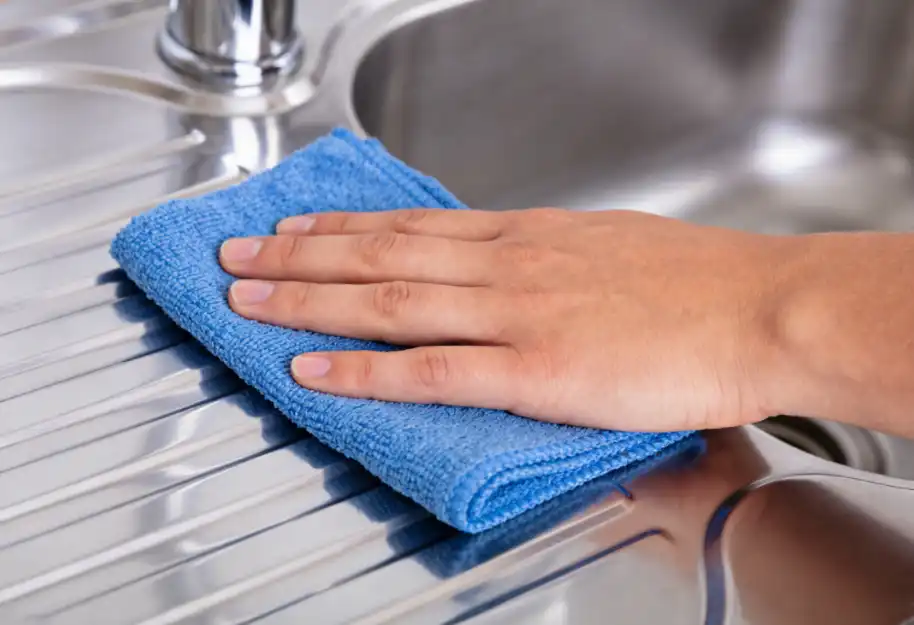
Hand wiping stainless steel sink with microfiber cloth along the grain direction
Why You Must Always Scrub Along the Grain
This is the single most important technique in stainless steel care, and most people either do not know about it or dismiss it as overkill. It is neither.
Stainless steel sinks have a brush finish — a pattern of extremely fine parallel lines created during manufacturing when the surface is polished with an abrasive belt moving in one direction. These lines are the “grain.” On most kitchen sinks, the grain runs lengthwise (from the faucet end toward the front), but check yours by looking at the surface under a light at an angle. The lines are subtle but visible.
When you scrub against the grain — perpendicular to those lines or in circular motions — you create cross-hatched micro-scratches that catch light differently from the original finish. The result looks like a dull, scuffed patch. Worse, those cross-grain scratches can compromise the passive chromium oxide layer, the invisible film that gives stainless steel its corrosion resistance. According to the British Stainless Steel Association, maintaining the integrity of this passive layer is essential for long-term corrosion resistance, and improper cleaning techniques are one of the most common ways homeowners inadvertently damage it.
When you scrub with the grain, your strokes follow the existing lines. Any micro-abrasion blends seamlessly into the finish pattern and remains invisible. Same cleaning power. Zero visible damage.
Quick grain test: Run your fingertip lightly across the sink surface in different directions. The direction that feels smoothest — where your finger glides with the least resistance — is along the grain. The direction that feels slightly rougher is against it.
This applies to every step: scrubbing, rinsing with a cloth, drying, and polishing. Always along the grain. Make it a reflex.

Close-up of stainless steel grain lines showing correct scrubbing direction along the brush finish
How to Remove Hard Water Stains and Rust Spots Naturally
The baking soda and vinegar routine handles everyday grime beautifully. But if your area has hard water (and roughly 85% of American households do, according to the U.S. Geological Survey), you will eventually face chalky white mineral deposits that resist a standard clean. And if a cast iron pan or a steel can sat in your wet sink overnight, you might find orange-brown rust spots that look alarming.
Neither problem is permanent. Here is how to deal with each one.
Tackling Hard Water Stains
Hard water stains are calcium and magnesium deposits left behind when water evaporates. They bond to the steel surface and will not come off with a quick wipe.
The baking soda paste method:
- Mix 3 tablespoons of baking soda with just enough water to form a thick paste — the consistency of peanut butter.
- Apply the paste directly to the stained areas.
- Let it sit for 15–20 minutes. This dwell time is critical. The mild alkalinity of baking soda slowly breaks the mineral bond.
- Scrub gently along the grain with a soft cloth.
- Rinse with warm water.
For especially stubborn calcium rings (common around the drain and faucet base), soak a cloth in white vinegar and lay it over the stain like a compress. Leave it for 10 minutes. The acetic acid dissolves calcium carbonate effectively — it is the same chemical principle behind commercial limescale removers, minus the synthetic additives and the $9 price tag.
Dealing With Light Rust Spots
Here is something that surprises people: stainless steel itself does not rust easily, but it can develop rust spots from other metal objects left on its surface. A steel wool fragment, a cast iron skillet, even a bobby pin — leave any of these in a wet sink, and iron particles transfer to the surface and oxidize. The rust you see is usually from the foreign metal, not the sink itself.
For light surface rust:
- Make a paste using baking soda and a few drops of lemon juice (the citric acid adds extra rust-dissolving power).
- Apply to the rust spot and let it sit for 15–20 minutes.
- Scrub along the grain with a soft cloth or the non-abrasive side of a sponge.
- Rinse and dry.
Another option that works surprisingly well: cream of tartar (potassium bitartrate). Mix it with a few drops of water to form a paste, apply to the rust spot, wait 10 minutes, and scrub. It is mildly acidic and acts as a gentle chelating agent that binds to iron oxide and lifts it away.
If the rust does not budge after two attempts, the corrosion may have penetrated deeper into the surface. At that point, a non-abrasive commercial rust remover formulated specifically for stainless steel is your next step — but for the vast majority of kitchen sink rust spots, baking soda and lemon juice do the job.
Safe Scratch Removal Techniques for Stainless Steel Sinks
Let me set realistic expectations upfront. There are two categories of scratches on stainless steel, and only one of them responds to home treatment.
Surface scuffs are the light, superficial marks you get from everyday use — pots sliding across the basin, utensils dropped in, abrasive sponges used carelessly. These affect only the very top layer of the finish and can usually be minimized or eliminated at home.
Deep scratches — the ones you can feel with your fingernail — have cut through the brush finish and into the base metal. No amount of baking soda will erase these. They can be reduced by a professional metal refinishing service, but home methods will not make them disappear. Accepting this saves you from wasting hours chasing a result that is not physically possible without industrial equipment.
The Baking Soda Slurry Method for Surface Scuffs
Mix baking soda with water to create a slightly thinner paste than you would use for stain removal — more like a slurry, loose enough to spread easily but not watery.
- Apply the slurry to the scratched area with a soft microfiber cloth.
- Using light, consistent pressure, rub along the grain in long strokes. Not back and forth randomly — one direction, along those brush lines.
- Continue for 30–60 seconds per area.
- Rinse and inspect. Repeat if needed.
What you are doing is gently re-blending the surface finish. The baking soda particles are just abrasive enough to smooth out the scuff marks and align them with the existing grain pattern, making them visually disappear.
Commercial Scratch-Repair Compounds
If the baking soda method does not fully resolve the scuffs, non-abrasive stainless steel scratch-repair compounds (like Bar Keepers Friend Soft Cleanser or Weiman Stainless Steel Scratch Remover) can be effective. These products contain oxalic acid or very fine polishing agents designed specifically for stainless steel.
Apply them the same way — along the grain, with a soft cloth, light pressure. Follow the product instructions for dwell time. And always test on an inconspicuous area first, because some formulations are more aggressive than others.
The honest truth? For a kitchen sink that gets daily use, minor scratches are inevitable. They develop a patina over time that many people actually prefer to a factory-fresh look. If you keep the surface clean and polished, those fine scratches blend into the overall finish and become part of the sink’s character rather than a flaw.
Buffing With Olive Oil Polish for a Like-New Shine
This is the step that transforms a clean sink into a showroom sink. And almost nobody does it.
After your sink is clean, rinsed, and completely dry, put 4–5 drops of olive oil (or food-grade mineral oil) onto a dry microfiber cloth. Not on the sink — on the cloth. You want a thin, controlled application, not a puddle of oil sitting in the basin.
Buff the entire surface using long, even strokes along the grain. Work from one end to the other systematically. You will see the steel transform — dull spots disappear, the color deepens, and the surface takes on a soft, warm luster that looks almost wet.
Why Does This Work?
The oil accomplishes two things simultaneously. First, it fills the micro-abrasions and tiny scratches that scatter light and make the surface look dull. With those imperfections filled, light reflects more uniformly, and the sink looks smoother and brighter. Second, the oil creates a thin hydrophobic barrier — a layer that repels water. Water droplets bead up and roll off instead of sitting on the surface and leaving mineral deposits behind. Fingerprints and smudges also become much less visible.
Olive Oil vs. Mineral Oil — Which Is Better?
Both work. The differences are minor but worth knowing.
Olive oil is readily available in every kitchen, applies beautifully, and gives an excellent shine. The downside: it is an organic oil that can eventually go slightly rancid if applied too heavily, leaving a faint sticky residue after a week or two. The solution is simple — use very little. A few drops on a cloth is all you need.
Food-grade mineral oil does not go rancid, lasts longer on the surface (often 2–3 weeks before needing reapplication), and leaves zero residue. It is the same oil used to condition butcher block countertops. If you already have a bottle in the kitchen, it is technically the superior choice for longevity.
In practice? Grab whichever one is in your cabinet right now. The difference in performance is marginal, and both are infinitely better than skipping this step entirely.
Products You Should Never Use on Stainless Steel
This section might save your sink. The damage from these products is often irreversible, and the frustrating part is that some of them are marketed as cleaning solutions.
Steel Wool Pads — The Worst Offender
Steel wool is harder than the stainless steel surface of your sink. Scrubbing with it gouges deep scratches into the finish that no amount of baking soda will fix. But the real damage is invisible: steel wool shreds leave behind tiny iron particles embedded in the surface. Those particles rust. Fast. Within days, you will see brown rust spots appearing in places that were previously spotless — and the rust is coming from the steel wool fragments, not your sink.
Even worse, the aggressive abrasion strips away the passive chromium oxide layer. This is the self-healing protective film (only about 1–5 nanometers thick) that forms naturally when chromium in the steel reacts with oxygen. It is what makes stainless steel stainless. Destroy it faster than it can regenerate, and you have turned your corrosion-resistant sink into ordinary steel that will discolor and pit.
Chlorine Bleach — Silent Destruction
Bleach (sodium hypochlorite) attacks stainless steel through a process called pitting corrosion. The chloride ions in bleach penetrate the passive layer and create tiny pits in the metal surface. These pits are permanent. They also trap moisture and contaminants, accelerating further corrosion in a vicious cycle.
You might not notice the damage immediately. It starts as subtle discoloration — a slight darkening or rainbow-like staining. Over weeks and months, the pitting becomes visible and the surface roughens. According to the Nickel Institute, chloride-containing cleaners are among the most common causes of premature stainless steel degradation in residential settings.
If you accidentally splash bleach in your sink, rinse it immediately and thoroughly with plenty of water. Brief contact (seconds) is unlikely to cause visible damage. Prolonged contact (minutes or longer) will.
Abrasive Powdered Cleansers
Many traditional powdered cleansers contain silica or feldspar — minerals harder than stainless steel. They scour the surface clean, sure, but they also sand away the finish. The sink looks okay when wet, but once it dries, you see a network of fine scratches and a dull, cloudy appearance that was not there before.
If you want a powdered cleanser, choose one specifically labeled as safe for stainless steel, and verify that it uses oxalic acid rather than harsh abrasive particles as its primary cleaning agent.
Daily Maintenance Tips to Prevent Future Buildup and Stains
Deep cleaning a neglected sink is satisfying. But you know what is better? Never needing to deep clean in the first place.
These habits take less than two minutes per day combined, and they keep your sink looking polished between those occasional thorough cleans.
Rinse and Dry After Every Use
This is the single highest-impact habit. After you finish using the sink — washing dishes, rinsing vegetables, whatever — give the basin a quick rinse with warm water and wipe it dry with a towel or microfiber cloth. Thirty seconds. That is all it takes to prevent 90% of hard water stains and mineral buildup.
The drying part is non-negotiable if you have hard water. Every droplet that air-dries deposits minerals. Hundreds of droplets per day, 365 days per year — that is how a bright sink turns into a cloudy, stained one.
Remove Rubber Mats and Wet Sponges Promptly
Here is a mistake almost everyone makes: leaving a rubber sink mat sitting on the bottom of the basin permanently. Rubber traps moisture against the steel surface. That trapped moisture cannot evaporate, creating a warm, damp environment where discoloration and even mildew develop. After a few months, you lift the mat and find a perfect rectangular outline of discolored, stained steel underneath.
Same principle applies to wet sponges, steel wool pads (which you should not have anyway), and dish rags left sitting in the basin. Remove them after use. Let the sink surface breathe.
Weekly Baking Soda Sprinkle
Once a week, do a quick maintenance clean: dampen the sink, sprinkle a tablespoon of baking soda, give it a 60-second scrub along the grain, rinse, and dry. This prevents any buildup from getting a foothold and keeps the surface consistently clean. Think of it as brushing your teeth — small, regular effort prevents big, painful problems.
Monthly Olive Oil Buff
Once a month (or whenever the sink starts looking a bit flat and dull), do the olive oil polish described earlier. Five drops on a cloth, buff along the grain, done. The hydrophobic barrier it creates genuinely extends the time between cleanings by repelling water and reducing mineral adhesion.
Watch What Goes Down the Drain
Acidic foods (tomato sauce, citrus juice, pickle brine) left sitting in the sink can etch the surface if given enough time. Do not let them pool. Rinse them away promptly. Same goes for salt — it contains chloride, and concentrated saltwater sitting on stainless steel accelerates corrosion just like bleach does, only slower.
Frequently Asked Questions About Cleaning Stainless Steel Sinks
Can vinegar damage stainless steel if left too long?
Yes, but it takes prolonged exposure. White vinegar at standard 5% acidity is safe for contact periods under 10 minutes. Leaving undiluted vinegar sitting on stainless steel for 30 minutes or more can dull the finish and, in extreme cases, cause minor etching. The simple rule: apply, let it work for a few minutes, then rinse. Do not walk away and forget about it.
How often should I deep clean my stainless steel sink?
If you follow the daily rinse-and-dry habit, a thorough baking soda and vinegar deep clean every 1–2 weeks is plenty. If you skip daily maintenance, you will likely need to deep clean weekly to prevent hard water buildup from becoming a stubborn problem. The frequency depends entirely on your water hardness and how much use the sink gets.
Is it safe to use lemon on stainless steel?
Absolutely — lemon juice is a great natural cleaner for stainless steel. The citric acid dissolves mineral deposits and light rust effectively. Just treat it like vinegar: apply, scrub, and rinse within a few minutes. Do not leave lemon halves sitting face-down on the steel surface for hours. A bonus: lemon leaves the sink smelling fresh without any artificial fragrance.
What causes rainbow-colored stains, and how do I fix them?
Those iridescent rainbow marks are caused by heat discoloration or by mineral deposits from hard water refracting light. Pouring boiling water directly into the sink or placing a hot pan on the surface can trigger it. To remove rainbow stains, apply a small amount of baking soda paste, scrub along the grain, and rinse. For persistent rainbow marks, a dab of white vinegar on a cloth usually dissolves the mineral film causing the optical effect. The steel itself is not damaged — it is a surface phenomenon.
Can I use hydrogen peroxide instead of vinegar?
You can, but it is less effective for the specific tasks involved in sink cleaning. Hydrogen peroxide is an oxidizer — great for disinfecting and removing organic stains, but it does not dissolve mineral deposits (calcium, lime) the way acetic acid in vinegar does. If your goal is sanitization, a 3% hydrogen peroxide solution sprayed on the clean sink surface works fine. For actual cleaning and descaling, vinegar remains the better choice.
Will baking soda scratch my stainless steel sink?
No. Baking soda has a Mohs hardness of approximately 2.5, while stainless steel typically rates between 5.5 and 6.5 on the same scale. A material can only scratch something softer than itself, so baking soda is physically incapable of scratching stainless steel. That said, always use it with a soft cloth or sponge — not a rough scrub brush — and work along the grain to keep the finish looking uniform.
Keep Your Sink Gleaming — A Simple Routine You Can Start Today
Everything in this guide boils down to a handful of principles that are easy to remember and even easier to execute. Stainless steel is remarkably durable — it is used in surgical instruments, commercial kitchens, and marine environments for a reason. Your kitchen sink does not need aggressive chemicals or expensive specialty products. It needs consistency and the right technique.
Here is your printable-friendly quick-reference checklist for the complete cleaning routine:
| Frequency | Action | Time Required |
|---|---|---|
| After every use | Rinse with warm water and dry with a clean towel | 30 seconds |
| Weekly | Sprinkle baking soda, scrub along the grain, rinse, dry | 2 minutes |
| Every 1–2 weeks | Full baking soda + vinegar deep clean (the 6-step method) | 8–10 minutes |
| Monthly | Olive oil or mineral oil buff along the grain | 2 minutes |
| As needed | Baking soda paste for hard water stains; baking soda + lemon for rust spots | 15–20 minutes (including dwell time) |
The do’s:
- Always scrub, dry, and polish along the grain.
- Dry the sink after every use — this single habit prevents most problems.
- Use baking soda as your go-to abrasive. It is cheap, effective, and physically cannot scratch the steel.
- Remove rubber mats, wet sponges, and metal objects from the basin when not in use.
- Rinse acidic foods and salt away promptly.
The don’ts:
- Never use steel wool — it embeds iron particles that rust and destroys the passive layer.
- Never use chlorine bleach — it causes irreversible pitting corrosion.
- Never scrub against the grain — it creates visible cross-hatch scratches.
- Never leave vinegar or lemon juice sitting on the surface for more than 10 minutes.
- Never let standing water pool in the basin overnight.
Stainless steel rewards you for treating it well. A sink that gets two minutes of daily care will look better after five years than a neglected sink looks after five months. The materials cost almost nothing — baking soda, vinegar, olive oil, and a couple of microfiber cloths. The technique is straightforward. And the result is a sink that gleams every single time you walk into your kitchen.
Bookmark this page. The next time your sink looks dull or spotted, come back, grab the baking soda, and give it ten minutes. You will wonder why you ever bought those overpriced specialty cleaners.


