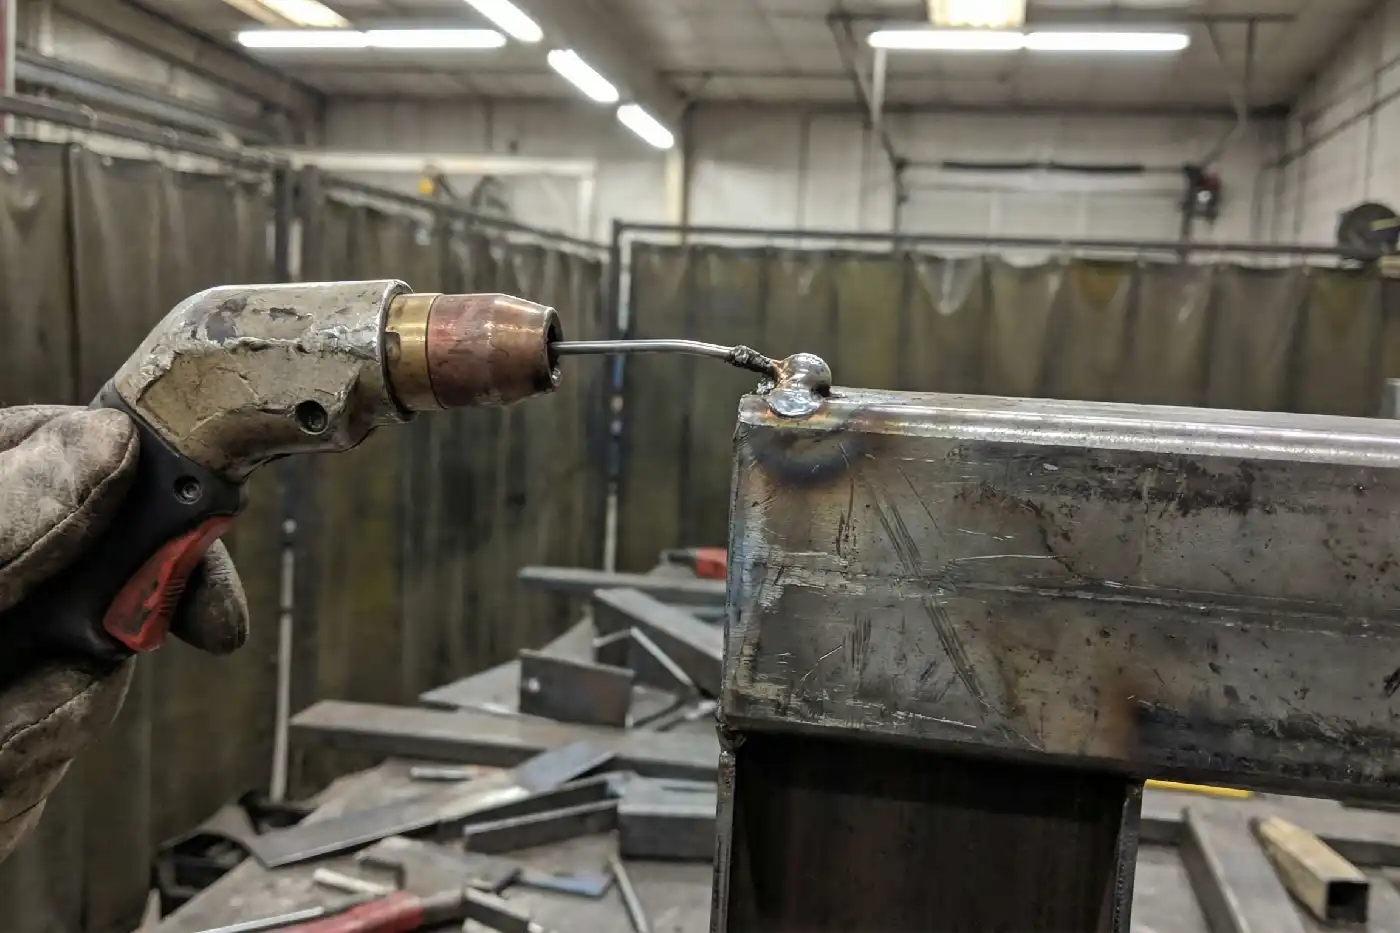
You want to stop your welding rod from sticking, right? The best way is to use the correct amperage and master your striking technique. Many beginners face this problem. You can fix it with a few simple steps. Don’t let sticking slow you down. Try these tips and watch your welding become smoother and easier.
Tip: If the rod sticks, check your setup before trying again.
Key Takeaways
- Choose the right amperage for your welding rod size. This helps stop sticking and makes your welds better.
- Clean your workpiece before you start welding. Dirt, oil, and water can make the rod stick.
- Learn how to strike the rod well. Strike it like a match and lift it fast so it does not fuse.
- Keep your welding rods in a dry spot. This keeps them free from moisture and ready to use.
- Practice welding often to get better. This helps you find the best ways that work for you.
Welding Rod Sticking Causes
Welding rods can stick for a few main reasons. Let’s break them down so you know what to watch for.
Incorrect Amperage
If you set your welder to the wrong amperage, the rod will stick almost every time. Too low, and the arc won’t stay hot enough. Too high, and you might burn through your workpiece. You want to match the amperage to your rod size. Here’s a quick guide:
| Electrode Size | Amperage Range | Notes |
|---|---|---|
| 1/16″ (1.6 mm) | 20–40 amps | For thin sheet metal and delicate welds. Use with care to avoid burn-through. |
| 3/32″ (2.4 mm) | 40–85 amps | Common for light fabrication and repairs up to 1/8″ thick material. |
| 1/8″ (3.2 mm) | 75–125 amps | Versatile size. Suitable for 1/8″ to 1/4″ thick steel. Good for general repairs. |
| 5/32″ (4.0 mm) | 110–160 amps | Best for heavy-duty or structural welding on thicker materials. |
Poor Striking Technique
How you start the arc matters a lot. If you don’t strike the rod like a match and move right away, it will stick. You want to touch down, get the arc going, and then lift just a bit. If you wait too long, the rod glows and fuses to the metal. It’s normal to struggle at first, but you’ll get better with practice.
Tip: If the rod sticks, give it a quick twist to break free and try again.
Dirty or Wet Workpiece
Dirt, rust, oil, or moisture on your workpiece can cause sticking. The arc needs a clean path. If you try to weld on a dirty or wet surface, the rod will grab and not let go. Always clean and dry your metal before you start.
Wrong Rod Type or Size
Using the wrong rod for your job can lead to problems. If the rod is too big or too small, you might get weak joints or too much spatter. Sometimes, the weld can even fail. Make sure you pick the right rod for your project and material thickness.
When you know these causes, you can stop your welding rod from sticking and get better results every time.
How to Prevent Welding Rod Sticking
Set Correct Amperage
You want your welding rod to flow smoothly. The right amperage makes all the difference. If you set it too low, the rod will stick and the arc will sputter. Too high, and you risk burning through your workpiece. Here’s how you can dial in the perfect setting:
- Match the amperage to your electrode size.
- Adjust for the thickness of your metal.
- Consider your welding position and the type of base metal.
When you set the correct amperage, you get better penetration and a cleaner bead. You also avoid frustration from constant sticking.
Tip: Always check your welder’s chart or manual for recommended settings before you start.
Strike Like a Match
Starting the arc can feel tricky, but you can master it with practice. Hold the welding rod at a slight angle. Drag it across the metal just like you would strike a match. As soon as you see the arc, lift the rod slightly. This keeps the tip from fusing to the workpiece.
If you move too slowly or press down, the rod will stick. Try to keep your hand steady and your movements smooth. Some welders find it helps to “pull cue” the rod, like you’re playing pool. Others prefer a quick tap and lift. Find what feels natural for you.
Keep Rods Dry
Moisture is the enemy of a good weld. If your welding rod absorbs water, you’ll see more sticking, porosity, and even cracks. You can prevent this by storing your rods the right way. Here’s a quick guide:
| Storage Method | Ideal Conditions | Notes |
|---|---|---|
| General Storage | Room temp (64-77°F), humidity below 60% | Lower humidity is better in warm climates |
| Heated Storage | 100-120°F for sensitive rods after opening | Don’t overheat—rods can get brittle |
| Low-Hydrogen Electrodes | Keep dry, re-bake at 250-300°F if exposed | Discard if coating flakes after drying |
| Rod Ovens | Heated cabinets for moisture removal | Great for high-volume welding |
| Storage Tubes | Airtight, portable, affordable | Best for short-term storage |
| Rod Quivers | Insulated, handheld, some heated models for mobility | Meets low hydrogen needs without a full oven |
Low hydrogen rods must stay dry. If they pick up moisture, you might see porosity or cracks in your weld. Sometimes, these problems only show up under x-ray inspection. Keep your rods sealed and dry for the best results.
Clean the Workpiece
A clean surface helps your welding rod start and run smoothly. Dirt, oil, rust, or moisture can cause sticking and weak welds. You should always prep your metal before you strike an arc. Here are some cleaning tools and agents you can use:
| Type of Cleaning Agent | Best For | Benefit |
|---|---|---|
| Solvent Degreasers | Steel plates, machine parts | Removes oil and grease that cause porosity |
| Acetone & Surface Cleaners | Aluminum, stainless steel, automotive parts | Prevents contamination, improves finish |
| Multi-Purpose Industrial Detergents | Tools, tables, PPE | Keeps your workspace clean and safe |
| Weld-Slag & Spatter Removers | Heavy steel, construction | Reduces cleanup time, protects workpieces |
| Rust Removers & Corrosion Inhibitors | Clamps, tables, outdoor steel | Extends equipment life, prevents rust |
Wipe down your workpiece and let it dry before you start welding. You’ll notice the arc starts easier and the rod sticks less.
Stabilize with Clamps or Magnets
You need your workpiece to stay put while you weld. If it moves, your welding rod can stick or slip. Use clamps or magnets to hold everything steady. Here’s a quick look at your options:
| Type | Pros | Cons |
|---|---|---|
| Magnetic Base Holder | Hands-free, easy to reposition, great for alignment | Not for high-current jobs, weakens with heat |
| Standard Locking Clamp | Secure grip, one-handed use, easy to find | Springs can wear out with heat |
| Twist-Lock Design | Fewer moving parts, good for tight spots | Slower to reload, needs two hands |
Pick the tool that fits your project. For small parts, a magnetic holder works well. For heavy pieces, use a locking clamp.
Maintain Steady Movement
Once you start welding, keep your hand moving. If you pause or slow down, the welding rod can stick. Try to drag the rod at a steady pace. If you need to stop, lift the rod gently before the arc dies out.
Some welders like to “drag faster” to keep the arc hot and the bead smooth. Others use a gentle weaving motion for cadenced progress. Find a rhythm that works for you. The key is to avoid sudden stops or jerky movements.
Note: If the rod starts to stick, lift it slightly and keep moving. Practice makes perfect!
You can prevent most sticking problems by following these steps. With the right setup and a little practice, you’ll see smoother welds and less frustration.
Welding Rod Troubleshooting
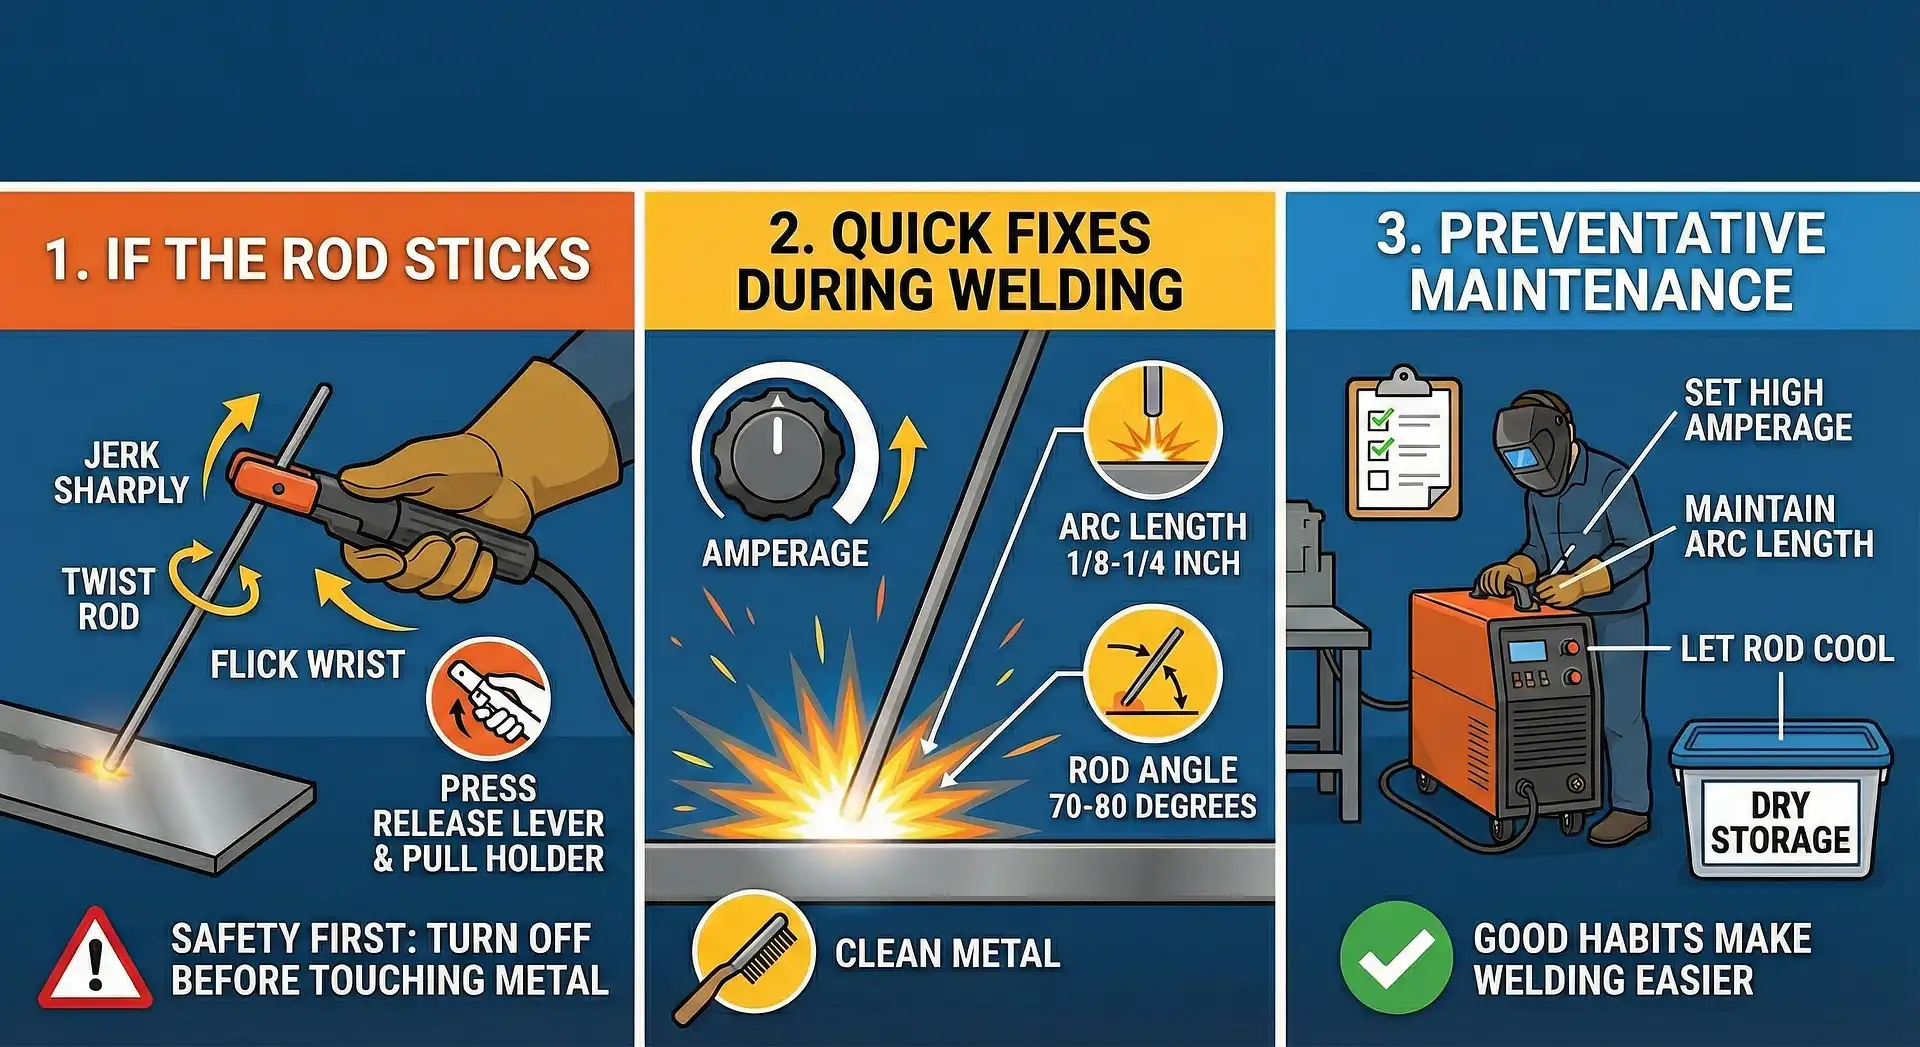
If the Rod Sticks
You might find your welding rod stuck to the workpiece. Don’t panic. This happens to everyone at some point. Here’s what you can do:
- Give the electrode holder a sharp jerk to break the rod free from the metal.
- If it doesn’t come loose, twist the rod back and forth to loosen it.
- Try a quick flick with your wrist to unstick the rod.
- If the rod still won’t budge, press the rod release lever and pull the holder hard.
- Always keep your hands away from the workpiece while the machine is running. Turn off the welder before touching the metal to avoid shock.
Tip: Never touch the stuck rod or the workpiece with bare hands while the welder is on. Safety comes first!
Quick Fixes During Welding
You can fix rod sticking right in the middle of your weld. Try these quick adjustments:
- Turn up your amperage a little to get a hotter, more stable arc.
- Keep your arc length steady—about 1/8 to 1/4 inch works best.
- Hold your rod at a 70-80 degree angle to the workpiece.
- Clean the metal with a wire brush or grinder before you start.
- Make sure you use the right rod for your job.
If you keep these things in mind, you’ll notice less sticking and smoother welds.
Preventative Maintenance
You can avoid most sticking problems with a few simple habits:
- Set your amperage high enough so the rod melts easily.
- Keep your arc length from getting too short.
- Let your welding rod cool down if it gets too hot.
- Store your rods in a dry place to prevent moisture problems.
Note: Good habits and regular checks make welding easier and safer.
With these troubleshooting steps, you can handle a stuck rod and keep your welding on track.
Pro Tips for Welding Success
Practice Techniques
You get better at welding when you practice often. Try different ways to strike the arc. Use both the “match strike” and the “quick tap” methods. Watch how your hand moves. Notice if the rod sticks more when you go slow or fast. You can set up scrap metal and run beads just for practice. This helps you find your rhythm and build muscle memory. If you make mistakes, don’t worry. Every welder learns by trying and adjusting. Keep a notebook to track what works best for you. Over time, you’ll see your welds improve and your confidence grow.
Tip: Challenge yourself to weld in different positions. Try vertical, horizontal, and overhead. Each one teaches you something new.
Equipment Checks
Your welding gear needs regular attention. If you skip maintenance, you might face rod sticking and poor welds. Here’s a simple checklist you can follow:
- Clean your equipment to remove dirt and debris.
- Inspect welding tips, nozzles, and electrodes. Replace them if they look worn.
- Check cables and connectors for loose spots.
- Lubricate moving parts and calibrate your machine as the manufacturer suggests.
- Store your tools in a dry place to protect them from moisture and corrosion.
- Read and follow the maintenance guide for your specific welder.
- Schedule professional servicing to catch problems early.
You keep your welds smooth and your rods from sticking when you care for your equipment.
Safety Reminders
You need to stay safe every time you weld. Always store your welding electrodes in a dry place. If you use low hydrogen rods, keep them sealed or in a heated cabinet between 250 to 300°F. Moisture can ruin your rods and cause cracks or holes in your welds. Watch out for moisture-resistant electrodes too. If they get too wet, your weld quality drops fast. Good storage keeps you safe and helps your welds last longer.
Note: Never weld in wet conditions. Wear gloves, a helmet, and protective clothing to shield yourself from sparks and heat.
You can stop your welding rod from sticking if you follow a few simple steps:
- Choose the right amperage for your rod.
- Clean your work surface before you start.
- Use the best arc striking technique.
Keep practicing and check your setup every time. You will see better welds and less frustration. Review your troubleshooting steps and pro tips often. This helps you stay sharp and safe in your welding projects.
FAQ
Why does my welding rod keep sticking even after cleaning the metal?
You might have your amperage set too low. Try increasing it a little. Make sure your rod is dry and you use the right size for your project.
How do I know if my rod is too wet to use?
If your rod feels damp or the coating looks soft, it’s too wet. Store rods in a dry place or use a rod oven to keep them ready.
Can I use any rod for any metal?
No, you need to match the rod to your metal type and thickness. Check the rod packaging or ask at your welding supply store for help.
What should I do if the rod sticks while welding?
- Stop welding.
- Turn off your machine.
- Use pliers to remove the stuck rod.
- Check your settings before you start again.
How can I practice my striking technique?
Grab some scrap metal and try both the match-strike and tap methods. Watch your hand and adjust your speed. Practice helps you find what works best.
Common Nozzle Types for Handheld Laser Welding
Shielding Gas: Nitrogen vs. Argon in Laser Welding


