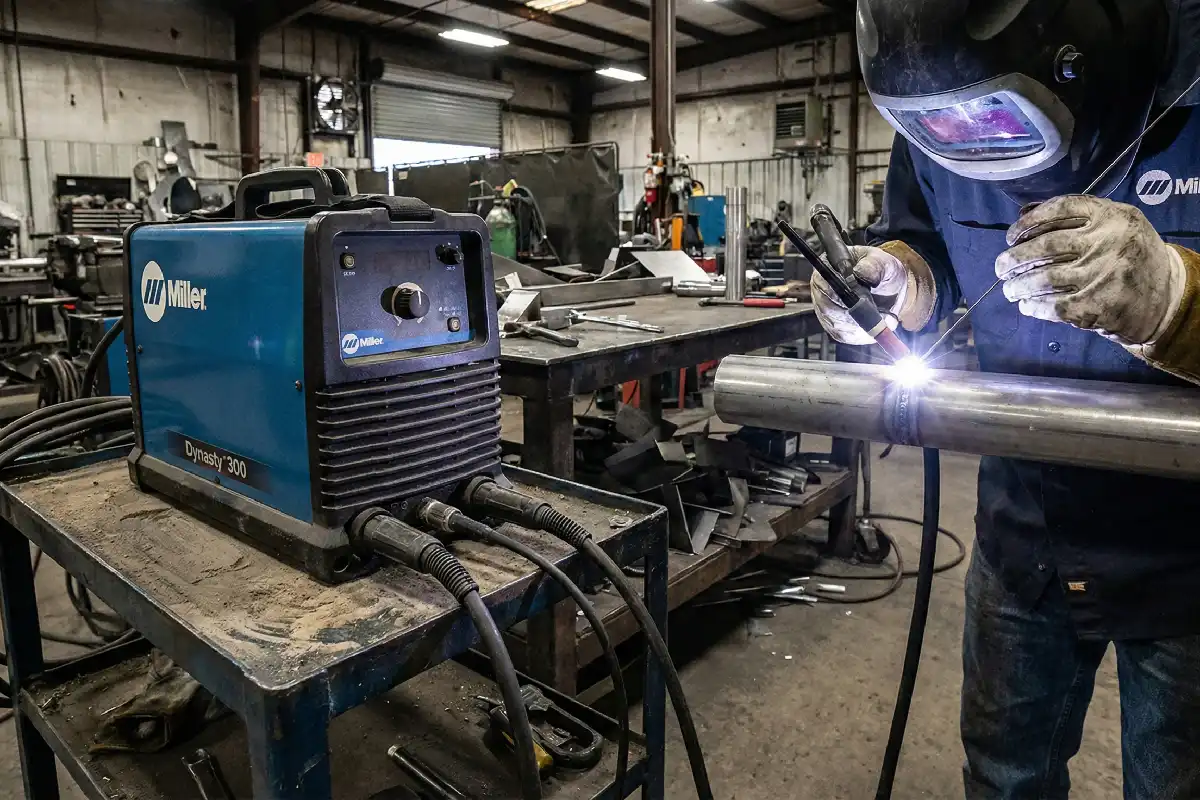
You might think you need a TIG welding machine to join aluminum, but you don’t! You can use a propane torch and special aluminum brazing rods instead. This method works well, even if you’re just starting out. It’s quick, easy, and doesn’t require fancy tools.
Tip: Always wear safety glasses and gloves when working with heat and metal. Clean surfaces make a stronger bond, so take your time with prep.
Key Takeaways
- You can weld aluminum with a propane torch and aluminum brazing rods. You do not need a TIG welder for this. This way saves money and is easy for beginners.
- Always clean your aluminum pieces very well before you start. Take off oil, dirt, and oxidation. This helps make the bond strong.
- Wear safety gear like goggles and gloves to stay safe. This protects you from burns and sparks when you use heat and metal.
- Heat the aluminum to about 1200°F before you use the brazing rod. This helps the rod melt and fill the joint well.
- Brazing works for many projects like repairs and crafts. You do not need expensive equipment for this technique.
Tools Needed
Before you start brazing aluminum, you need to gather the right tools and materials. Having everything ready makes the process smoother and safer.
Aluminum pieces
You can use different types of aluminum for your project. Here’s a quick look at some common options:
| Alloy Type | Description |
|---|---|
| Al-6061 | Great for building things that need strength, like frames or supports. |
| Al-1100 | Easy to shape and resists rust, perfect for simple repairs or crafts. |
| 3000 Series | Good when you want something easy to work with and strong enough for most jobs. |
Pick the aluminum that fits your project best. Make sure the pieces are clean and free from oil or dirt.
Brazing rods
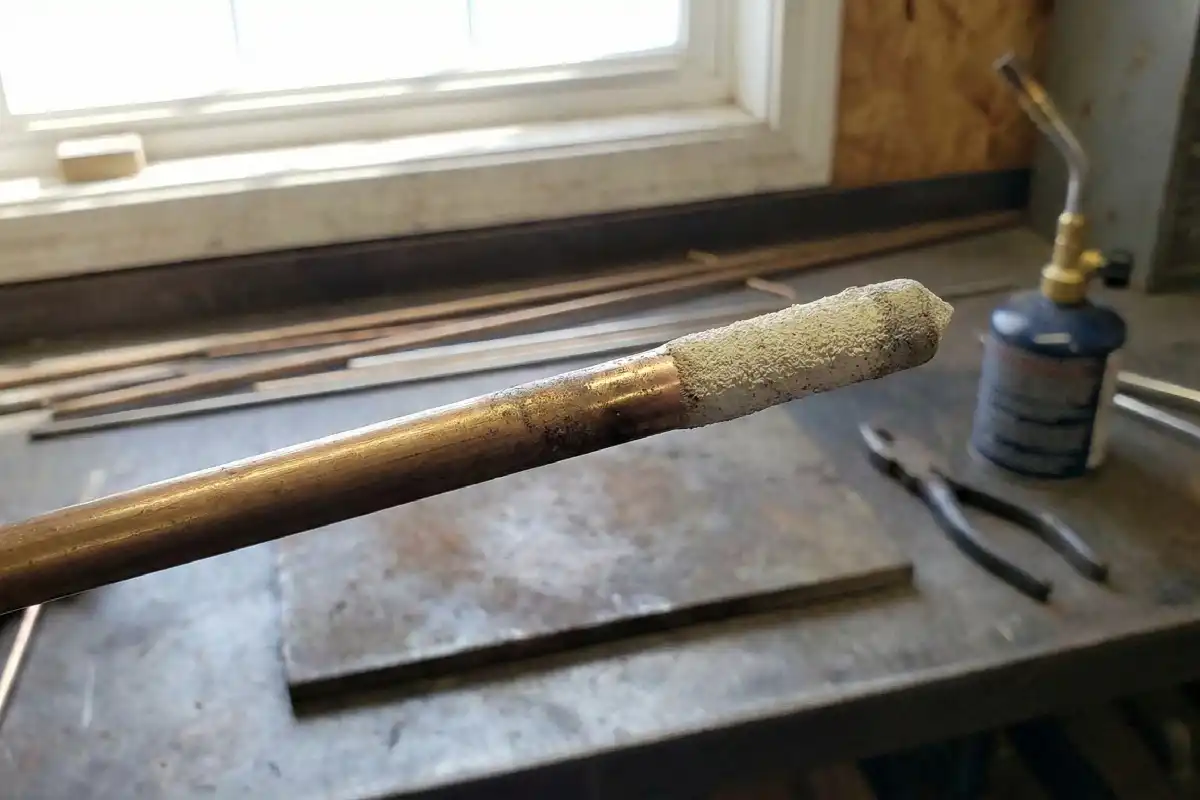
You need special rods to join aluminum. Look for aluminum-silicon alloy rods. These melt at lower temperatures than the aluminum itself, which helps you avoid damaging your workpiece. Alumaloy rods are a popular choice because they work well for beginners and pros alike. Always check that your rod matches the type of aluminum you’re using. This helps prevent corrosion and makes a stronger joint.
Key properties of good brazing rods:
- They bend easily, so you can shape them to fit your joint.
- They transfer heat quickly, which helps the bond form fast.
- They leave little residue, so your joint stays clean.
Propane torch
A propane torch gives you the heat you need for brazing. Most standard torches reach up to 2000°F, which is more than enough since you only need to heat the aluminum to about 1200°F. You don’t need fancy equipment—just a regular propane torch from the hardware store will do the trick.
Sandpaper and wire brush
Clean metal makes a strong bond. Use sandpaper and a wire brush to scrub away any oxidation or grime. This step is important because even a little dirt can weaken your joint. Take your time and make sure both pieces shine before you start.
Safety gear
Never skip safety! Here’s what you should wear:
| Safety Gear Item | Protection Provided |
|---|---|
| Safety goggles with side shields | Keeps sparks and debris out of your eyes |
| Heavy, flame-resistant gloves | Protects your hands from burns |
| Leather or flame-resistant clothing | Shields your body from hot metal and sparks |
Tip: Always wear safety glasses and leather gloves. They protect you from burns, sparks, and flying bits of metal. Good safety gear keeps you working confidently and safely.
Surface Prep
Getting your aluminum ready is the secret to a strong, lasting bond. If you skip this step, your joint might not hold up. Let’s break down what you need to do before you start brazing.
Cleaning aluminum
Start by making sure your aluminum is super clean. Oil, grease, and dirt can stop the brazing rod from sticking. Even if you plan to use flux, it won’t clean the metal for you. You need to do that first. Grab a degreasing solvent or a simple household cleaner. Wipe down the aluminum until it feels squeaky clean. If you see any sticky spots, scrub them off. You can also use warm, soapy water for light cleaning. Dry the pieces well before moving on.
Tip: Always clean off oil and grease first. Other cleaning steps won’t work if the metal is still greasy.
Removing oxidation
Aluminum forms a thin, tough oxide layer that you can’t see, but it can ruin your brazing job. This layer stops the melted rod from flowing and sticking. You need to get rid of it. Use sandpaper or a wire brush to scrub the surface until it looks shiny. Sanding not only removes oxidation but also helps the brazing rod grip better. For stubborn spots, you can use a chemical etch, but most home projects just need a good sanding.
- Sand the area where you’ll join the pieces.
- Brush away any dust or flakes.
- Make sure the metal shines.
Securing workpieces
Now, you want your aluminum pieces to stay put while you work. If they move, your joint could end up weak or crooked. Use clamps or a sturdy vise to hold everything steady. Make sure you have good ventilation, especially if you’re working indoors. This keeps you safe from fumes. Double-check that your work area is clear and your tools are close by. When everything is secure, you’re ready to start heating and brazing.
Note: Clean metal and a steady setup make your brazing job easier and safer. Take your time with prep, and you’ll get better results.
Brazing Steps
Heating aluminum
You want to heat the aluminum just right. If you get it too hot, the metal can melt and ruin your project. If you don’t heat it enough, the brazing rod won’t stick. Start by setting up your propane torch with a soft, wide flame. This type of flame helps prevent oxidation and gives you even heat.
Here’s what you should do:
- Hold the torch a few inches from the joint.
- Move the flame slowly across the area you want to join.
- Watch for the aluminum to start “sweating.” This means the surface looks shiny, but it isn’t melting.
Tip: Use blue safety goggles. They help you see the puddle better and make sure you’re not overheating the metal.
While you heat the aluminum, scratch the surface with the brazing rod. This breaks through the oxide layer that forms when aluminum gets hot. The rod will help the filler melt and stick to the base metal. Keep the flame moving so you don’t overheat one spot.
Applying brazing rod
Once the aluminum reaches the right temperature, you’re ready to apply the brazing rod. You don’t need to melt the aluminum itself. The heat from the base metal will melt the rod.
Follow these steps for a strong bond:
- Make sure the aluminum is heated evenly. Uneven heating can cause weak spots.
- Heat the base metal to about 1200°F. You don’t need a thermometer—just look for the flux to change from white and crusty to a clear, glass-like layer. That’s your sign the metal is ready.
- Touch the brazing rod to the joint. The rod should melt and flow into the gap by capillary action.
- Let the melted rod fill the joint. Move the rod along the seam so the filler spreads out.
- Check for any gaps or holes. If you see any, repeat the process and add more filler.
- After you finish, clean off any leftover flux. This keeps your joint strong and prevents corrosion.
Note: Always scrub both joint surfaces before you start. Use a wire brush, but avoid steel brushes. Steel can contaminate the aluminum and weaken your bond.
A neutral flame works best. If you need more control, reduce the flame size. This helps you avoid overheating and keeps the joint clean.
Checking bond
You want to make sure your joint is solid before you call it done. Look for these signs:
- The filler metal should be smooth and shiny.
- There shouldn’t be any cracks, gaps, or holes.
- The joint should feel firm when you tap it gently.
If you see any rough spots or weak areas, you can reheat and add more brazing rod. Let the joint cool down before you test its strength. A good bond will hold up to light pressure and won’t break apart.
Tip: If the joint looks cloudy or rough, you may need to clean off excess flux or reheat the area. A clear, glass-like finish means you did it right.
Now you’ve finished the main brazing steps. You’re ready to move on to cooling and cleaning your new aluminum joint.
Finishing and Troubleshooting
Cooling joint
Let your aluminum joint cool down slowly. Don’t rush this step. If you move the pieces before the filler metal sets, you might weaken the bond. You can leave the joint to air-cool, or if you want to speed things up, dip the assembly in hot water (about 120°F or warmer) after the filler has solidified. This helps remove water-soluble flux and cools the metal at the same time. Always make sure the joint feels solid before you handle it.
Cleaning excess
After brazing, you’ll see some leftover flux or filler around the joint. Cleaning this off keeps your project looking neat and helps prevent corrosion. Here are some easy ways to clean up:
- Soak the joint in hot water and gently agitate it to loosen excess flux.
- Use a wire brush while the joint is still warm to scrub away stubborn residue.
- For really tough spots, try a mild acid solution, but wear gloves and rinse well.
- If you have access to an ultrasonic cleaner, it can make the job even easier.
- Steam cleaning works too, blasting away residue with super-heated steam.
Take care not to scratch the aluminum. A clean joint not only looks better but also lasts longer.
Fixing common mistakes
Sometimes things don’t go as planned. Here’s a quick guide to common brazing problems and how you can fix them:
| Common Mistake | How to Fix |
|---|---|
| Weak braze bonds | Clean surfaces well. Remove all oil, grease, and rust. Use the right flux. |
| Gas entrapment | Use proper flux. Heat the joint evenly. Don’t overheat or underheat. |
| Disturbed joints | Reheat the joint. Let it cool without moving. Clamp pieces if needed. |
Tips for inspecting weld strength
You want your joint to hold up under stress. Here’s how you can check:
- Look for a smooth, shiny finish with no cracks or gaps.
- Tap the joint gently. It should feel firm and not wiggle.
- For a stronger test, try bending or shearing the joint. A good aluminum braze can handle about 45 pounds of bending force or 130 pounds of shear force.
- If you have access to ultrasonic testing, it can help spot hidden flaws.
If your joint feels weak, clean and re-braze the area. Sometimes, a second pass with the brazing rod does the trick. You don’t need a TIG welding machine to get a strong, reliable bond—just good prep and careful finishing.
Tip: Take your time with these steps. Careful finishing makes your aluminum project last longer and look more professional.
Welding Aluminum Without a TIG Welding Machine
Why skip TIG welding machine
You might ask why you would not use a TIG welding machine for aluminum. The reason is that brazing with a propane torch and aluminum rods is easier and less stressful. TIG welding machines cost a lot and are hard to use. They need special training and a steady hand. If you are new or have a small project, you may not want to spend money or time learning something hard.
Let’s see how brazing and TIG welding machines are different:
| Benefit | Aluminum Brazing Rods | TIG Welding Machine |
|---|---|---|
| Temperature | Lower temperatures (1150°F to 1600°F) | Higher temperatures (melting base metal) |
| Base Metal Properties | Preserves integrity of base metals | Base metals are melted, altering properties |
| Joining Dissimilar Metals | Easier, no melting required | Difficult, requires sophisticated techniques |
| Skill Acquisition | Faster for operators | Slower, requires precise techniques |
| Automation Potential | Easier to automate | More complex automation |
Brazing uses less heat. This means you will not melt your aluminum by mistake. Your metal stays strong. Brazing also makes it simple to join different metals. You do not need to learn hard welding skills. You can learn brazing fast and get good results.
TIG welding machines need a clean space and special gas. If you do not have a workshop or many tools, brazing is better. You can work in your garage or outside. You only need a propane torch and rods.
Benefits of brazing
Brazing aluminum is great for DIYers and hobbyists. You do not have to be an expert to make strong, neat joints. Brazing is simple to learn and does not cost much. You can fix things at home, repair car parts, or build new projects without worry.
Here’s how easy it is to start:
| Welding Type | Skill Level Required |
|---|---|
| MIG | Easy to learn |
| TIG | Requires a higher skill level |
Brazing is as easy to learn as MIG welding. You can start quickly, even if you have never welded before. TIG welding machine skills take more time to learn. You must control the heat, the rod, and the gas all at once.
You might wonder, “Is brazing strong enough for my project?” For most home and light jobs, the answer is yes. Look at this comparison:
| Factors | Brazing | Welding |
|---|---|---|
| Joint Strength | Good to excellent; can be stronger than base metals in some cases, but generally less strong than welds for structural loads. | Very High; often stronger than the base metals; ideal for structural applications. |
Brazed joints are good for repairs, crafts, and some car fixes. If you need to fix a radiator, patch a container, or repair HVAC coils, brazing works well. Here are some common uses:
| Application Area | Description |
|---|---|
| HVAC/R Coils | Ideal for brazing coils in air conditioning and refrigeration units. |
| Automotive Components | Used in manufacturing and repairing radiators and condensers. |
| General Aluminum Repair | Suitable for quick repairs of aluminum containers and light structures. |
Tip: Brazing lets you work on many projects without a TIG welding machine. You save money, avoid stress, and get good results.
If you want to join aluminum at home, brazing is a smart choice. You do not need fancy tools or years of practice. You just need patience and the right tools. Try it and see how easy it is!
You can weld aluminum at home without a TIG welder by following these steps:
- Gather a propane torch and aluminum brazing rods.
- Cut and chamfer your aluminum pieces.
- Clean the metal with a wire brush.
- Heat the aluminum until the rod melts.
- Apply the brazing rod to fill the joint.
Stay safe by wearing gloves and goggles, and keep your workspace clear and ventilated. Many people find brazing easy and effective, especially with good prep. Give it a try—your joints will be strong and last a long time!
FAQ
Can I use a regular soldering iron for aluminum brazing?
No, a soldering iron does not get hot enough. You need a propane torch. The torch heats the aluminum to the right temperature so the brazing rod melts and flows.
Do I need to use flux with aluminum brazing rods?
Most aluminum brazing rods have flux built in. If your rod does not, you should use a flux made for aluminum. Flux helps the filler metal stick and keeps the joint clean.
How strong are brazed aluminum joints?
Brazed joints can be very strong. For most home repairs and light projects, they hold up well. If you prep the surfaces and heat them right, your joint will last.
What should I do if the brazing rod will not stick?
Clean the aluminum again. Remove all oil, dirt, and oxidation. Make sure you heat the metal enough. Try scratching the surface with the rod while heating.
Is it safe to braze aluminum indoors?
You can braze indoors if you have good ventilation. Open windows or use a fan. Always wear safety gear. Keep flammable items away from your work area.
How Does Laser Wire Feeding Technology Improve Welding Precision
What is Wobble Laser Welding? Solving Fit-up Gaps
Wire Feeding vs No Wire Feeding Laser Welding: Which Is Better?


