According to a 2024 report by the International Federation of Robotics, global cobot installations grew 15% year-over-year — yet nearly 40% of first-time deployments miss their go-live date by four weeks or more. The root cause isn’t the technology. It’s a poorly mapped cobot deployment timeline. A realistic timeline spans five distinct phases — assessment, selection, integration, validation, and production launch — and typically takes 8 to 20 weeks depending on application complexity, safety requirements, and supply chain readiness. This guide breaks down each phase with concrete durations, decision checkpoints, and the pitfalls that silently push schedules off track.
How Long Does a Typical Cobot Deployment Take
Short answer: A typical cobot deployment timeline runs 8 to 20 weeks from initial planning through full production. Simple pick-and-place tasks can go live in as few as 6 weeks, while multi-step assembly or machine-tending applications with custom end-effectors often push past 16 weeks.
Three variables drive that range more than anything else: application complexity, integration depth, and organizational readiness. A standalone palletizing cell with a Universal Robots UR10e, for example, requires far less engineering time than a cobot welding station that must sync with conveyor PLCs, vision systems, and existing MES software.
Organizational readiness is the factor most teams underestimate. Do you already have a risk assessment framework aligned with ISO/TS 15066? Have operators been introduced to collaborative robotics concepts? Companies deploying their first cobot typically spend 2–4 extra weeks on safety documentation and change management alone.
- Simple applications (single task, no vision, minimal fixturing): 6–10 weeks
- Moderate applications (force-sensing, basic vision, one integration point): 10–16 weeks
- Complex applications (multi-sensor, ERP/MES integration, custom grippers): 16–20+ weeks
According to a 2023 deployment survey published by the International Federation of Robotics (IFR), SMEs averaged 12 weeks from purchase order to stable production — roughly 40% faster than traditional industrial robot installations. That speed advantage is precisely why understanding your cobot deployment timeline upfront prevents budget overruns and missed production targets.

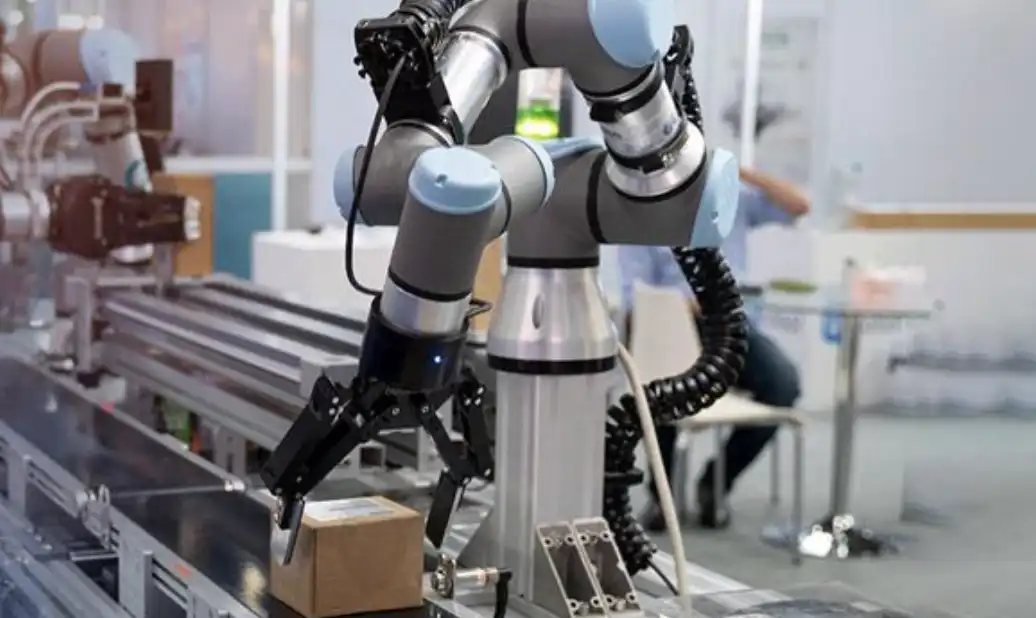
Cobot deployment timeline infographic showing 8 to 20 week phases from planning to production
Phase 1 — Assessment, Goal Setting, and ROI Analysis
Weeks 1 through 3 set the trajectory for everything that follows. Skip the rigor here, and you’ll pay for it tenfold during integration — this phase is the single most common reason a cobot deployment timeline stretches beyond 20 weeks.
Identify the Target Application First
Not every task is cobot-ready. Start by auditing your production line for repetitive, ergonomically demanding, or quality-critical processes. Machine tending, palletizing, and pick-and-place operations consistently deliver the fastest payback — often under 12 months, according to data published by the International Federation of Robotics (IFR).
Define Measurable KPIs
Vague goals like “improve efficiency” derail projects. Pin down specifics:
- Cycle time reduction — target a percentage, e.g., 15% improvement per unit
- Throughput increase — units per hour or per shift
- Ergonomic incident reduction — baseline current injury reports
- OEE (Overall Equipment Effectiveness) — measure before and after
Build the Business Case
A credible ROI projection compares total cost of ownership — cobot hardware, end-of-arm tooling, integration labor, training — against labor savings, scrap reduction, and uptime gains. Most collaborative robots from Universal Robots, FANUC, or ABB fall in the $25,000–$65,000 range before integration costs. Factor in a realistic 18–24 month payback period rather than the optimistic 6-month figures vendors sometimes quote.
Rushing past feasibility analysis to “just get the cobot on the floor” is the mistake that inflates your cobot deployment timeline by months, not weeks.
Conduct a brief feasibility study covering payload requirements, reach envelope, floor-space constraints, and ISO/TS 15066 safety considerations. Document everything — this becomes the specification sheet that Phase 2 depends on.

Cobot deployment timeline phase 1 assessment board with ROI analysis and KPI planning
Phase 2 — Cobot Selection and Cell Design
Weeks 3 through 6 are where your project takes physical shape. This phase consumes roughly 15–20% of the total cobot deployment timeline, yet the decisions made here lock in 80% of your system cost. Rushing vendor selection or oversizing your cobot are the two most expensive mistakes teams make.
Matching Cobot Specs to Task Requirements
Start with three non-negotiable parameters: payload capacity, reach envelope, and cycle speed. A pick-and-place task handling 2 kg parts within a 500 mm radius has radically different requirements than a palletizing application lifting 12 kg boxes across 1,300 mm. Leading models from Universal Robots (UR series), FANUC (CRX line), and ABB (GoFa/SWIFTI) each occupy distinct sweet spots — don’t default to the brand you already know.
Over-specification kills ROI. A UR20 with 20 kg payload is overkill for a 3 kg assembly task, and its larger footprint wastes floor space. Size to your actual requirement plus a 15–20% margin, no more.
Workcell Layout and End-of-Arm Tooling
Design the cell around material flow, not around the robot. Map every inbound part, fixture position, and outbound path before placing the cobot in your CAD layout. Key decisions during this window include:
- End-of-arm tooling (EOAT) — vacuum grippers, mechanical fingers, or force-torque sensors from suppliers like Robotiq or Schunk
- Safety zoning — determining whether you need fencing, area scanners, or can rely on power-and-force-limiting mode alone
- Fixture design — repeatable part presentation is critical; even a ±2 mm variance causes failures
Vendor Evaluation Tips
Request a feasibility study or simulation — reputable integrators provide these within 1–2 weeks. Compare at least two vendors on total cost of ownership, not just sticker price. Factor in programming software licenses, spare gripper kits, and local service response times. A thorough selection process here prevents costly change orders that stretch your cobot deployment timeline by weeks.
Phase 3 — Integration, Programming, and Risk Assessment
Weeks 6 through 12 are where the cobot deployment timeline either holds or falls apart. This phase demands tight coordination between mechanical engineers, electricians, controls programmers, and safety personnel — all working in parallel. Expect roughly 30–40% of your total project hours to land here.
Mechanical and Electrical Integration
Mounting the cobot arm is the easy part. The real complexity lives in integrating end-of-arm tooling, conveyors, sensors, and PLC communication. Electrical integration alone — wiring safety-rated I/O, configuring fieldbus protocols like EtherNet/IP or PROFINET — can consume two full weeks if your existing infrastructure wasn’t designed for collaborative automation.
Programming Task Sequences
Most integrators use teach pendants or drag-and-drop platforms (Universal Robots’ PolyScope, FANUC’s CRX interface) for initial waypoint programming. But don’t confuse “easy to program” with “fast to program.” A palletizing routine with 6 box patterns and variable layer heights might require 40+ hours of iterative refinement. Force-sensing tasks like polishing or insertion add another layer of tuning complexity.
ISO/TS 15066 Risk Assessment
This step is non-negotiable. You must measure actual contact forces and pressures against the biomechanical limits defined in ISO/TS 15066 — for example, 140 N maximum for transient contact on the forearm. Use a calibrated force measurement device, not assumptions from simulation.
Risk assessment isn’t a one-time checkbox. Every programming change that alters speed, payload, or trajectory requires re-evaluation of contact scenarios.
That iterative loop — program, assess, adjust, reassess — is exactly what determines whether your cobot deployment timeline stays within the 12-week target or drifts toward 16.
Phase 4 — Testing, Validation, and Operator Training
Weeks 12 through 16 are your last line of defense before production. Rushing this phase is the single most expensive mistake teams make — rework after launch costs 4 to 10 times more than catching issues during validation, according to data from the International Federation of Robotics.
Dry-Run Testing and Cycle Time Validation
Start with dry runs at reduced speed (typically 25–50% of target). Measure actual cycle times against the benchmarks you established in Phase 1. A gap larger than 8–10% signals a programming or tooling issue that needs resolution before you scale up. Run at least 500 consecutive cycles at full speed to confirm repeatability.
Force-Limiting and Safety Verification
Every collaborative robot must comply with ISO/TS 15066 force and pressure thresholds. Use a calibrated force measurement device — not guesswork — to verify contact forces across all reachable body regions. Document every reading. Auditors will ask for this data, and gaps here can stall your entire cobot deployment timeline by weeks.
Hands-On Operator Training
- Duration: 8–16 hours per operator, split across classroom and floor sessions
- Content: Emergency stops, teach pendant basics, error recovery, and quality inspection criteria
- Validation: Each operator should demonstrate competency through a practical skills check — not just a written quiz
Operators who trust the cobot protect it. Operators who fear it sabotage the deployment — sometimes unconsciously. Invest the training hours now.
Quality checks round out this phase. Run sample parts through your existing QC process and compare defect rates against manual baselines. Only when cycle time, safety, and quality all pass should you greenlight Phase 5.
Phase 5 — Production Launch and Continuous Optimization
Weeks 16 through 20 mark the go-live transition — but calling it a “launch” undersells what actually happens. This is where your cobot deployment timeline stops being a project and becomes an ongoing operational discipline. Long-term ROI isn’t captured at installation. It’s captured here.
Ramp-Up Strategy: Don’t Go Full Speed on Day One
Start at 60–70% of target cycle time and increase incrementally over 5–7 shifts. Monitor reject rates per batch, not just throughput. A controlled ramp-up catches parameter drift before it becomes scrap.
Metrics That Matter
- OEE (Overall Equipment Effectiveness): Target 75%+ within the first two weeks; world-class cobot cells reach 85% by week 20.
- Throughput per shift: Compare against the baseline you established in Phase 1.
- Mean time between interventions (MTBI): If operators stop the cell more than twice per shift, your programming needs refinement.
Fine-Tuning and Scaling
Adjust waypoints, grip force, and speed profiles based on real production data — not simulation assumptions. According to the International Federation of Robotics (IFR), manufacturers that systematically optimize cobot parameters post-launch see 15–30% productivity gains within six months beyond initial targets.
Once your first cell stabilizes, document every parameter change. That playbook compresses the cobot deployment timeline for your second and third cells by 30–40%, turning a 20-week process into roughly 12.
Common Delays That Extend Your Cobot Deployment Timeline
Five bottlenecks account for the majority of schedule overruns. Knowing them upfront can save you 4–8 weeks of painful rework.
- Underestimated integration complexity. Legacy PLCs, proprietary fieldbus protocols, and undocumented I/O maps turn a “simple” connection into weeks of troubleshooting. Mitigation: conduct a full controls audit in Phase 1 and budget 20% schedule contingency for integration.
- Custom end-of-arm tooling lead times. Specialty grippers or fixtures from vendors like Schunk or Robotiq often carry 6–10 week lead times. Order tooling the moment cell design is finalized — not after integration begins.
- Scope creep. A stakeholder asks to add a second SKU or an extra inspection step mid-project. Each “small” addition can push your cobot deployment timeline out by 2–3 weeks. Lock scope with a signed change-order process before Phase 3.
- Weak stakeholder buy-in. Floor supervisors who feel bypassed will slow operator training and resist process changes. Include them in the risk assessment — their input reduces resistance and surfaces real constraints early.
- Safety certification surprises. Discovering during validation that your ISO/TS 15066 force-limiting thresholds fail under certain load conditions can stall launch by 3+ weeks. Run preliminary force and pressure measurements during integration, not just in Phase 4.
A 2023 survey by the International Federation of Robotics found that 38% of cobot projects exceeded their original timeline, with integration issues and tooling delays cited as the top two causes.
The pattern is clear: most delays originate from decisions — or non-decisions — made in the first three phases. Front-load the hard conversations, and the back half of your project stays on track.
Frequently Asked Questions About Cobot Deployment Timelines
Can I deploy a cobot without a systems integrator?
Yes — but only for simple, single-task applications like machine tending or basic palletizing. Brands like Universal Robots and FANUC offer out-of-the-box kits with drag-and-drop programming that skilled maintenance teams can handle in 3–5 weeks. Once you need custom end-effectors, vision systems, or PLC integration, hire an integrator. The time you think you’ll save doing it yourself usually reappears as rework.
How does the cobot deployment timeline differ across industries?
Food and pharmaceutical plants face longer validation cycles — FDA and GFSI compliance can add 4–8 weeks of documentation and hygiene testing alone. Automotive tier-one suppliers, by contrast, often compress timelines to 10–12 weeks because they already have standardized cell layouts and experienced integration partners. Electronics assembly sits somewhere in between, typically 12–16 weeks, driven by precision calibration requirements.
What’s the fastest realistic deployment?
About 3 weeks, and that assumes a plug-and-play application with no custom tooling, pre-trained operators, and zero regulatory hurdles. Universal Robots documents case studies where single-cobot cells went live in under 20 days. Treat that as the exception, not the benchmark.
How should I handle deployment across multiple production lines?
Deploy one line first, stabilize it for at least two weeks, then replicate. Each subsequent line typically takes 30–50% less time because programming templates, risk assessments, and training materials carry over. Staggering rollouts also prevents a single integration error from disrupting your entire operation simultaneously.
See also
How to determine whether steel has been galvanized
How to combine laser cleaning machine with industrial robots
What Operators Should Know About Laser Cleaning Machine Training


