
oceanplayer

Oceanplayer Laser Equipment | Cleaning, Welding, Marking, Automation Sample Testing | Global Shipping | OEM/ODM Support
Mold & Die Laser Solutions

Mold and Die Laser Solutions for Precision Cleaning, Repair Prep, Welding and Traceability.

Oceanplayer helps mold shops, die manufacturers, injection molding plants and repair teams remove residue, rust, oil, oxide and coating from molds while protecting fine details, polished surfaces and textured areas. Laser systems can also support mold repair welding and permanent mold identification.
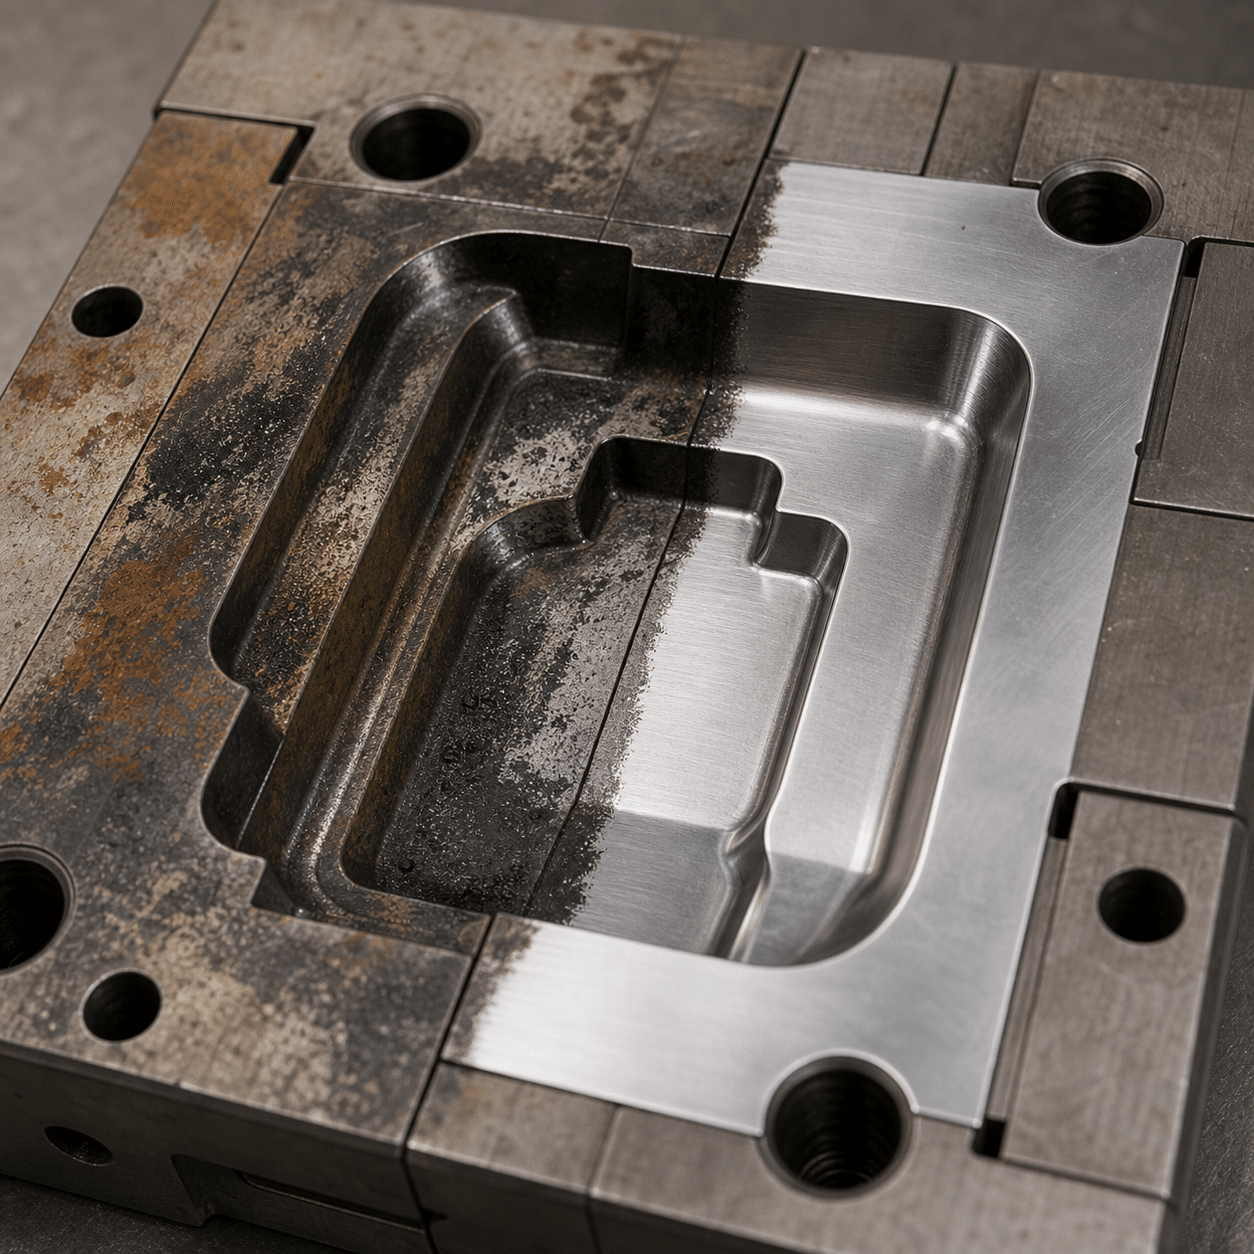
  • Non-contact mold cleaning with controlled heat input
  • Residue, release agent, rust and oxide removal
Mold and die laser cleaning welding and marking solution for precision mold maintenance
Protect mold details Clean residue while preserving texture, edges and precision surfaces
Clean Residue and rust
Repair Weld prep
ID Mold marking
Non-Contact Cleaning Clean cavities and surfaces without abrasive contact
Detail Protection Support textured, polished and precision mold areas
Faster Maintenance Reduce downtime for routine mold cleaning and repair
Sample Proof Test your mold material and residue before selecting power
Industry Needs

Mold maintenance needs cleaning that removes buildup without changing the mold surface

Mold shops care about product quality, cavity detail, polishing cost, maintenance time and repeatable production. A laser cleaning solution should remove contamination while helping protect the mold geometry and surface finish.

Release Agent and Resin Residue

Clean buildup from injection molds, rubber molds, tire molds and forming dies without relying on aggressive scraping.

Rust and Oxide Removal

Remove storage rust, oxidation and discoloration from mold steel, die surfaces, inserts and repair areas.

Texture and Polished Surface Care

Use controlled laser settings to clean delicate patterns, logos, cavity details and polished areas with less mechanical contact.

Repair Welding Preparation

Prepare worn or damaged mold areas by cleaning oil, oxide and contamination before repair welding or resurfacing.

Routine Maintenance Downtime

Clean molds in scheduled maintenance windows and reduce time spent on chemical soaking, manual brushing and cleanup.

Mold ID and Traceability

Mark mold numbers, insert IDs, QR codes and maintenance data on mold bases, plates and tooling components.

Mold Care Workflow

Plan laser cleaning around surface protection and production uptime

A good mold cleaning process starts with the residue type and ends with a surface that is ready for production, repair or inspection.

Step 01

Check Mold Surface

Identify polished areas, textures, edges, engraving, vent lines and sensitive cavity details.

Step 02

Identify Contamination

Review resin residue, rubber buildup, release agent, oil, rust, oxide or mixed deposits.

Step 03

Set Laser Parameters

Choose pulsed power, scan width, speed and focus based on removal level and surface protection.

Step 04

Verify Production Readiness

Confirm cavity cleanliness, surface appearance, residue removal and whether the mold is ready for production.

Mold Applications

Use laser systems for mold cleaning, repair and tooling identification

Laser cleaning is especially useful when the mold has details that are difficult to clean manually, or when chemical cleaning and abrasive methods create extra downtime and cleanup.

  • Injection mold residue and release agent cleaning.
  • Rubber mold, tire mold and compression mold buildup removal.
  • Die casting mold oxide, oil and carbon deposit cleaning.
  • Stamping die rust removal and surface preparation.
  • Mold repair welding preparation and post-repair cleaning.
  • Mold number, insert ID, QR code and tool tracking mark creation.
Laser cleaning application for mold cavity die insert and tooling maintenance
Solution Matrix

Select laser equipment by mold material, residue and surface finish

The right choice depends on whether you need fine cleaning, faster rust removal, repair welding support or permanent tooling identification.

Mold Requirement Recommended Laser Option Best Use What To Check
Precision cavity cleaning 200W/300W/500W pulsed laser cleaner Injection molds, textured molds, inserts and fine details Surface finish, residue type, heat input and cleaning width
Rust and oxide removal Pulsed laser cleaner or CW laser cleaner Storage rust, die surfaces, mold bases and large steel areas Rust depth, base metal protection and cleaning speed
Routine mold maintenance Handheld laser cleaning machine Maintenance rooms, production plants and mold repair shops Portability, cable length, operator access and fume extraction
Mold repair welding Laser welder with cleaning support Worn edges, small repair zones, inserts and tooling restoration Weld material, heat control, wire need and final polishing
Mold ID marking Fiber or MOPA laser marker Mold plates, inserts, nameplates, QR codes and serial numbers Mark depth, readability, material grade and location
Surface Protection

Protect the mold features that affect part quality and release performance

For mold cleaning, the goal is not just a clean look. The process should preserve the details that control final part appearance, release behavior and dimensional consistency.

01

Cavity Detail

Clean corners, patterns and small features where residue accumulates and manual tools are hard to control.

02

Texture and Grain

Use controlled settings to remove buildup while helping preserve etched, textured or patterned mold surfaces.

03

Polished Areas

Reduce direct mechanical contact on mirror-like or polished areas that may require costly refinishing if scratched.

04

Vent Lines

Clean residue near narrow vent lines and parting lines so air release and molding performance remain consistent.

05

Repair Zones

Prepare worn areas before laser welding and clean discoloration or oxide after repair work.

06

Maintenance Records

Mark IDs and QR codes on tooling parts to support mold tracking, service intervals and spare insert management.

Cleaning Results Gallery

Review mold cleaning results for residue, rust, oxide and repair preparation

Clear results help your team compare cleaning quality, surface effect and whether the mold is ready for production, inspection or repair.

System Options

Choose the right laser setup for mold cleaning and tooling repair

Mold applications usually need controlled cleaning first. Higher power may be useful for larger rusted surfaces, but precision and surface protection should lead the selection.

Maintenance

Handheld Laser Cleaning Machine

Useful for routine mold cleaning in repair shops, production plants and tool maintenance rooms.

Repair and ID

Laser Welding and Marking Systems

Support mold repair welding, insert marking, QR code marking and tooling traceability.

Project Planning

Share these details to get a better mold laser recommendation

Because mold surfaces vary widely, sample information helps us recommend power, pulse settings, lens, cleaning head and operation method more accurately.

Mold and Surface Details

Mold type Injection mold, rubber mold, tire mold, die casting mold, stamping die or insert.
Material Mold steel, stainless steel, aluminum, copper alloy or coated tooling surface.
Contamination Resin, rubber, release agent, oil, rust, oxide, carbon deposit or mixed buildup.
Surface finish Polished, textured, engraved, coated, matte or repair-welded surface.

Maintenance and Production Details

Cleaning frequency Daily production cleaning, weekly maintenance, repair cleaning or long-term storage rust removal.
Operation access Open mold, deep cavity, narrow corner, large plate or fixed tool position.
Target result Production-ready cavity, repair preparation, inspection surface or permanent identification mark.
Worksite setup Power supply, fume extraction, safety area, operator training and maintenance workflow.
Sample Test

Test your mold surface before choosing the laser system.

Send your mold sample, residue photos, material type and surface requirement. We can help compare cleaning effect, heat input, surface appearance and recommended configuration.

01

Share Mold Details

Provide mold type, material, residue condition, surface finish and photos or short videos.

02

Run Cleaning Test

Compare residue removal, surface protection, speed and final mold appearance.

03

Confirm Settings

Choose power, scan width, lens, cooling, safety setup and maintenance workflow.

FAQ

Mold and die laser solution questions

These answers help your team evaluate laser cleaning, repair preparation and marking for mold maintenance workflows.

Can laser cleaning remove residue from injection molds?
Yes. Pulsed laser cleaning can remove resin buildup, release agent, oil and light oxidation from many injection mold surfaces. A sample test helps confirm the settings for your mold material and finish.
Will laser cleaning damage mold texture or polished areas?
With the right pulsed laser settings, cleaning can be controlled to reduce mechanical contact and help protect textured or polished areas. The safest approach is to test on the same material and surface finish before production use.
Which laser cleaner is best for mold cleaning?
For most precision mold cleaning tasks, a 200W, 300W or 500W pulsed laser cleaner is preferred because it offers better control over heat input and surface effect.
Can laser cleaning prepare a mold before repair welding?
Yes. Laser cleaning can remove oil, oxide, rust and contamination around worn or damaged areas before repair welding. It can also help clean discoloration after repair work.
Can Oceanplayer help with mold ID marking?
Yes. Fiber or MOPA laser markers can create mold numbers, insert IDs, QR codes and serial numbers on mold plates, tooling components and nameplates.
What information is needed for a mold cleaning sample test?
Please share mold type, material, surface finish, contamination type, cleaning area and target result. Photos, short videos or physical samples help us recommend settings and machine configuration.