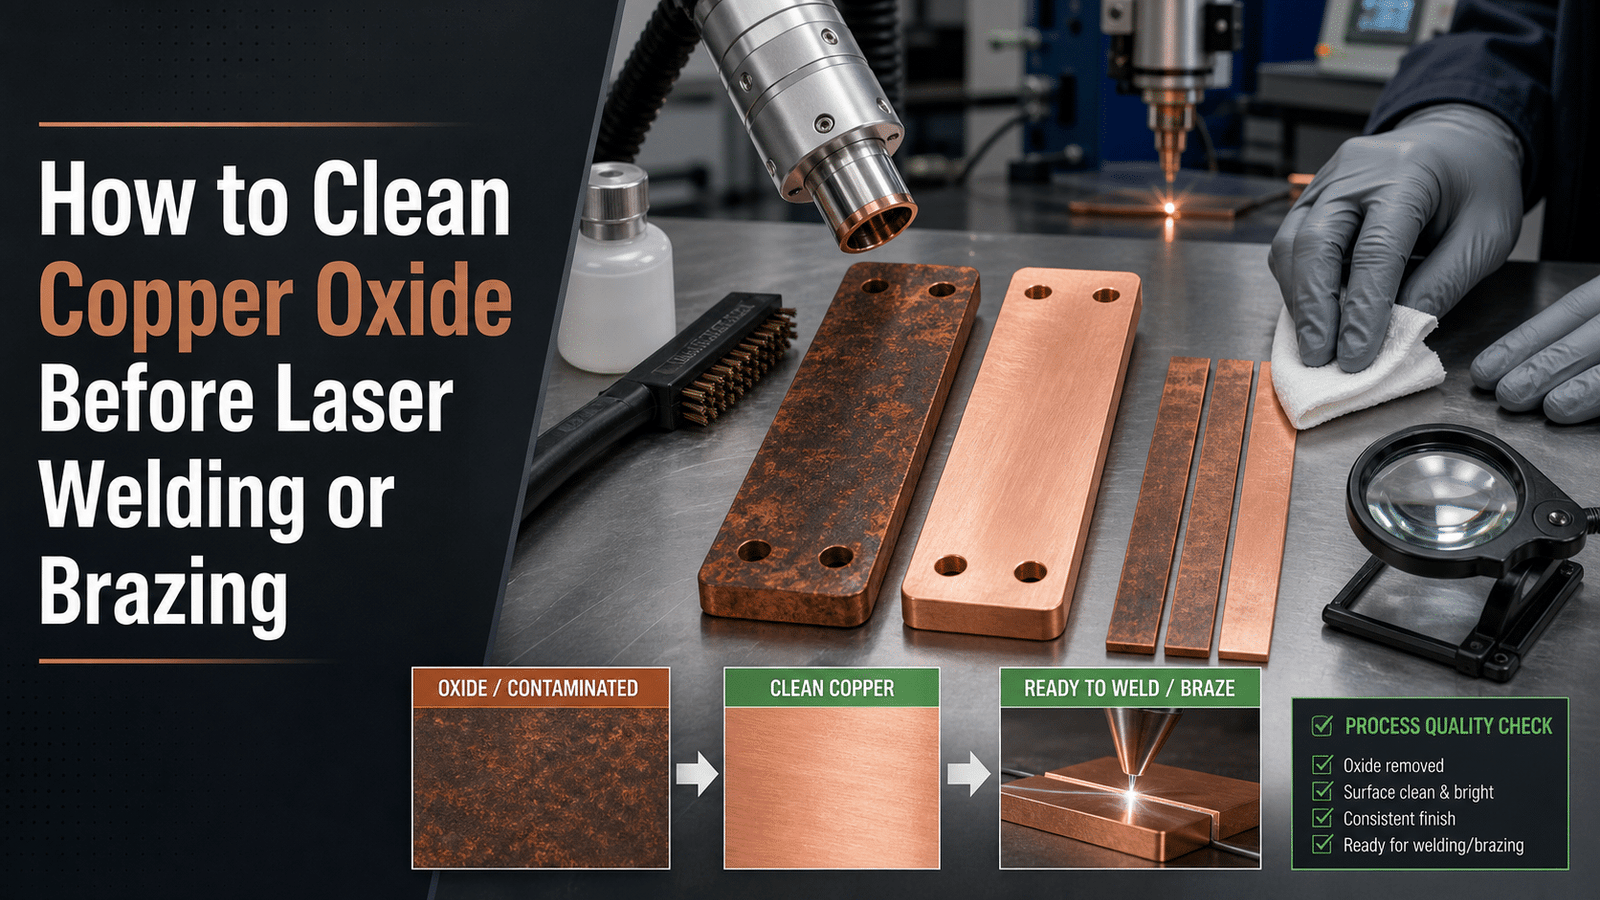
To remove copper oxide before welding, submerge the copper in a 10%[1] dilute sulfuric acid (H₂SO₄) pickling bath for 5–10 minutes, then rinse with clean water and neutralize with baking soda. This matters because oxide melts far higher than copper—cuprous oxide (Cu₂O) at 1235°C and cupric oxide (CuO) at 1326°C[2] versus pure copper’s 1085°C. Skipping this step traps gas and produces braze joints that are 30–approximately 50% weaker, plus porosity and failed connections.
Which cleaning method fits your job, chemical, mechanical, or laser? What safety gear do acids demand? And how do you keep copper oxide-free until the torch or laser fires?
Quick Takeaways
- Pickle copper in approximately 10%[3] sulfuric acid for 5–10 minutes to dissolve oxide.
- Rinse thoroughly, then neutralize acid residue with baking soda.
- Oxide melts 150–240°C higher, trapping gas and weakening joints 30–approximately 50%.
- Choose laser cleaning to skip abrasives and chemical waste entirely.
- Weld same day—clean copper reoxidizes within hours of preparation.
Why Must You Remove Copper Oxide Before Laser Welding or Brazing?
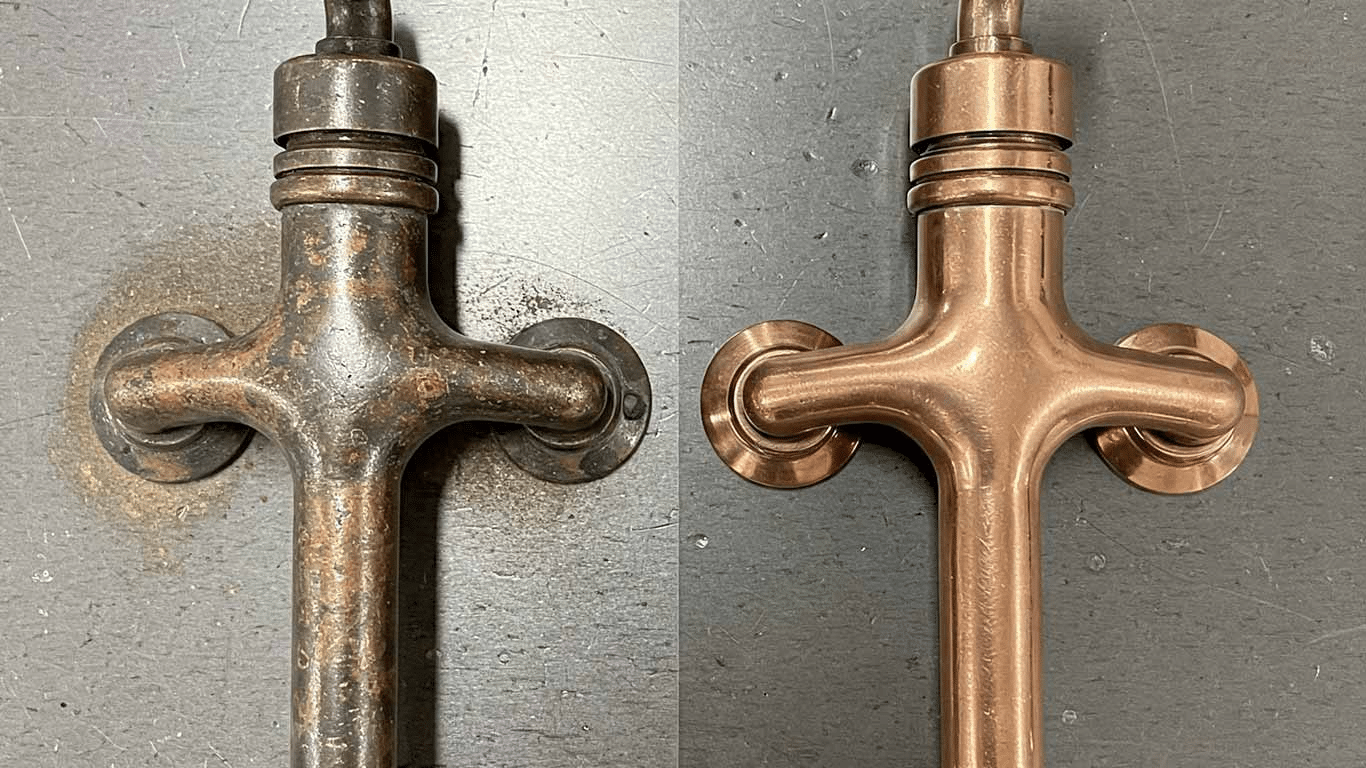
You have to remove copper oxide before welding because that oxide film bounces the laser light back, stops the pieces from melting together, and holds onto gas that later becomes tiny holes. Pure copper melts at 1085°C, but cuprous oxide (Cu₂O) melts at 1235°C[5] and cupric oxide (CuO) melts at 1326°C.
That gap of 150 to 240 degrees means the oxide stays solid while the copper underneath has already turned to liquid, basically like a lid sitting on a pot of boiling water, where the metal below melts but the crust floating on top just refuses to join in. This unmelted skin ends up getting folded into the weld pool as a film, which creates Lack of fusion, essentially a weak spot where two pieces never actually bonded together.
The reflection problem gets even worse for laser work. Clean copper already sends back a big share of near-infrared laser energy, but an oxide layer scatters the beam in an uneven way, which causes unstable coupling and spatter. Oxides sitting in the joint also lower the electrical conductivity, and that is the reason high-conductivity coppers like OFHC (oxygen-free high-conductivity copper) must be cleaned down to bright metal before welding.
Then you have the trapped gas to think about. When Cu₂O breaks apart inside the molten pool, it lets go of oxygen. That oxygen turns into bubbles that freeze in place as porosity, which are the tiny voids that fail both pressure checks and X-ray inspection. When you skip the cleaning step, you basically inherit all three of these defects at the same time, and that is why every joint-prep procedure for brazing and laser welding really starts the exact same way. You strip the oxide off first.
Red Cuprous Oxide vs Black Cupric Oxide — Which One Are You Dealing With?
Red cuprous oxide (Cu₂O) and black cupric oxide (CuO) are two different corrosion layers, and the black one is harder to strip. Cu₂O forms at moderate heat and shows as a reddish or purple film; CuO forms above roughly 300°C and looks dull black. The black layer is thicker and denser, so you must remove copper oxide before welding with more force or a stronger acid.
Heat and humidity decide which layer you get. A part left in damp air grows a thin red cuprous oxide film. Push copper past 300°C[6], during laser cutting, brazing, or a prior weld pass, and that red film oxidizes further into black CuO, which can run 5,10 times thicker than a fresh red film and block metal-to-metal bonding.
What quick field test tells the two oxides apart?
Rub the surface with white vinegar (5% acetic acid) on a cotton pad for 60 seconds. Red Cu₂O dissolves fast and leaves bright copper; black CuO reacts slowly and often needs abrasion afterward. Acetic acid dissolves copper oxides into water-soluble salts, per weld-prep guidance, so a stubborn dark stain confirms you’ve the tougher cupric layer.
Practical rule: if vinegar clears it in under a minute, a wire brush finishes the job. If a black film stays, plan for stronger chemical pickling. Identify the oxide first, then pick your method in the next section.
How Do You Match the Oxide-Removal Method to Your Welding Process and Oxide Thickness?
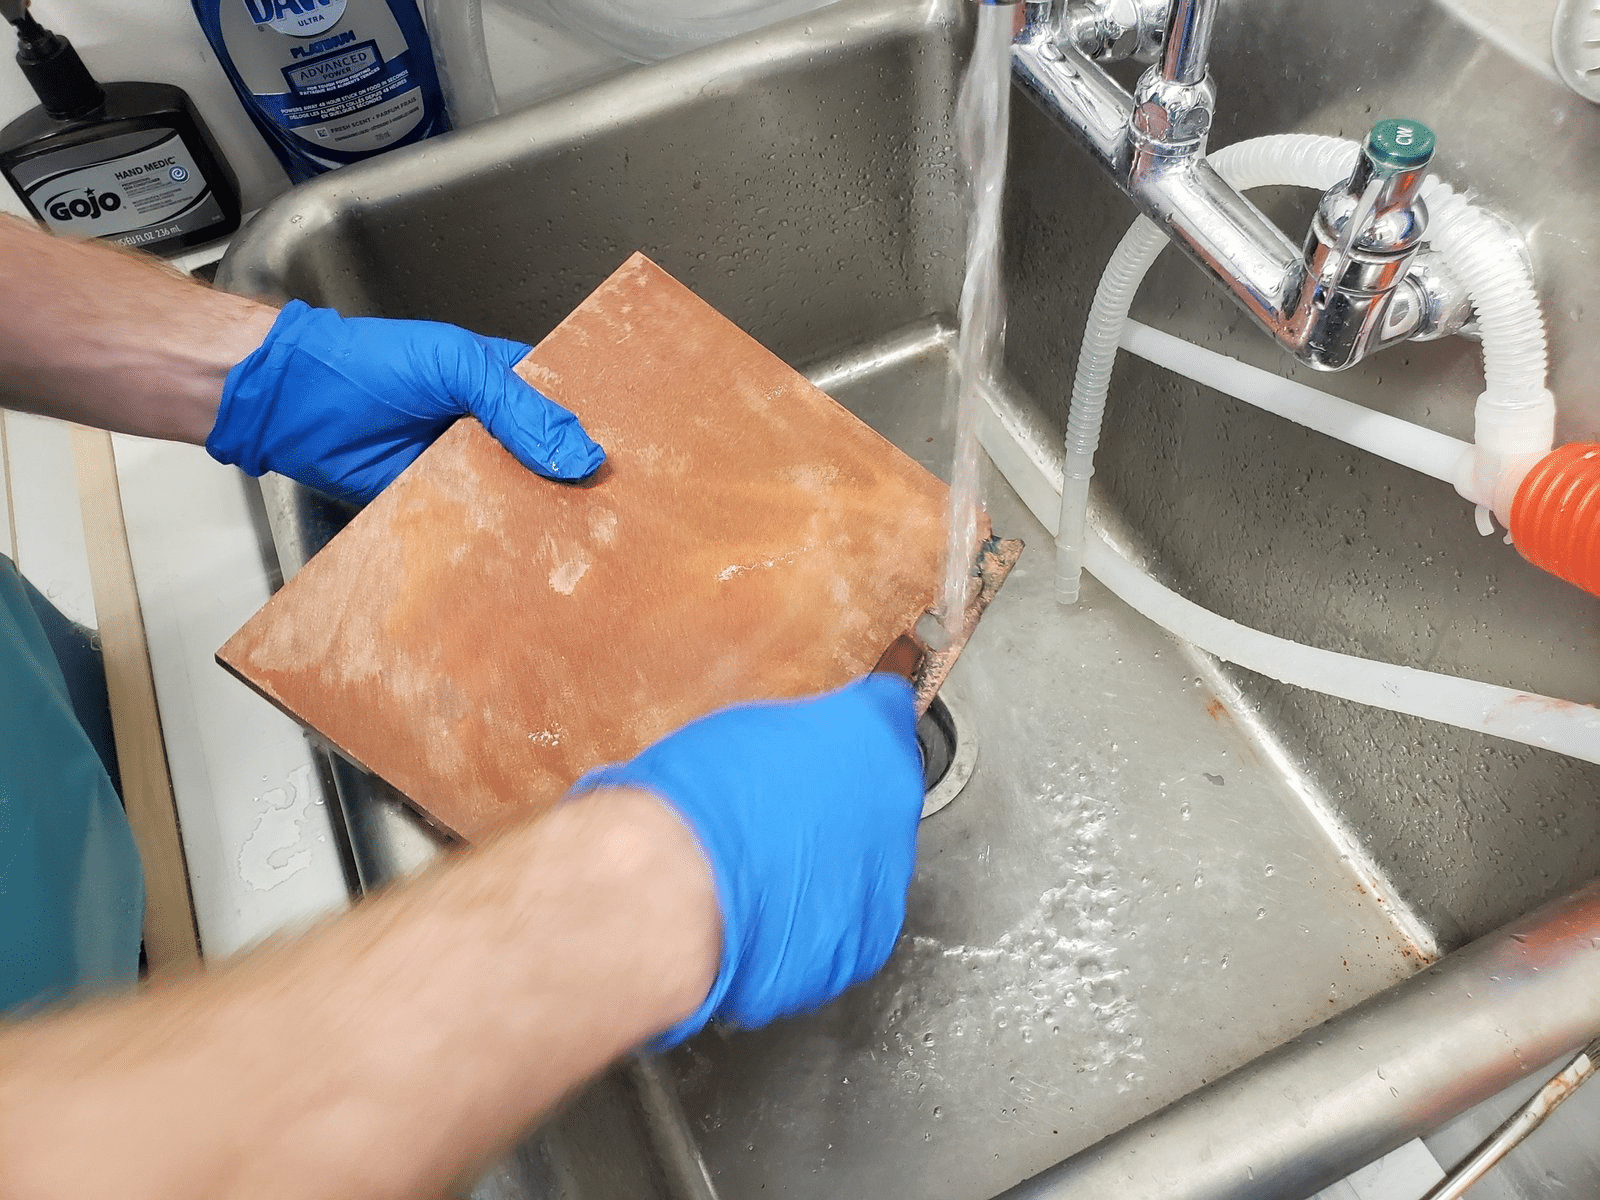
Match the method to two things: your joining process and how deep the oxide runs. Thin-film oxide (a light tarnish under about 2 microns) responds to abrasive or flux cleaning. Heavy black scale needs mechanical grinding or a dilute acid pickle. For laser welding, pulsed laser oxide removal keeps the surface contact-free before the weld.
The wrong pairing wastes time and reintroduces defects: chemical pickling on a thin solder joint is overkill, while a wire brush on 50-micron black scale barely scratches it.
| Process | Thin-film oxide | Heavy scale |
|---|---|---|
| Laser welding | Pulsed laser cleaning | Abrasive flap disc + laser pass |
| TIG (GTAW) | Stainless wire brush to bright metal | 10%[7] H₂SO₄ pickle, 5–10 min |
| Brazing | Chemical flux | Emery cloth + flux |
| Soldering | Acid flux (mild) | Sandpaper + flux |
For TIG on high-conductivity copper, a 10% dilute sulfuric acid bath for 5,10 minutes (2026) strips heavy layers, then a water rinse and baking-soda neutralization stop further etching. To remove copper oxide before welding thin sheet, skip the acid and brush to bright metal instead.
One rule holds across every process: clean to bright, bare copper, because any remaining film in the joint zone cuts weld strength and conductivity. Section 4 breaks down the mechanical route in detail.
How Do You Remove Copper Oxide Mechanically?
Mechanical cleaning takes off copper oxide through abrasion, and the goal here is pretty simple: you want to clean down to bright, pink metal with no gray or black film left behind. The standard practice in the field is to brush copper until it’s bright metal before you strike an arc or fire a laser. You’ll want to match your tool to how thick the scale is, or else you end up wasting time and running the risk of contaminating the joint.
Which Tool Suits Thick Black Scale vs Light Films?
Thick black cupric oxide really needs aggressive abrasion, while a light tarnish only needs a gentle pass over it. If you pick the wrong pairing, you’ll either leave scale behind or gouge into the base metal itself.
| Oxide type | Tool | Grit / spec |
|---|---|---|
| Heavy black scale | Flap disc or glass-bead blast | 60–80 grit / 60–120 mesh bead |
| Medium film | Non-woven abrasive pad | Maroon (medium) |
| Light tarnish | Stainless wire brush or emery cloth | 320+ grit |
How Do You Avoid Embedding Contaminants or Work-Hardening?
It helps to use a dedicated stainless-steel brush that you keep only for copper and nothing else. A brush that has touched carbon steel drags iron particles into the surface, and those particles are what cause weld porosity and rust spots down the line.
You’ll also want to keep the pressure light. Copper is a soft metal, so heavy grinding smears it around and work-hardens the top layer, which then tends to crack under the heat of welding. Let the abrasive do the cutting for you, and don’t lean into it. Glass-bead blasting at 40,60 psi takes off thick scale without gouging, unlike sharp grit that embeds shards you simply cannot rinse back out. It’s best to brush right before welding to remove copper oxide before welding, since a fresh copper surface will re-form its tarnish again within just a few minutes.
Which Chemical and Flux-Based Options Dissolve Copper Oxide?
Chemical baths dissolve copper oxide by turning it into water-soluble copper salts, while brazing flux does the same job during heating. A 10% dilute sulfuric acid pickling bath for 5,10 minutes strips oxide effectively when you rinse it clean afterward. Pick chemistry when parts are too complex to reach with an abrasive.
⚠️ Common mistake: Pickling copper on Monday, then welding it on Wednesday. This happens because clean copper reoxidizes within hours of preparation—the fresh oxide layer melts 150–240°C higher than pure copper (1235°C[8] vs 1085°C), trapping gas and weakening joints 30–50%. The fix: pickle in 10%[9] H₂SO₄ for 5–10 minutes, rinse, neutralize with baking soda, and weld the same day.
What concentration and dwell time actually work?
Use one of these proven recipes, then rinse and neutralize:
- Citric acid soak: 10–15% solution, 15–30 minutes at room temperature. Mild, food-safe, and slow. Best for light red cuprous oxide on small fittings.
- Dilute sulfuric pickle: 10% H₂SO₄, 5–10 minutes. Rinse in clean water, then neutralize with a baking-soda wash.
- Sulfuric-peroxide etch: about 20% H₂SO₄ with 3% H₂O₂ at roughly 125°F (52°C). This mildly etches copper and copper-beryllium, cutting thicker oxide films fast.
Always rinse until the water sheets off clean. Trapped acid pits the copper and ruins the joint.
When does flux beat pre-cleaning alone?
Flux wins whenever the surface re-oxidizes during heating. Brazing fluxes carry active fluorides or borates that dissolve fresh oxide the instant a torch or induction coil hits the metal. A pre-cleaned joint still grows a new oxide skin at brazing temperature, so on copper-to-brass or hard-solder work you need both: clean to bright metal to remove copper oxide before welding, then flux to hold that clean state through the heat cycle.
What Safety Precautions Do Mechanical and Chemical Cleaning Require?
Both cleaning routes create hazards you can’t see. Mechanical abrasion throws fine copper and abrasive dust into the air; acid pickling releases corrosive mist. When you remove copper oxide before welding, treat respiratory protection and ventilation as mandatory, not optional. A NIOSH-approved P100 respirator blocks 99.97%[10] of fine particles, which is the baseline for grinding or wire-brushing copper.
Why is glass-bead and copper dust more dangerous than it looks?
Glass-bead blasting media often contains crystalline silica, which the OSHA silica standard caps at a permissible exposure limit of 50 micrograms per cubic meter over an 8-hour shift. Inhaled silica scars lung tissue permanently. Copper dust irritates airways and, at high concentration, triggers metal fume fever. Run local exhaust ventilation at the abrasion point, not just a room fan.
How do you handle pickling acids safely?
Nitric acid fumes are the worst offender. They release nitrogen dioxide gas, which can cause delayed lung damage hours after exposure. Wear nitrile or neoprene gloves, a face shield, and an acid-resistant apron. Mix acid into water, never water into acid.
- Neutralization: Rinse pickled copper in clean water, then dip in a baking-soda solution to neutralize residual acid before drying.
- Waste disposal: Spent copper-laden acid is a regulated hazardous waste; never pour it down a drain.
- Ventilation: Pickle inside a fume hood or under captured exhaust rated for acid vapors.
Skip shortcuts here. A single unventilated nitric bath can send a worker to the ER.
How Long Does a Cleaned Copper Surface Stay Weldable Before Re-Oxidation?
A freshly cleaned copper surface stays reliably weldable for only minutes in normal shop air. Copper starts building a thin oxide film (flash oxidation) within seconds of exposure, and in humid conditions a visible tarnish can form in under 15 minutes. The practical rule: weld or braze immediately, or protect the surface until the arc strikes.
Why so fast? Bare copper is chemically hungry. Oxygen and water vapor react with the pink metal the moment abrasion or pickling exposes it. Heat makes it worse, a part warmed by preheat or a nearby torch re-oxidizes faster than a cold one. That’s why the effort you spent to Remove copper oxide before welding can be wasted if the joint sits open on the bench for an hour.
How Do You Keep the Surface Clean Until Fusion?
Control the air around the metal. These countermeasures buy you time:
- Immediate welding: Clean and weld in one motion; treat cleaned parts as perishable, not stock.
- Inert-gas purging: Flood the joint with argon before and during the arc. AC with argon shielding also helps break up any film that forms, per copper welding practice guidance.
- Controlled humidity: Keep the shop below 50% relative humidity; dry air slows the reaction sharply.
- Protective coatings: A thin brazing flux or anti-tarnish film seals the metal for hours until you heat it.
For deoxidized copper replacement parts like AWS A5.7 ERCu, joint prep by mechanical cleaning plus degreasing only pays off if fusion follows quickly. Stage your fixtures first, then clean last.
How Do You Trace Porosity, Lack of Fusion, and Cracking Back to Poor Oxide Removal?
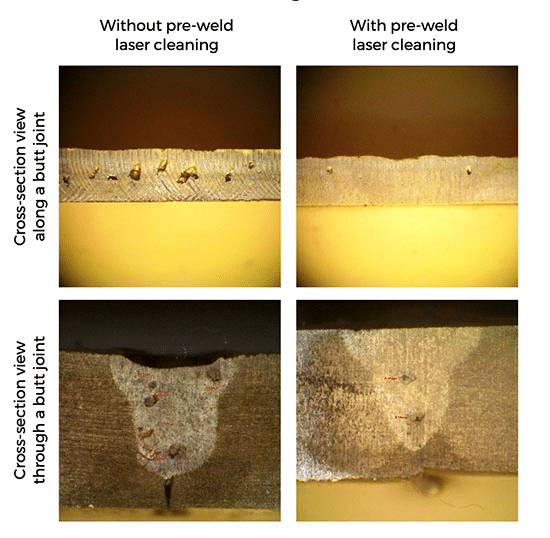
Residual oxide leaves a fingerprint. Porosity clustered along the joint line, weld metal that beads up instead of wetting, and cracks that follow the fusion boundary all point to skipped or incomplete cleaning rather than a bad machine. The rule holds because oxides in the joint region weaken the weld and cut electrical conductivity, which is why copper welding practice demands cleaning to bright metal before you strike an arc.
Which defect signals oxide, and which signals something else?
Match the failure to its cause before you blame your parameters.
| Defect | Oxide-driven sign | Other likely cause |
|---|---|---|
| Porosity | Fine pores along the joint centerline | Scattered pores = moisture or bad shielding gas |
| Lack of fusion | Molten pool balls up, refuses to wet | Wide cold gaps = low heat input |
| Cracking | Cracks track the oxidized fusion line | Center cracks = high sulfur or restraint |
What diagnostic checklist confirms the prep failed?
Cut a cross-section and etch it. If black cupric oxide stringers sit trapped in the pore walls, cleaning failed. Run these five checks: Was the surface pink-bright before welding? Did cleaning finish under the 10,15 minute re-oxidation window?
Was the wire brush stainless and copper-dedicated? Was grease degreased, not just brushed? Did you brush between passes? Two or more “no” answers means you must remove copper oxide before welding more carefully,not adjust the laser.
Frequently Asked Questions About Cleaning Copper Oxide Before Welding
Short answers to the questions welders ask most when they need to remove copper oxide before welding: sandpaper alone works for light film, flux never replaces cleaning, and cleaned copper should be welded within minutes, not stored overnight.
Is sandpaper enough to remove copper oxide?
Yes, for thin surface oxide. Emery cloth or 120-grit sandpaper strips light film to bright metal in seconds. But sandpaper struggles inside grooves and fillet roots. For those spots, switch to a stainless wire brush or a small flap wheel that reaches the contour.
Can flux replace cleaning?
No. Flux dissolves only trace oxide and shields fresh metal from air during heating. Thick scale sits under the flux and stays in the joint. Mechanical abrasion plus flux is the proven combination for copper fittings, and the same rule applies to weld prep, according to welding fabrication guidance. Clean first. Flux second.
Can I store cleaned copper overnight?
Not for critical joints. Bare copper begins re-oxidizing within minutes at room temperature. If a delay is unavoidable, seal parts in a bag with a desiccant, then re-abrade lightly before welding.
How do I clean oxide inside tight joints or tube fittings?
Use a nylon or brass tube brush sized to the bore. For deeper cleaning, a 10% dilute sulfuric acid pickling bath for 5 to 10 minutes reaches surfaces a brush can’t, followed by a water rinse and baking-soda neutralization, per welding prep data.
Choosing the Right Cleaning Workflow for Your Next Copper Weld
The right workflow follows one rule: identify the oxide, remove it to bright metal, protect the surface, then inspect before the arc strikes. A stainless-steel wire brush handles thin films in seconds, while a 10% dilute sulfuric acid pickling bath for 5,10 minutes (2026) clears heavier oxide before you rinse and neutralize with baking soda. Match effort to oxide, not habit.
What does the decision tree look like?
Start with color. Red cuprous oxide means a light film, so mechanical abrasion to pink metal is usually enough. Black cupric oxide signals a thicker, heat-grown layer that resists brushing and calls for acid pickling or pulsed laser cleaning. Then check the process: brazing tolerates flux-assisted cleaning, but laser welding demands a spotless, reflection-free surface because oxide scatters the beam.
What goes on the pre-weld checklist?
- Identify: note oxide color and thickness; deep black scale needs chemical or laser removal.
- Clean: abrade or pickle until you see continuous bright, pink copper — no dull patches.
- Degrease: wipe with acetone after mechanical work to strip oil that traps moisture.
- Protect: weld within minutes of cleaning, since re-oxidation starts fast in humid air.
- Inspect: confirm no residual flux, grit, or discoloration before striking the arc.
Write these five steps into a documented procedure and post it at the bench. Standardizing how you remove copper oxide before welding turns lucky joints into repeatable ones. Log the method against each joint, and porosity or lack-of-fusion defects drop because every weld starts from the same clean baseline.
See also
How to Remove Rust from Metal: 11 Different Methods
The Ultimate Guide to Parameter Requirements for Fiber Laser Cleaning
What Is a Pulse Laser Cleaning Machine and How Does It Work
Shielding Gas: Nitrogen vs. Argon in Laser Welding
4 Forces That Shape Every Weld Pool (And How to Read Them)