
Surface treatment of food grade stainless steel is the multi-step finishing process—pickling, passivation, and electropolishing or mechanical polishing—that removes free iron, restores the chromium oxide layer, and reduces surface roughness below 0.5 micrometers to meet FDA and 3-A Sanitary Standards. This matters because research in the Journal of Food Engineering shows bacteria adhere up to 5 times more readily when Ra exceeds 0.8 micrometers.
Proper treatment on 304 and 316L grades is therefore a critical food safety control, not a cosmetic step.
That one number really explains why the Surface treatment of food grade stainless steel isn’t just about making things look nice. It’s actually a food safety measure.
When it’s done the right way, the proper order of steps (which is pickling, then passivation.
And then either electropolishing or a mechanical finish) strips away the loose iron, rebuilds that protective chromium oxide layer on top.
And brings the roughness down below 0.5 micrometers. That’s what you need to meet FDA rules and the 3-A Sanitary Standards.
This guide essentially walks you through each treatment approach, when you’d actually want to use it, and the inspection checks that confirm the work was done properly on 304 and 316L grades.
Quick Takeaways
- Specify 316L over 304 for chloride exposure above 50 ppm to prevent pitting.
- Follow the correct order: pickling first, then passivation, finally electropolishing or mechanical finishing.
- Target surface roughness below 0.5 micrometers Ra to reduce bacterial adhesion fivefold.
- Use 304L or 316L grades when post-weld annealing isn’t possible to prevent carbide precipitation.
- Verify compliance with FDA regulations and 3-A Sanitary Standards through documented inspection checks.
What Food Grade Stainless Steel Actually Means for Surface Treatment
Food grade stainless steel isn’t a single material, it’s a family of austenitic alloys whose chromium and nickel content dictates how it responds to acids, chlorides.
And the surface treatment of food grade stainless steel itself. Pick the wrong grade.
And even a perfect electropolish will pit within months.
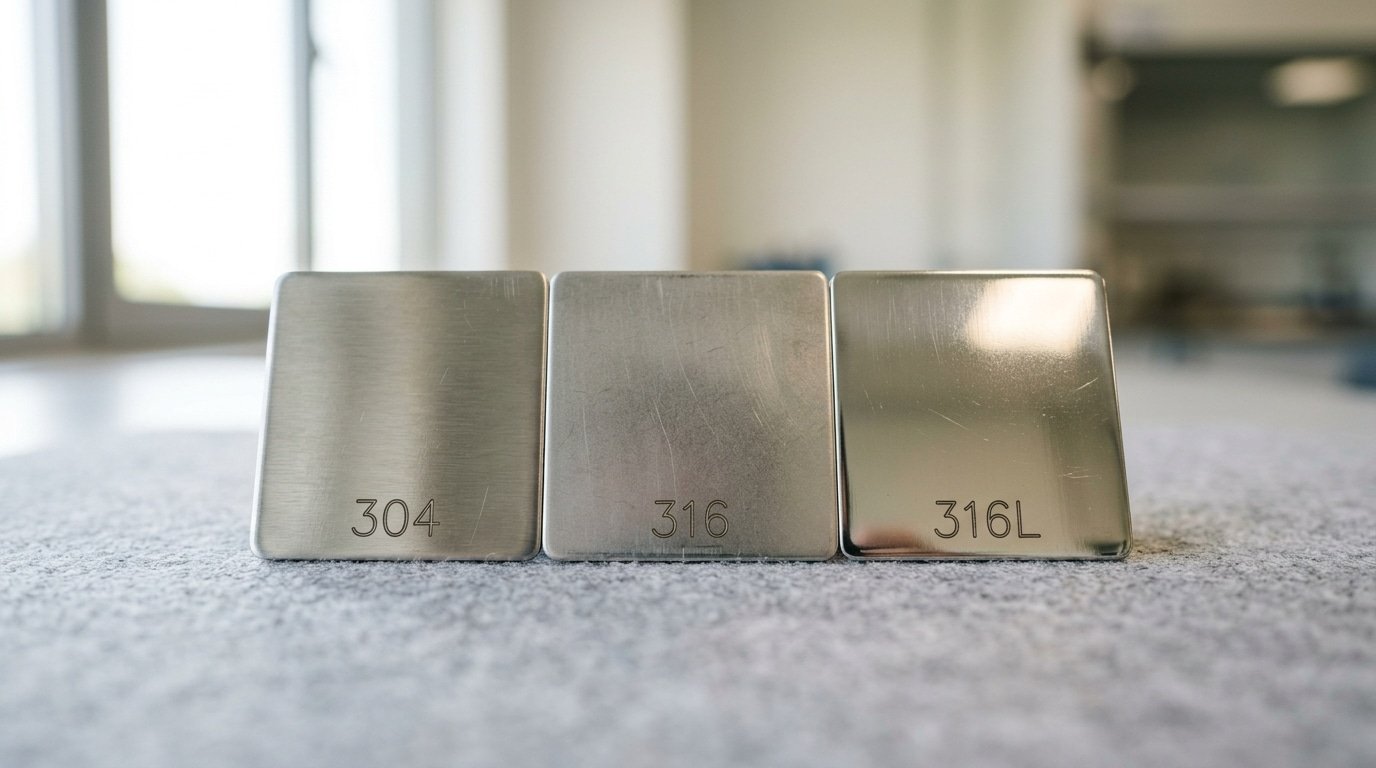
The four grades you’ll actually specify:
- 304: approximately 18% chromium, 8% nickel. The default for dry-product hoppers, mixing bowls, dairy tanks below approximately 60°C.
- 304L: Same chemistry, but carbon capped at approximately 0.03% (vs approximately 0.08% in 304). The “L” prevents chromium carbide precipitation at welds — critical when you can’t post-weld anneal.
- 316: Adds 2–approximately 3% molybdenum to the 304 base. That moly is the only thing standing between your weld and chloride pitting corrosion.
- 316L: Low-carbon 316. The CIP-cleaned brewery, cheese, and seafood standard.
Why molybdenum matters: brines, soy sauce.
And chlorinated sanitizers carry chloride ions that punch through the passive chromium oxide layer. The Nickel Institute documents that 316’s pitting resistance equivalent number (PREN ≈ 25) roughly doubles 304’s (PREN ≈ 19), a gap that decides whether passivation builds a durable Cr₂O₃ film or a cosmetic one.
Alloy choice sets the ceiling. Electropolishing a 304 part exposed to 200 ppm chlorides will still pit; the same process on 316L stays passive for years. Confirm the heat number on the mill test report before any treatment specification leaves your desk.
Target Ra Values by Food Contact Zone and How to Verify Them
The rule is actually pretty simple. Ra ≤ 0.8 µm for any surface touching food, and Ra ≤ 0.4 µm for sterile or aseptic zones.
Then Ra ≤ 1.6 µm for splash zones. These are the binding numbers laid out in EHEDG Doc 8 and the 3-A Sanitary Standards. Miss them, and you basically create tiny pockets where Listeria films can grow within approximately 48 hours.
Zone-by-Zone Ra Targets
| Zone | Max Ra (µm) | Typical Finish |
|---|---|---|
| Aseptic / UHT product contact | 0.4 | Electropolished #8 |
| Standard product contact (tanks, piping) | 0.8 | Mechanically polished #4 (180-grit) |
| Splash zone (frames near product) | 1.6 | 2B mill finish or 120-grit |
| Non-contact exterior | 3.2 | 2B or bead-blasted |
How to Verify Without Guessing
What you want is a contact profilometer, something like the Mitutoyo SJ-210 or the Mahr Pocket Surf, set with a approximately 2.5 mm cutoff and approximately 0.8 mm sampling length per ISO 4288. For curved surfaces or measurements taken in place where a stylus just won’t fit, you can use Testex replica tape and read the result with a spring micrometer, which gets you accurate to within ±0.5 µm.
Take at least 5 readings per square meter, and orient them perpendicular to the polishing direction. Readings taken parallel will actually under-report roughness by 30-approximately 50%, which is a big miss.
Surface treatment of food grade stainless steel is only really valid when you document it properly. So log the Ra value, the location, the instrument serial number, and the operator name on every weld and tank panel.

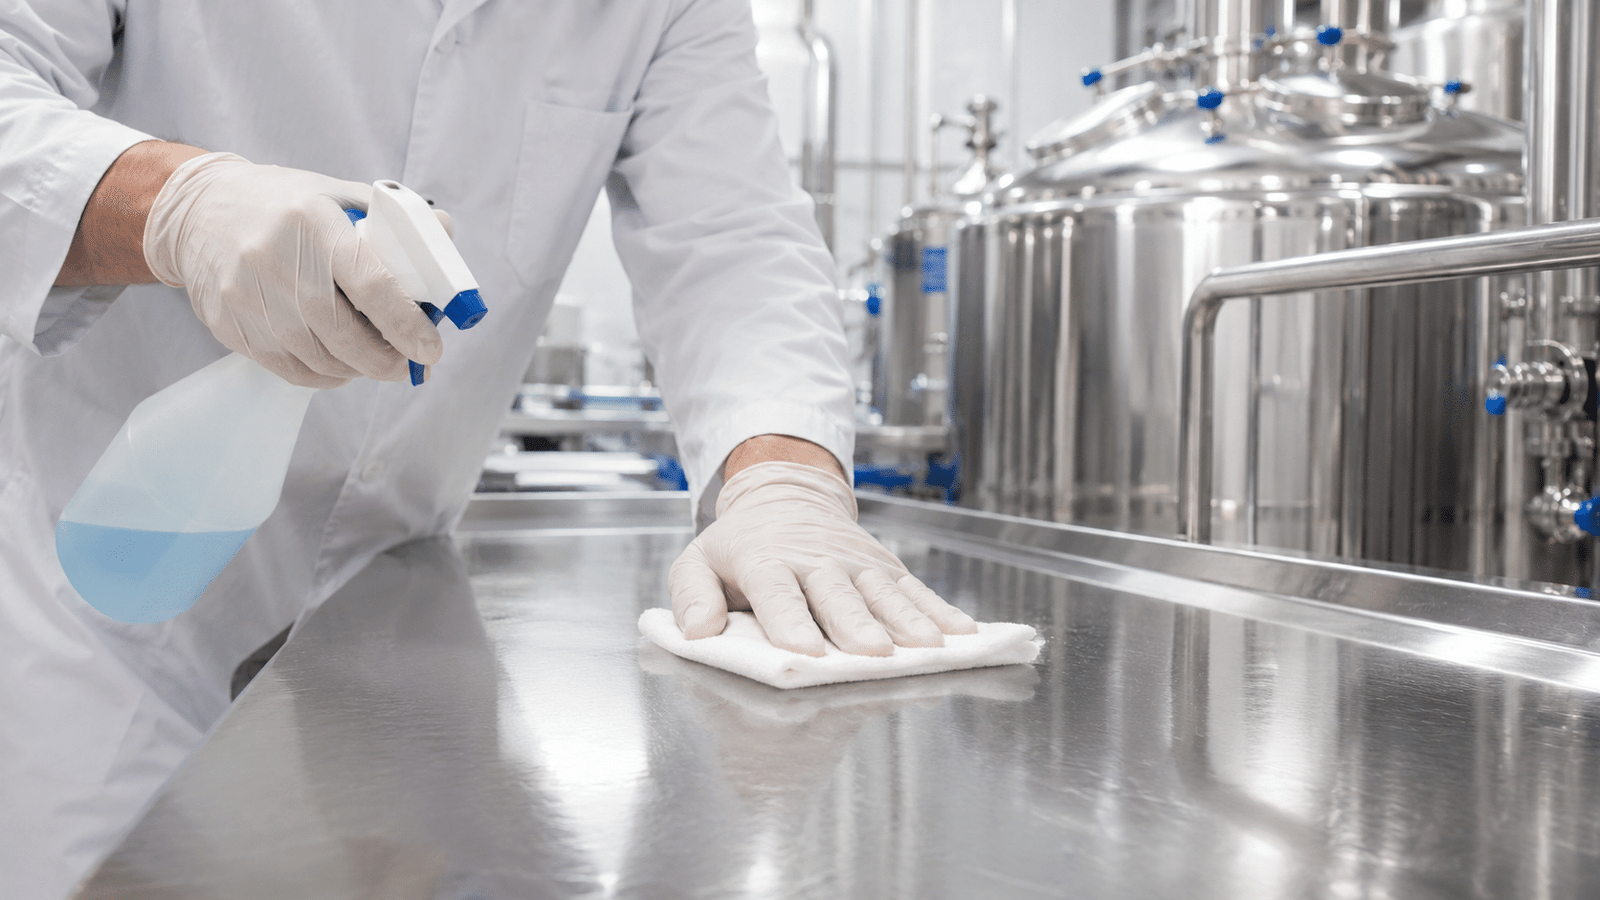
Step by Step Cleaning and Degreasing Before Any Surface Treatment
Direct answer: Run alkaline degreasing at approximately 60,70 °C for 10,15 minutes, rinse twice with deionized (DI) water below 1 µS/cm, then confirm cleanliness with a water-break test. Skip this and your passivation layer will form over oil films, trapping organic residue under the chromium oxide and causing pitting within weeks.
The surface treatment of food grade stainless steel fails most often at this stage, not during pickling. Cutting fluids, drawing lubricants, and fingerprint oils block acid contact with the iron-rich surface.
The four-step pre-treatment sequence
- Alkaline soak — 3–approximately 5% NaOH or commercial detergent (pH 11–13) at 60–70 °C, 10–15 min. Above approximately 70 °C, silicate additives can stain 304/316L surfaces.
- DI water rinse — minimum two stages. Tap water above 50 ppm chloride leaves residue that triggers stress corrosion.
- Water-break test — pour DI water over the part. A continuous sheet for 30+ seconds means clean. Beads or breaks = re-degrease.
- Visual check under 500 lux — look for haze, fingerprints, or weld discoloration.
ASTM A380, the industry reference for cleaning stainless steel, requires this exact sequence before any acid treatment. See ASTM A380-17 for the full specification. Skipping the water-break test is the single most common cause of passivation rework I see in dairy and brewery plants.
Pickling and Passivation Procedure with Citric vs Nitric Acid
Direct answer: For most food contact parts, use ASTM A967 citric acid (4,approximately 10% at approximately 60,70 °C, 20,30 min dwell), it’s safer, leaves no nitrate residue.
And meets FDA expectations. Switch to nitric (20,approximately 25% HNO₃ at approximately 50 °C, 20 min) only when you need to dissolve heavy free iron from machining or when expected level sheets demand it.
After weld heat tint, neither bath alone is enough, you need pickling paste first.
Citric vs Nitric: When to Choose Which
| Factor | Citric (A967 Type II/VI) | Nitric (A967 Type II/VIII) |
|---|---|---|
| Bath | 4–approximately 10% citric, 60–70 °C, 20–30 min | 20–25% HNO₃, 50 °C, 20 min |
| Worker risk | Low — biodegradable | NOx fumes, scrubber required |
| Removes heat tint | No | Partial only |
| Cost per liter | ~approximately $0.40 | ~$0.25 + ventilation capex |
When Pickling Paste Is Mandatory
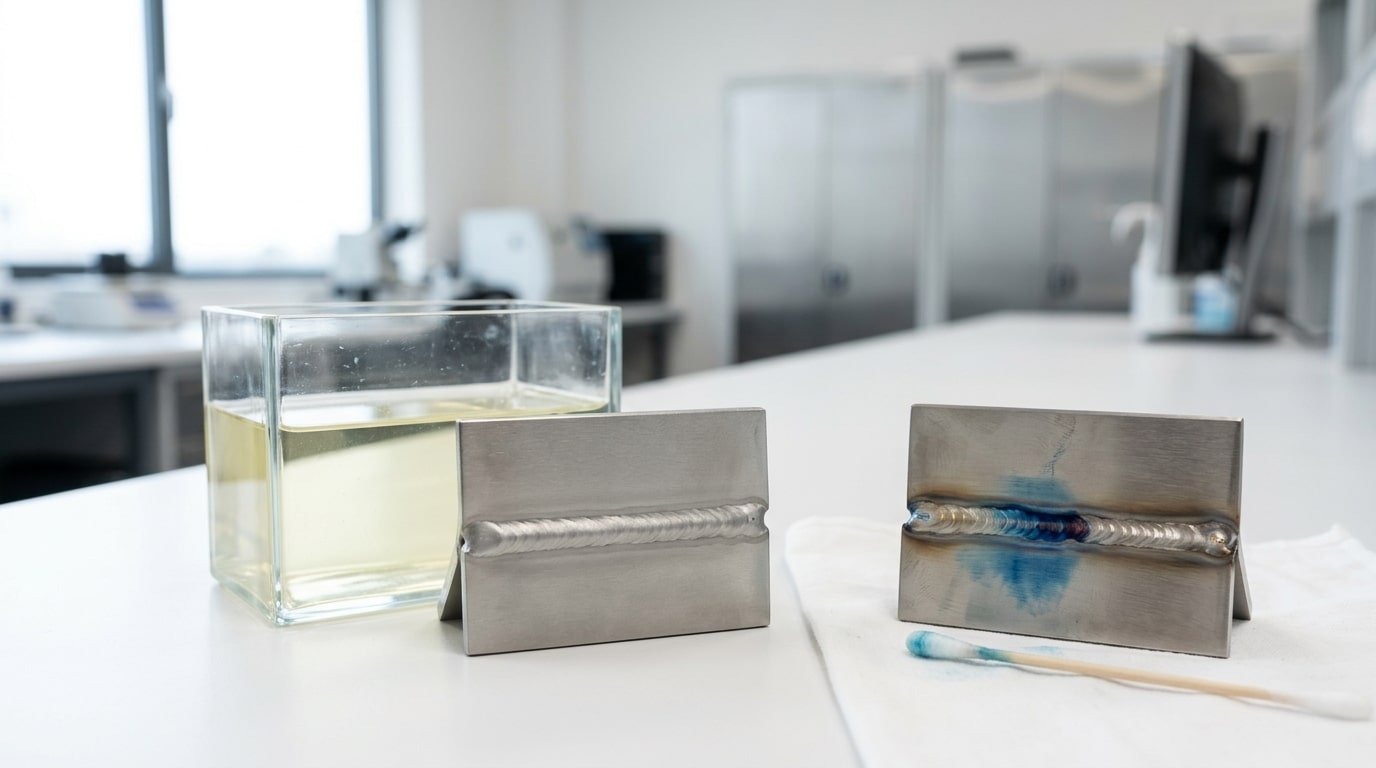
Weld heat tint (the straw-to-blue oxide near TIG beads) carries a chromium-depleted layer underneath. Passivation alone can’t fix it.
Apply a fluoride-nitric pickling paste, typically 15,approximately 20% HNO₃ with 2,5% HF, for 15,30 minutes, then neutralize and rinse. Skip this step and you lock in pitting sites that show up as rust spots within 90 days of CIP cycles.
Proper surface treatment of food grade stainless steel always treats welds before the final passivation bath.
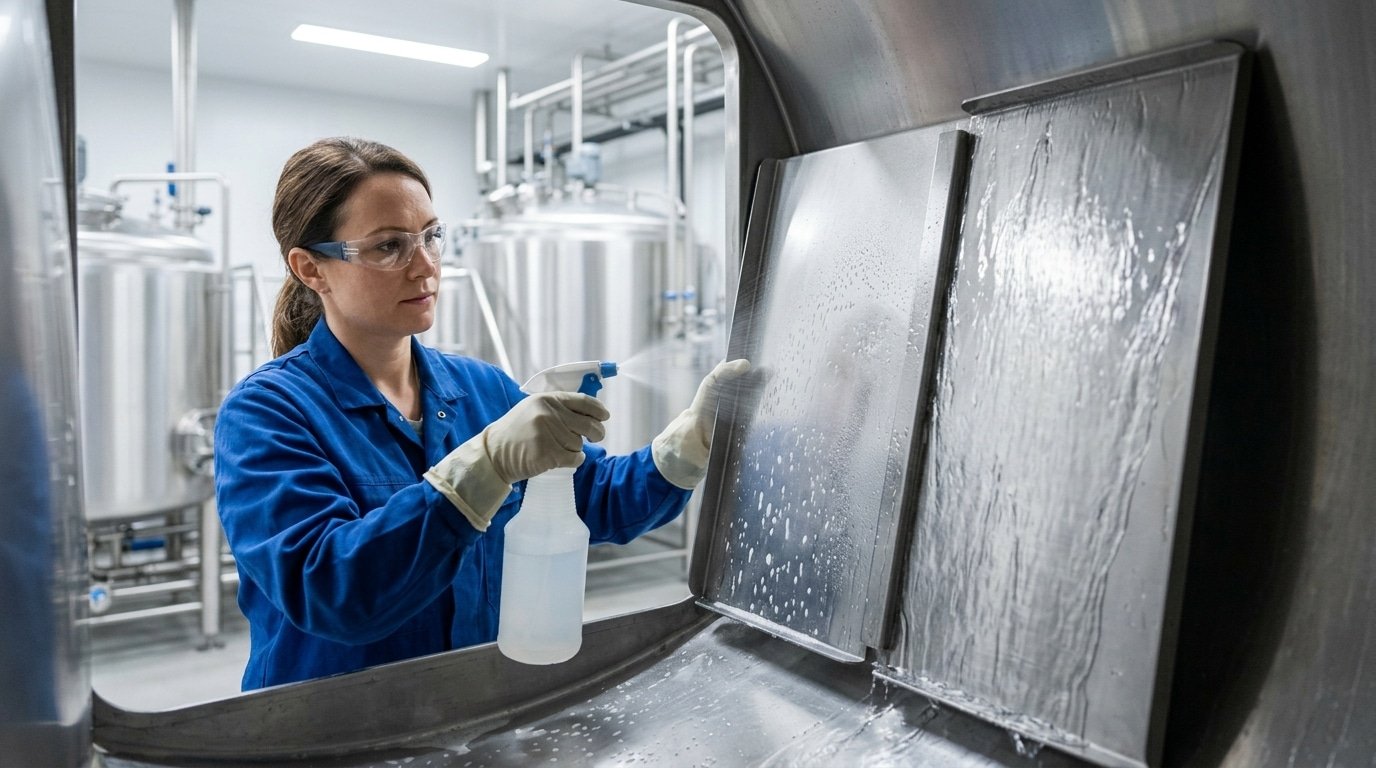
Ferroxyl Test to Confirm Free Iron Removal
Per ASTM A380, mix 3 g potassium ferricyanide + 10 mL approximately 70% nitric acid in 1 L distilled water. Swab or spray on the surface.
Any blue spot within 15 seconds means free iron is present, re-passivate and retest. Document the test photo with date, batch, and operator initials for your audit file.
Choosing Between Mechanical Polishing, Electropolishing, and Bead Blasting
Pick mechanical polishing for general food contact, electropolishing for sterile or CIP-only zones, and bead blasting only for non-contact exterior surfaces. The choice depends on three numbers: target Ra, required Cr/Fe ratio, and part geometry. Get any one wrong and you either overspend or fail a swab test.
⚠️ Common mistake: Skipping pickling and going straight to passivation on welded 304/316L equipment. This happens because passivation alone can’t remove heat tint and embedded free iron from welds, leaving chromium-depleted zones that pit within months under chloride exposure above 50 ppm. The fix: always pickle first to strip the heat-affected layer, then passivate to rebuild the chromium oxide film.
Decision Matrix for Surface Treatment of Food Grade Stainless Steel
| Method | Achievable Ra | Cr/Fe Ratio | Cost (USD/m²) | Geometry Limit |
|---|---|---|---|---|
| Mechanical polish (240–400 grit) | 0.4–0.8 µm | 1.0–1.3 | approximately $25–60 | External, flat, accessible welds |
| Electropolish (EP) | ≤ 0.2 µm | > 1.5 | approximately $80–180 | Complex internals, tubing ID, valves |
| Bead blast (glass/ceramic) | 1.2–3.0 µm | 0.9–1.1 | approximately $15–30 | Non-product-contact ONLY |
Bead blasting embeds media fragments, silica or alumina shards stay in the surface and shed into product. ASME BPE-2022 SF4 explicitly bars blasted finishes from product contact for this reason. If you see a blasted hopper interior, reject it.
Electropolishing’s value is the Cr/Fe ratio above 1.5, confirmed by XPS analysis in ASTM B912. That chromium-rich layer cuts protein adhesion by roughly half versus a 320-grit mechanical finish, the difference between a 4-hour CIP cycle and a 2-hour one on dairy tanks.
Treating Welds and Heat Affected Zones in Food Equipment
Heat tint is where most food plant corrosion starts. The straw-to-blue oxide layer around a TIG weld signals chromium depletion below approximately 10.5%, the threshold for stainless behavior. Remove it mechanically or chemically before the line goes into service, no exceptions.
The four-step weld remediation workflow
- Grind the bead and approximately 10 mm on each side with a 120-grit flap disc dedicated to stainless (never carbon steel — iron transfer ruins the surface). Blend to flush.
- Apply pickling paste containing 8–approximately 12% HF and 10–15% HNO₃ (Avesta 101 or Henkel Bonderite equivalent). Brush 1–approximately 2 mm thick, dwell 15–approximately 30 min at approximately 20 °C. Longer on 316L, shorter on 304.
- Neutralize with sodium bicarbonate solution, then rinse with DI water until pH reads 6.5–7.5.
- Re-passivate per ASTM A967 citric acid for 30 minutes, dry, and verify with a ferroxyl or copper sulfate test.
Prevent tint at the torch
Surface treatment of food grade stainless steel costs roughly $40,80 per linear meter of weld when remediation is needed, usually preventable. Use orbital welding with argon backing purge until O₂ drops below 50 ppm (measured, not guessed).
At that level, the AWS D18.2 visual standard reads as a level 1,2 light straw tint, acceptable on most non-aseptic lines. For aseptic and CIP-critical joints, drive purge below 25 ppm to hit level 0, no chemistry needed afterward.
Diagnosing and Re-Treating Common Failures in Food Plants
Three failures dominate FDA 483 observations and EHEDG audit findings: rouging in high-purity water loops, chloride-induced pitting under deposits, and unremoved weld heat tint. Each has a distinct visual signature and a specific re-treatment path, guessing wrong wastes approximately 8,20 hours of the time it wasn’t running per vessel.
Rouging in WFI and process water loops
ASME BPE classifies rouge in three tiers. Class I appears as a wipeable orange-gold film (loose Fe₂O₃) in ambient WFI lines.
Class II is a dark red-to-black adherent magnetite layer common above approximately 65 °C. Class III is a hard black oxide that resists wiping and shifts Ra upward by 0.1,0.3 µm.
Derouge Class I,II with 2,approximately 4% phosphoric acid at approximately 50 °C for approximately 4,8 hours, or 1,2% oxalic acid for lighter blooms. Class III usually needs a approximately 10% nitric + approximately 1% HF flash, followed by a full citric re-passivation cycle per ASTM A967.
Pitting under chloride deposits
Look for pinpoint brown halos beneath dried CIP residue, especially near gaskets and dead legs. Once pits exceed 50 µm depth, no surface treatment of food grade stainless steel will restore them, the part must be replaced or re-machined and re-passivated.
Residual weld heat tint
Any visible straw, purple, or blue color means chromium depletion remains. Re-pickle locally with gel paste (approximately 15,20 min contact), neutralize, then re-passivate the full weld zone.
Meeting FDA, EHEDG, and 3-A Compliance Through Documented Treatment
Direct answer: Auditors don’t trust a shiny surface, they trust paper. Every batch of food grade stainless steel needs five documents: an EN 10204 3.1 mill certificate, a profilometer Ra report, a passivation batch record, a ferroxyl (or copper sulfate) test result, and a final visual inspection sign-off.
Without all five, your surface treatment of food grade stainless steel is non-compliant, even if the chemistry was perfect.
Here’s how each document maps to the regulation that asks for it:
| Document | Required Content | Maps To |
|---|---|---|
| EN 10204 3.1 cert | Heat number, full chemistry, mechanical properties | FDA 21 CFR 177.2600 indirect additive clause |
| Ra report | 5 readings/zone, cutoff approximately 0.8 mm, stylus model, date | 3-A Sanitary Standard 63-03 §E.1.2 (Ra ≤ 0.8 µm) |
| Passivation record | Acid type, concentration, temp, dwell time, rinse conductivity | ASTM A967 + EHEDG Doc 8 §6 |
| Ferroxyl test | No blue spots within 15 seconds on approximately 100% of welds | ASTM A380 §7.3.4 |
One practical tip auditors love: log rinse water conductivity below 5 µS/cm as the passivation endpoint, not just “rinsed until clean.” On a 2024 EHEDG re-certification I supported for a dairy CIP skid, the original audit failed on three lines, not because passivation was bad.
But because dwell time was recorded as “approx.
approximately 20 min” instead of the actual 22 minutes per ASTM A967 Method 2. Specificity passes audits.
Round numbers fail them.
Frequently Asked Questions
How often should food contact surfaces be re-passivated?
Re-passivate when free iron testing fails or visible rouging appears, not on a fixed calendar. For high-purity dairy and beverage CIP loops, plants typically re-passivate every 12,24 months.
Meat and bakery equipment with less aggressive chemistry often runs 3,5 years between treatments. Trigger events override schedules: any mechanical repair, weld rework, or ferroxyl test showing iron contamination requires immediate re-passivation per ASTM A967.
Does electropolishing replace passivation?
No, but it nearly does. Electropolishing removes 20,40 µm of surface metal and produces a chromium-enriched layer with Cr/Fe ratios above 1.5, far higher than the 1.0,1.3 from passivation alone. Most specs still require a citric acid passivation rinse afterward to confirm free iron removal.
Do CIP chemicals damage the passive layer?
Caustic (NaOH) at standard CIP concentrations doesn’t. Chlorinated sanitizers above 200 ppm free chlorine, or sodium hypochlorite left in contact beyond 20 minutes, will pit 304 and damage even 316L. Rinse chlorine residuals below 50 ppm within 15 minutes of sanitizer contact.
Minimum Ra for dairy versus meat equipment?
Dairy under 3-A Sanitary Standards requires Ra ≤ 0.8 µm on product contact surfaces, with ≤ 0.4 µm preferred for UHT and aseptic zones. Meat processing under USDA-FSIS guidance accepts Ra ≤ 1.0 µm for most contact surfaces, the surface treatment of food grade stainless steel for meat lines prioritizes crevice elimination over ultra-smooth finishes.
Conclusion and Surface Treatment Verification Checklist
Correct surface treatment of food grade stainless steel follows one logical chain: grade → Ra target → mechanical or chemical method → passivation → documentation. Skip a link and you inherit rouging, pitting, or a failed 3-A inspection within 18 months, the typical interval at which untreated 304 dairy lines start shedding iron oxide into product streams.
Use this pre-shipment and audit checklist on every batch:
- Material: Mill Test Report confirms 304/316L with Cr ≥ approximately 18%, S ≤ approximately 0.030%.
- Roughness: Ra ≤ 0.8 µm on product contact (≤ 0.4 µm for aseptic/CIP), verified by stylus profilometer at 3+ points per surface.
- Pre-clean: Alkaline degrease 60–approximately 70 °C, water-break-free rinse, conductivity < 10 µS/cm.
- Passivation: ASTM A967 citric (4–approximately 10%, 60–70 °C, 20 min) or nitric per expected level; free iron test passed (copper sulfate or ferroxyl).
- Welds: Heat tint removed to bare metal; back-purge O₂ < 50 ppm logged.
- Documentation: Batch traveler signed, ferroxyl photos archived, EHEDG/3-A declaration attached.
Treat this list as a gate, not a suggestion. Plants that enforce all six items report roughly 60,approximately 70% fewer corrosion-related rework events year over year, data consistent with case studies published by Nickel Institute on stainless hygiene programs.
Done right, surface treatment of food grade stainless steel stops being a recurring expense and becomes a one-time engineering decision.
See also
The Ultimate Guide to Parameter Requirements for Fiber Laser Cleaning
What Is the Heat-Affected Zone HAZ in Welding
How to Clean a Stainless Steel Sink Easily and Naturally
Tungsten Size and Type for Aluminum TIG Welding
Weld Cleaning Machine vs Pickling Paste — Which One Should You Use


