

Consumables for Laser Welding Machines Every Beginner Should Know
The everyday consumables for a handheld laser welding machine are protective windows, welding nozzle tips, filler wire, shielding gas and wire-path wear parts. Water-cooled systems may also require manufacturer-specified coolant and filters. Focus lenses, seals and feeder components are usually replacement parts—not items to discard on a fixed schedule.
Inspect consumables by condition and follow the exact machine manual. A dirty protective window, damaged nozzle or unstable wire path can imitate a parameter problem, reduce weld consistency and expose more expensive optics to contamination. Keep a model-specific starter kit, record failures and never substitute an unverified part merely because it fits.
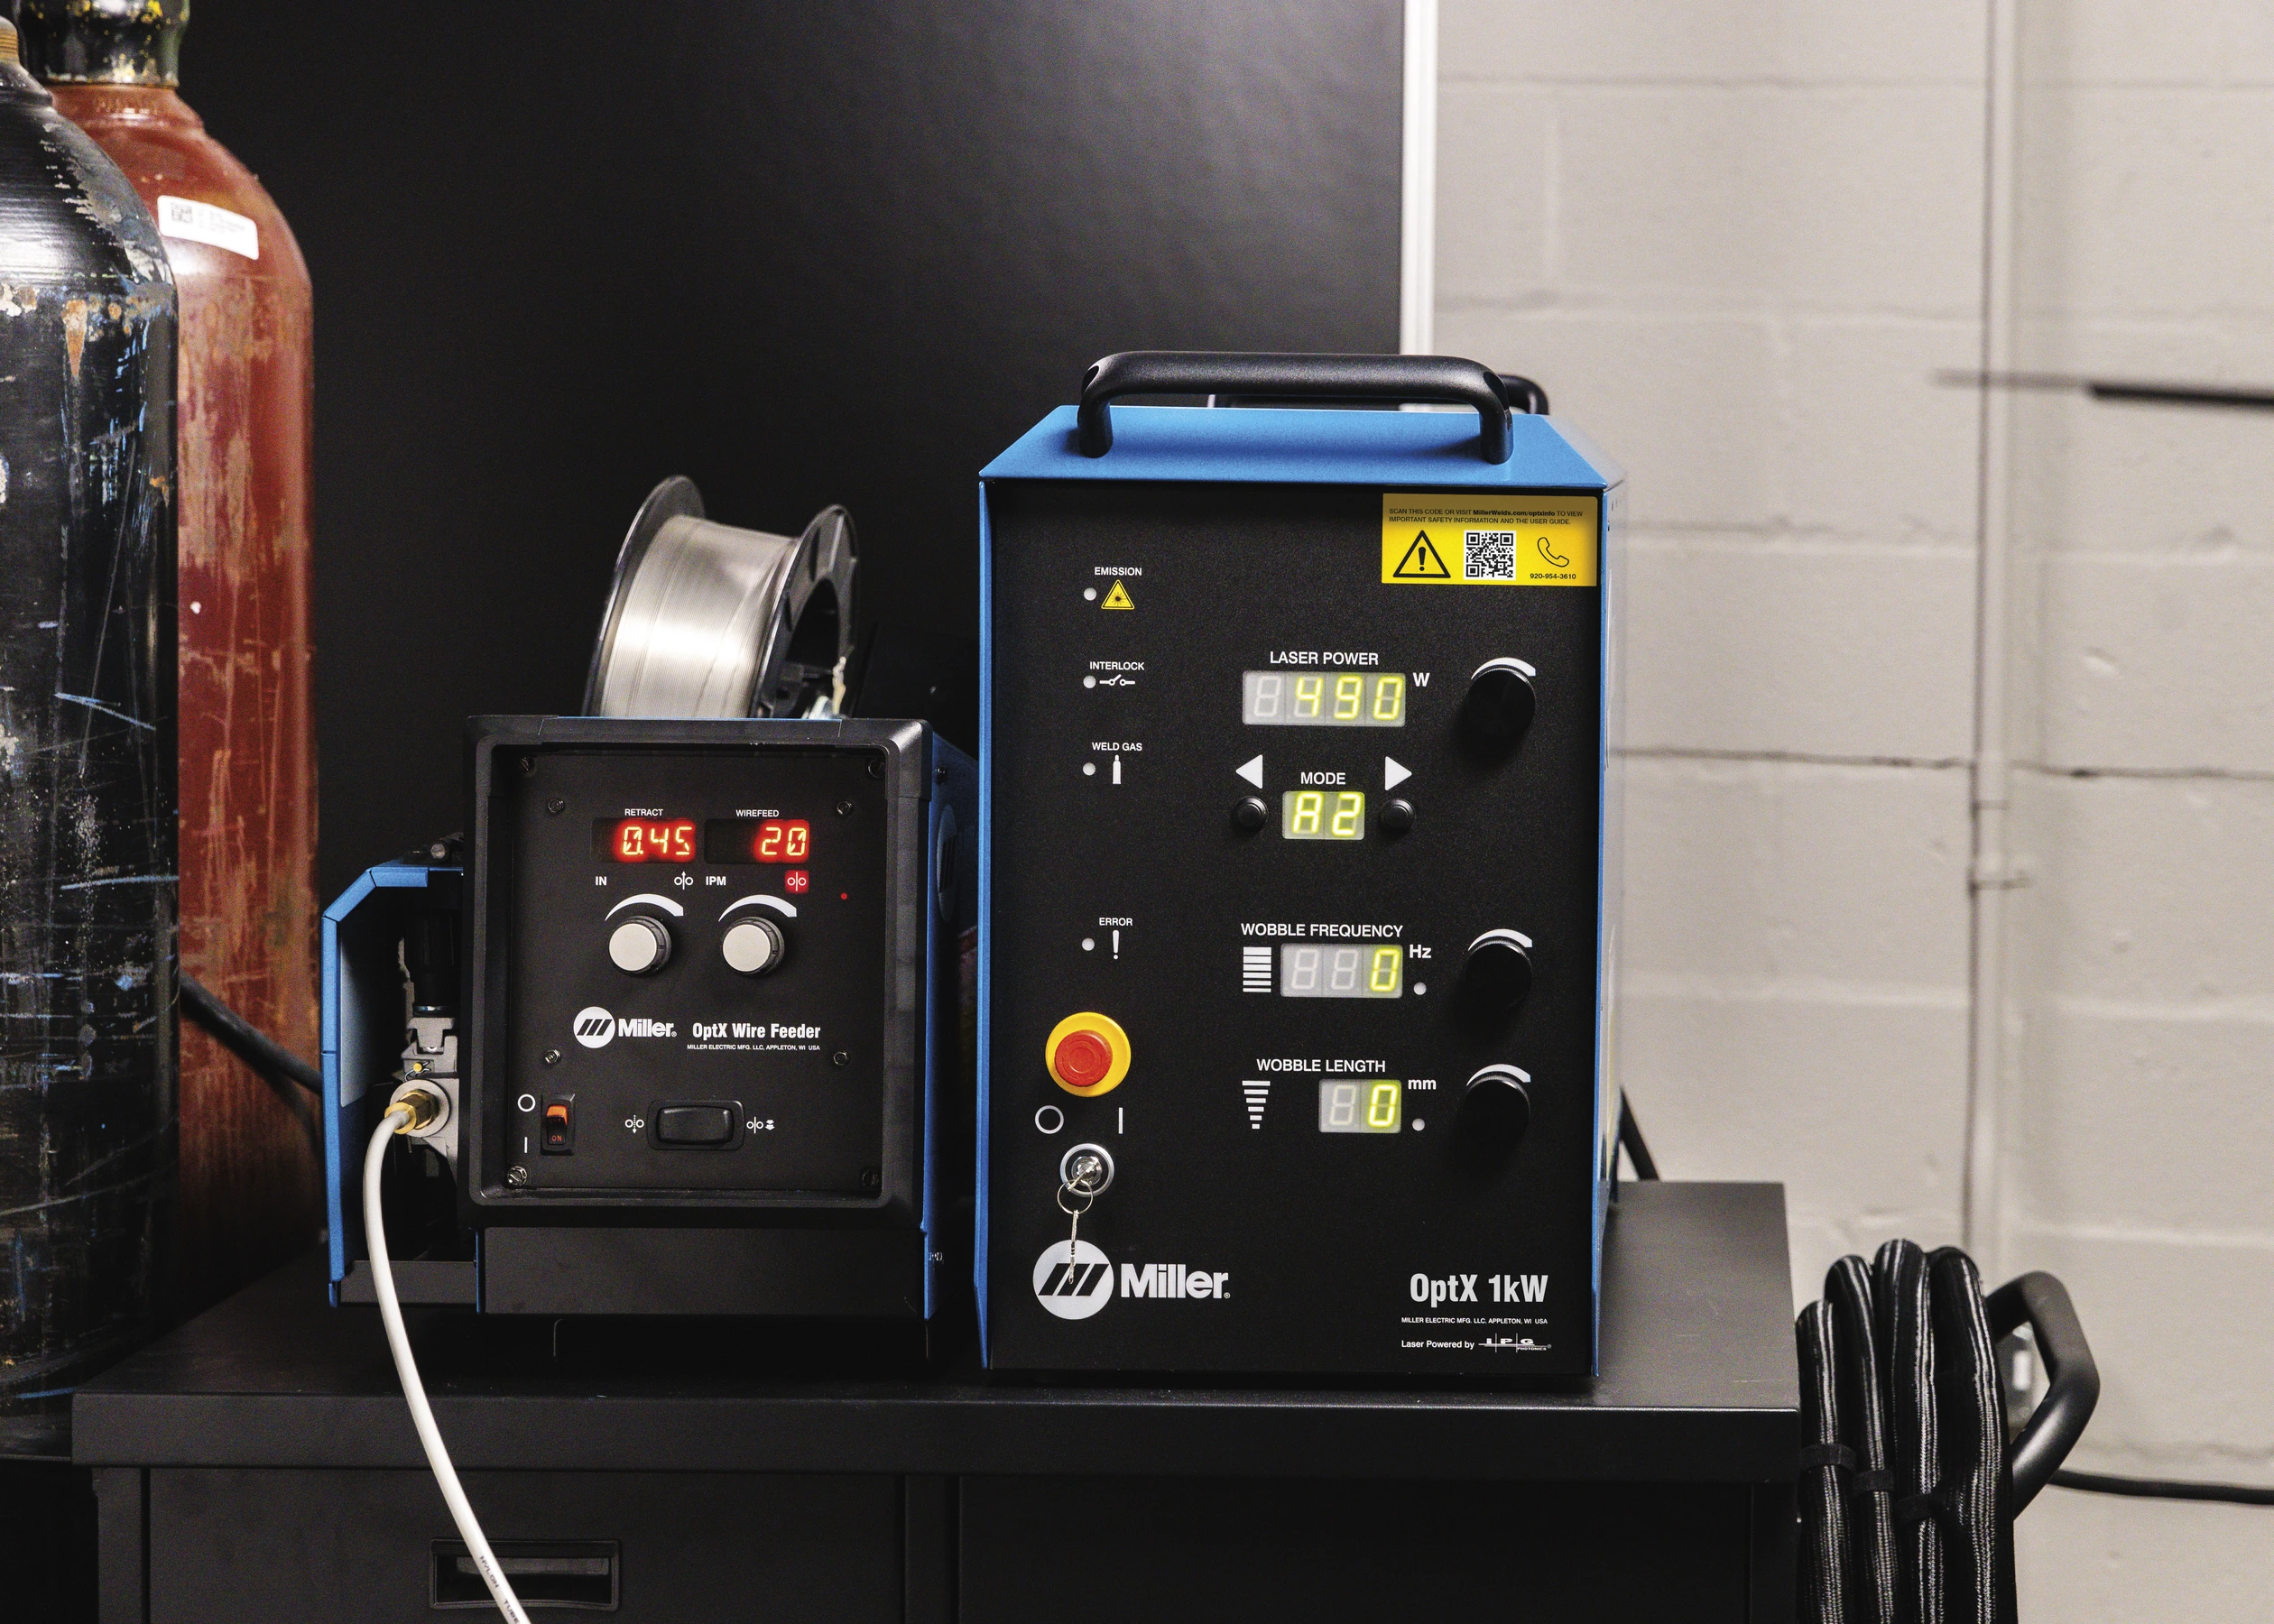
Application image: Miller OptX handheld laser welding system.
Protect the optics, stabilize the wire path and document every replacement.
Beginners often buy extra nozzles but forget protective windows, correct drive rolls, contact tips, seals and cleaning supplies. Build inventory from the manufacturer’s bill of materials and your actual failure history. Do not use a generic “replace every X hours” rule where the manual specifies inspection by condition.
They form a sacrificial barrier between spatter and the more expensive focusing optics. Inspect before contamination becomes thermal damage.
Use the geometry specified for fusion, wire, corner, cleaning or cutting modes. Damage can affect standoff, contact sensing and gas delivery.
Wire alloy, diameter, drive rolls, liner, guide tube and contact tip must work as one system for stable feeding.
Eyewear and helmets require inspection, but engineering controls, an interlocked controlled area and ventilation remain primary protections.
Consumable, maintenance part or PPE: they are not the same.
Accurate categories make purchasing and maintenance easier. A consumable is expected to be used or replaced through normal production. A maintenance part is replaced by condition or service need. PPE is personal protection and must not be treated as a substitute for machine and workplace safeguards.
Protective windows, nozzle tips, filler wire and shielding gas. Depending on the system, contact tips, liners, seals, coolant and filtration elements may also be regular stock items.
Focus lenses, collimating optics, feeder motors, pumps, sensors and complete torch components are not routine throwaway items. Replace them according to inspection, diagnostics and approved service procedures.
Laser eyewear, welding helmets, protective clothing, barriers and interlocks are safety controls. They have inspection and replacement criteria, but calling them “consumables” can hide their more important compliance role.
Protective windows and nozzles that look similar may differ in coating, dimensions, optical quality, contact points or power rating. Miller’s OptX manual, for example, warns against using unapproved protective windows and nozzle tips that do not meet the system’s minimum requirements. Compatibility must come from the equipment documentation or supplier—not appearance.
Know what each item protects—and what failure looks like.
The table gives a planning framework. Exact part numbers, inspection method and replacement criteria must come from the manufacturer’s manual for the installed welding head, feeder and cooling system.
| Item | Primary function | Inspect for | Replace or replenish when | Common beginner mistake |
|---|---|---|---|---|
| Protective window | Sacrificial optical barrier that protects the focus-lens area from spatter, vapor and dust | Dots, haze, scratches, edge chips, discoloration, residue and abnormal heating | Cleaning cannot restore the approved optical condition, damage is visible, or the machine procedure requires replacement | Continuing to weld through a contaminated window until a more expensive lens is damaged |
| Welding nozzle tip | Establishes torch contact/standoff and supports the intended joint, gas and wire geometry | Spatter buildup, deformation, worn contact points, blocked gas path, damaged threads and poor fit | The tip no longer seats, senses, guides or delivers gas as designed | Using a fusion tip for wire welding or choosing only by opening diameter |
| Filler wire | Bridges gaps, adds deposit and may control weld chemistry | Alloy identification, diameter, rust, oxide, dirt, moisture, tangles and damaged spool | The spool is empty, contaminated, incorrectly identified or outside storage requirements | Assuming “same metal family” guarantees a suitable filler alloy |
| Contact tip / guide tube | Positions wire close to the molten pool and supports smooth delivery | Grooving, enlarged bore, burnback, deposits, poor alignment and loose mounting | Wire position or feed stability cannot be restored by correct setup and cleaning | Compensating with more feeder pressure instead of replacing a worn path component |
| Drive rolls and liner | Move and guide the selected wire without crushing, shaving or slipping | Wrong groove, wear, metal dust, scoring, kinks, contamination and excess drag | Correct tension and alignment no longer produce stable feeding | Using a V-groove setup for soft aluminum wire when the feeder specifies a different path |
| Shielding gas | Limits atmospheric interaction around the molten pool and optics/nozzle zone | Cylinder level, purity, leaks, pressure, flow stability, moisture and hose damage | Supply is low, contaminated, leaking or unsuitable for the qualified procedure | Selecting gas from a generic chart without validating the alloy and weld requirement |
| Coolant / filter | Maintains thermal control or removes contamination in systems that use these items | Correct fluid, level, conductivity/quality, debris, discoloration, pressure, flow and filter loading | The machine manual’s condition or service interval is reached | Adding tap water or an arbitrary antifreeze mixture to a water-cooled machine |
The protective window is cheap insurance for expensive optics.
The protective window sits in the welding head’s optical path and is designed to take contamination before it reaches the focus lens. It is not the same component as the focus lens. A dirty or damaged window absorbs more energy, can heat locally and may distort the delivered beam or fail suddenly.


Window life can change with material cleanliness, torch angle, spatter, gas delivery, process mode and handling. Inspect at the cadence required by the manufacturer and whenever output, beam behavior or window temperature changes. Replace by approved condition criteria—not an invented weld count.
Signs that justify stopping
New dark spots, rainbow discoloration, haze, chips, cracks, scratches in the active area, residue that approved cleaning cannot remove, an optics alarm, unusual window heating or a sudden change in weld consistency all justify stopping and inspecting before more production.
What not to do
Do not touch optical faces with bare fingers, blow debris away with your mouth, wipe with shop rags, reinstall a questionable O-ring or use household glass cleaner. Do not open the optical cavity in a dusty welding bay if the manual requires a clean environment.
Inspect or replace a protective window without adding contamination.
The following sequence reflects common manufacturer precautions, including JASIC’s published handheld-laser manual. The exact holder direction, cleaning material and service permissions must match your machine.
Make the machine safe
Stop welding, disable laser emission, follow the specified shutdown and lockout procedure, and disconnect power where the manual requires it. Allow hot components to cool. Only trained, authorized personnel should open the head.
Move to a clean work area
Prepare a dust-controlled surface, approved gloves or finger cots, optical tissues/swabs, the specified cleaning liquid, a covered tray and the correct replacement window and seal. Keep the replacement sealed until needed.
Remove and cover promptly
Open the protective-window access exactly as the manual shows. Remove the holder without touching optical faces and close or cap the head promptly so airborne dust cannot enter the open cavity.
Inspect under clean light
Check both faces and edges for particles, film, burn marks, cracks, chips and coating damage. Inspect the seal and energized/contact ring where fitted. If damage is uncertain, use a new approved part rather than testing it under full power.
Clean only as approved
Use the liquid and wiping method specified by the manufacturer. JASIC’s manual describes a cotton swab with anhydrous ethanol for its protective lens; that instruction should not be transferred automatically to a different coating or head.
Reinstall and verify
Install the window, holder and seal in the correct orientation, close the cover, verify red-light alignment and safety signals where the procedure calls for it, then make a controlled test weld before returning to production.
Choose a nozzle by joint and operating mode—not by appearance.
A handheld laser-welding nozzle can help establish contact sensing, standoff, torch angle, shielding-gas delivery and filler-wire position. The exact role varies by system. Manufacturer catalogs commonly separate fusion, wire-welding, corner, cleaning and cutting tips, and may also distinguish aluminum or power ranges.
Supports welding without filler wire. Confirm the tip’s rated power, contact geometry and compatible joint orientations.
Positions the wire relative to the beam and pool. Wire diameter, guide tube, angle and offset must be set together.
Additional contact points can help stabilize the torch on tee, lap or inside-corner joints when specified by the manufacturer.
Multi-function machines may require a different tip, lens and program. Changing the mode is a documented conversion—not merely a menu selection.
Clean or replace?
Remove loose deposits only with the approved method and without changing the contact geometry or gas orifice. Replace a tip that is bent, deeply scored, blocked, loose, cross-threaded, electrically unreliable or unable to hold the documented wire position.
Why nozzles fail early
Common causes include torch angle that reflects energy back toward the head, excessive spatter, wire striking the tip, unstable contact with the workpiece, wrong standoff, incorrect process parameters and using a nozzle outside its intended mode.
Stable filler delivery requires more than the correct spool.
Wire welding adds a complete mechanical path to the laser process: spool, drive rolls, inlet guide, liner or conduit, feed tube, contact/guide tip and final alignment with the laser. A fault anywhere in that chain can appear as porosity, underfill, irregular bead shape, wire stubbing or inconsistent travel.

Wire alloy and diameter, drive-roll groove, tension, liner, guide tube and final tip must be compatible and aligned.
Wire-feeder image: JASIC handheld laser welding system.
Select filler from the welding requirement
Match the filler classification to the base-metal grades, service condition and qualified procedure. “Stainless wire for stainless steel” is not specific enough. For example, the appropriate filler for a 304-series assembly may differ from a dissimilar, high-temperature or corrosion-critical joint.
Match diameter to the complete system
The source article’s “thicker plate needs thicker wire” rule is too simple. Diameter must fall within the feeder, roll, liner and tip range, while deposition rate, gap, travel speed and heat input remain controllable. Follow qualified settings.
Control contamination
Store spools dry, covered and clearly identified. Do not use rusty, oily, oxidized, kinked or mixed-alloy wire. Keep steel debris away from aluminum wire and clean the feeder before switching incompatible materials where cross-contamination matters.
Excess pressure can deform soft wire and create metal shavings; insufficient pressure can slip. If feeding is unstable, inspect spool drag, roll groove, roll alignment, liner condition, bends, tip bore, wire cleanliness and feeder synchronization before simply tightening the rolls.
Gas is a process variable, not just a cylinder purchase.
Shielding gas can influence oxidation, plume behavior, bead appearance and process stability. Argon and nitrogen are listed for many handheld systems, but that does not make them interchangeable for every alloy and acceptance requirement. Use the machine supplier’s material program and qualify the exact gas, purity, pressure, flow and delivery geometry.
Argon
Argon is widely used because it is inert, readily available and suitable for many steel, stainless, aluminum and titanium applications. It is still necessary to verify purity, flow and compatibility with the required weld metallurgy and appearance.
Nitrogen
Nitrogen is used by some handheld-laser procedures and may be listed by manufacturers for specific steels or aluminum systems. It is not correct to call it universally unsuitable for aluminum—or universally suitable for stainless. Qualification decides.
Helium or mixtures
Helium and engineered mixtures may be useful in specialized procedures, but higher cost alone does not make them better. Only use gases supported by the equipment and welding procedure, with regulators and hoses compatible with the supply.
Confirm cylinder restraint, label, remaining pressure, regulator condition, hose integrity, leak-free connections and the qualified flow/pressure at the torch.
Shielding gas protects the process zone. It does not capture laser-generated fumes. Extraction filters and prefilters are separate maintenance items selected for the actual metals and coatings.
Do not assume more gas is always the answer. Excessive flow can disturb shielding. Check surface cleanliness, leaks, nozzle damage, wire, joint fit-up and parameter stability together.
Coolant and filters depend on whether the welder is water- or air-cooled.
Do not put a universal coolant schedule into every laser welder. Air-cooled systems have no process-water loop but still require clean airflow and inspection of vents or filters. Water-cooled systems require the exact fluid quality, temperature and maintenance steps specified for the laser, welding head and chiller.
Water-cooled machine
Typical checks include coolant level, temperature, pressure/flow, leaks, water quality, condenser cleanliness and filter condition. JASIC’s published LS-15000F/LS-20000F manual specifies distilled or deionized water for that system and prohibits tap water; its monthly tasks include checking/replacing cooling water and cleaning the circuit. Other brands may specify different fluids or intervals.
Air-cooled machine
Keep intake and exhaust paths clear, maintain the required distance around vents, control dust and stay inside the rated ambient temperature. A clogged filter or dust-covered heat exchanger can reduce cooling performance even when no liquid consumable is present. Use only the cleaning and filter procedure in the manual.
Use only the type and concentration approved for the installed laser and chiller. Incorrect coolant can attack seals or metals, alter conductivity, form deposits or void warranty coverage. If the machine will be stored below freezing, follow the manufacturer’s drain or protection procedure.
Build a kit that restores production without guesswork.
The quantities below are planning categories rather than universal minimums. Set actual reorder points from lead time, shift count, contamination rate, failure history and the cost of downtime. Every package should carry the machine model and approved part number.
| Stock group | Keep available | Why it matters | Inventory control |
|---|---|---|---|
| Optical protection | Approved protective windows, seals/O-rings, holder tool, dust caps and specified optical-cleaning supplies | A damaged window can stop production and expose the focus lens | Keep sealed, lot-labeled and separated from used parts; record every installation |
| Nozzle set | Each tip used by released fusion, wire, corner or auxiliary programs plus protective caps | Operators should not improvise with the wrong geometry when one tip is damaged | Shadow-board or labeled compartments; inspect threads and contact points before return to stock |
| Wire path | Correct contact/guide tips, liners or conduits, drive-roll sets, wire tubes and approved fasteners | These parts isolate feeding faults without replacing the entire feeder | Label by alloy family and diameter; do not mix aluminum and steel path components |
| Filler and gas | Qualified filler classifications/diameters and enough gas for scheduled work plus changeover margin | A production job should not stop because one spool or cylinder reaches its end | Use alloy traceability, dry storage, first-in/first-out and cylinder control |
| Cooling / extraction | Approved coolant, chiller filters, air filters, extraction prefilters/main filters as applicable | Thermal and fume-control systems need their own maintenance supply chain | Use differential-pressure or service indicators and manual-defined fluid records |
| Qualified spare parts | Focus lens or cell, torch cover, work-sense/contact components and critical fuses only when authorized | Long-lead parts can justify local stock even though they are not routine consumables | Separate from consumables and restrict replacement to trained personnel |
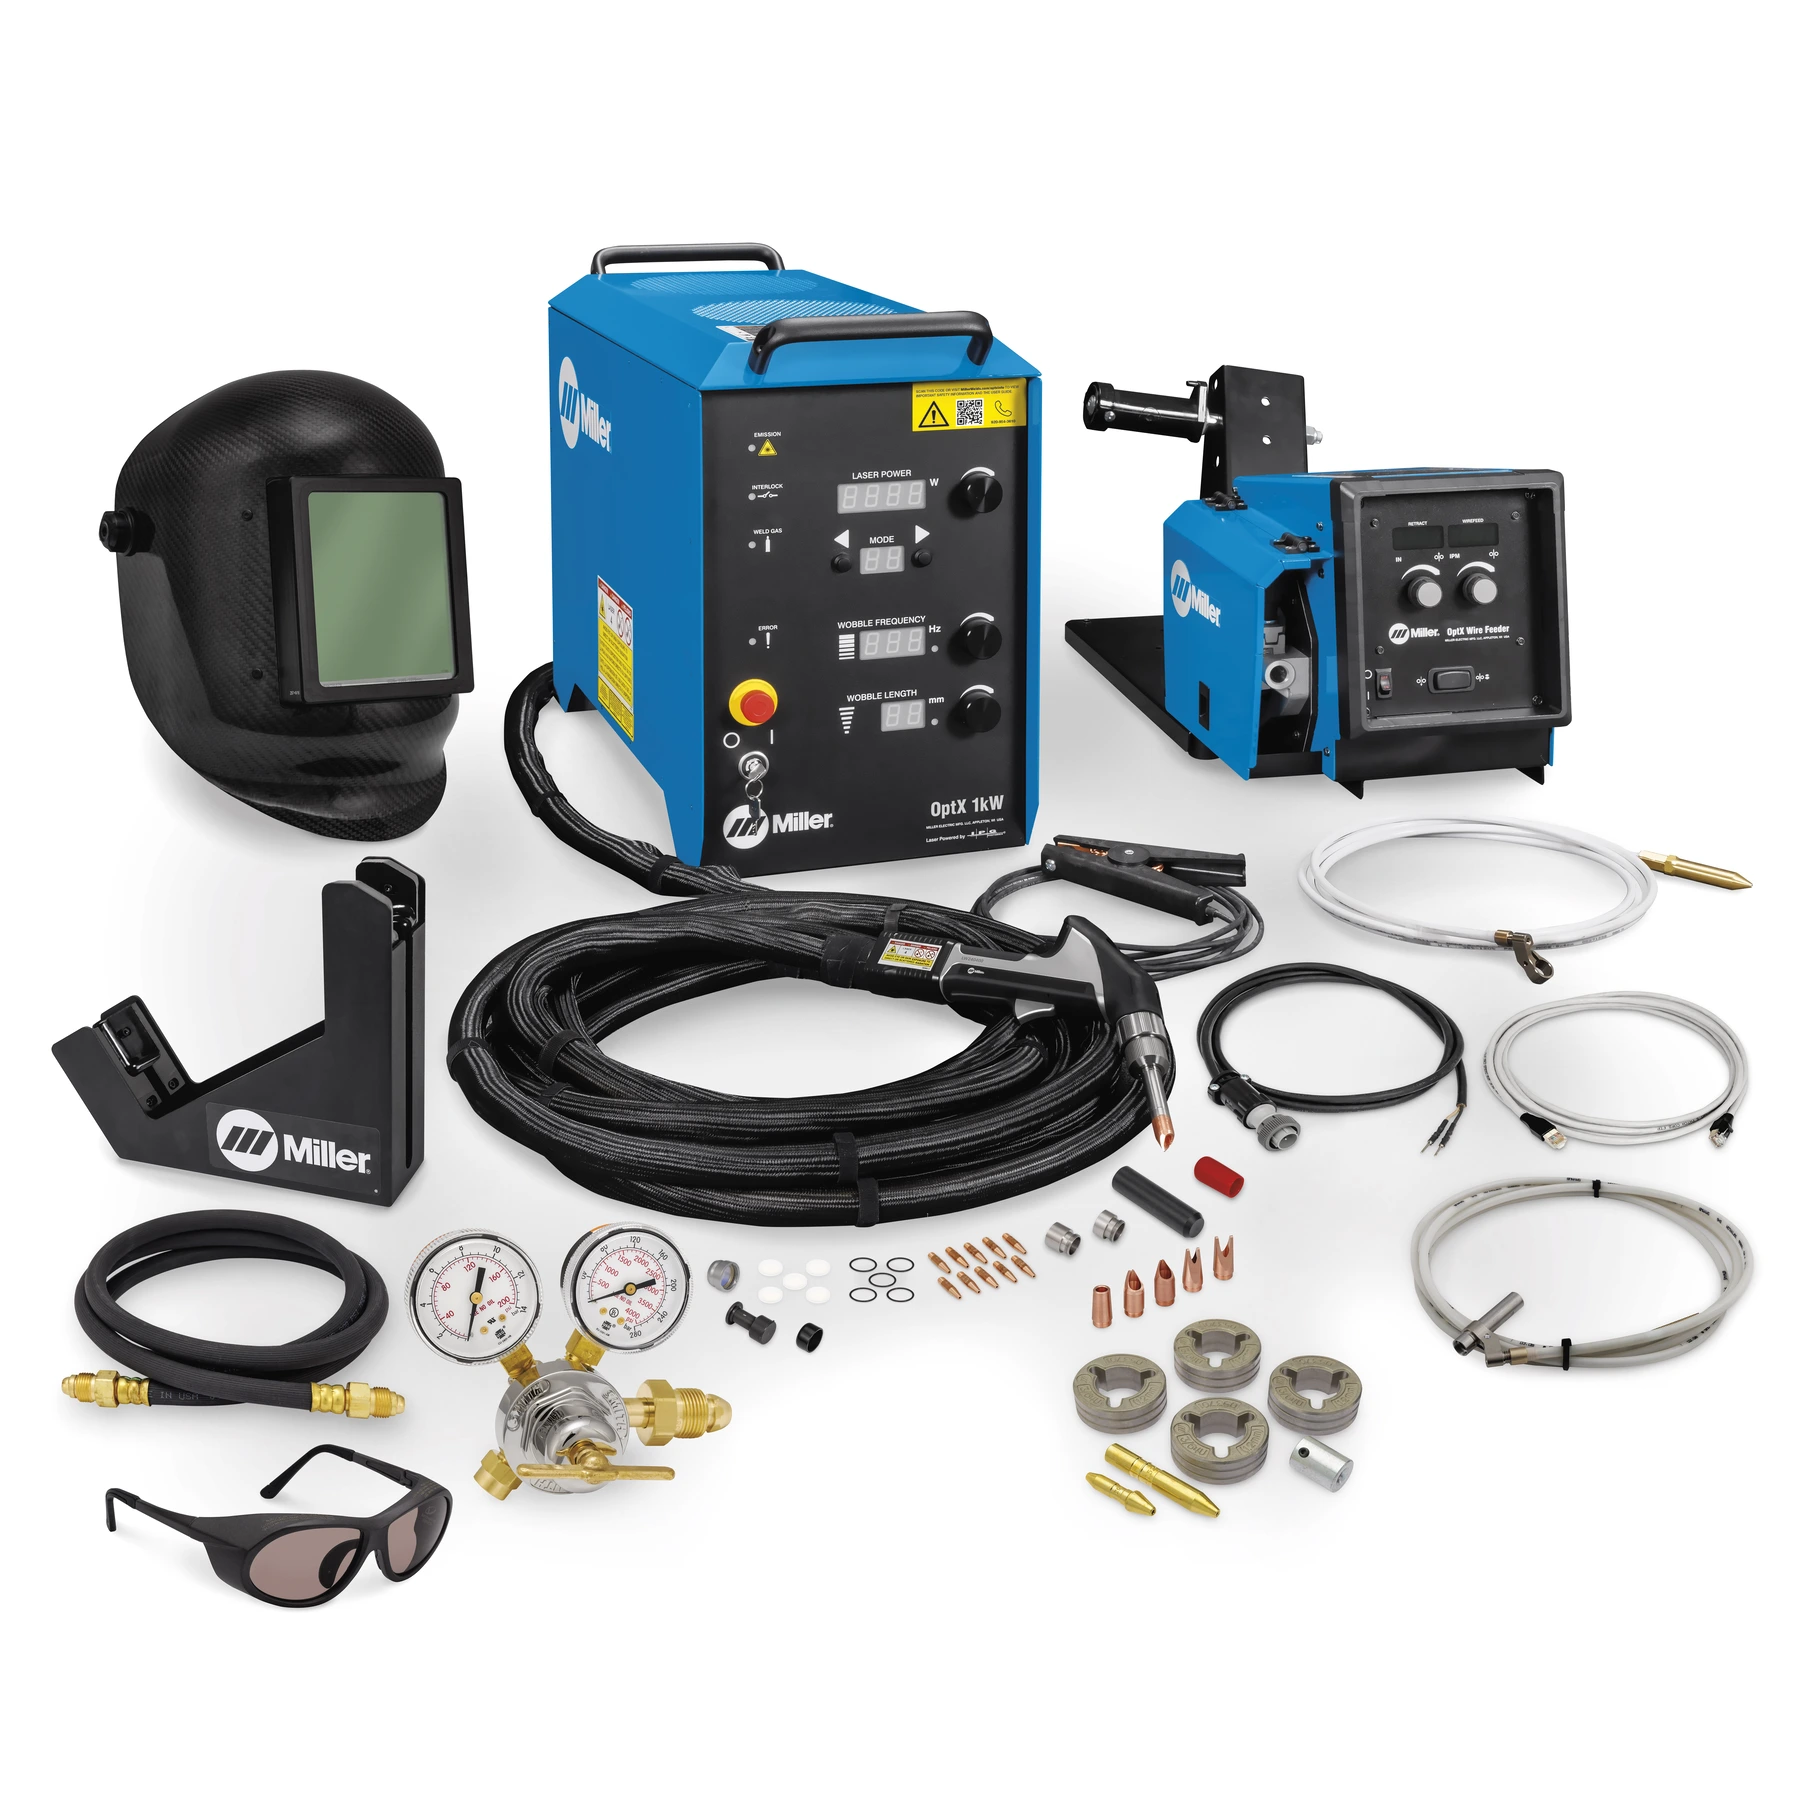
A complete-system kit can include nozzles, protective windows, seals, wire-feed hardware, gas equipment and safety items. Record the exact part numbers before production begins.
System image: Miller OptX complete package.
Use condition-based checks inside a repeatable routine.
The cadence below is a workflow template, not a replacement schedule. Insert the manufacturer’s actual tasks and intervals into the maintenance plan, then tighten inspections when contamination, multi-shift use or critical production justifies it.
Before the shift
Verify the correct nozzle, clean window condition, torch and cable condition, work-sense connection, wire identity and path, gas supply, extraction, coolant/airflow status, interlocks and PPE inspection.
During production
Watch for gas instability, feed slip, unusual spatter, nozzle heating, window alarms, beam inconsistency, new weld discoloration and changes after a material or parameter change.
At job changeover
Remove the previous wire and nozzle where required, clean the approved areas, verify alloy and diameter, select the released program, confirm gas and make a first-piece validation.
End of shift
Park the torch in its cradle, cap exposed interfaces, remove approved external deposits, store wire and optical supplies, log usage and isolate any questionable part so it cannot return to production.
Periodic maintenance
Inspect feeder wear, liner drag, hose and cable routing, cooling or air filters, extraction filters, coolant condition, electrical connections and machine alarms at the manual-defined interval.
After a consumable failure
Record the part number, date, machine hours, job, symptom and likely cause. If failures repeat, investigate torch angle, contamination, gas, parameters, handling and compatibility instead of increasing stock alone.
Clean storage protects weld quality before the parts reach the machine.
Consumables can be damaged while they wait. The storage system should prevent dust, moisture, impact, fingerprints, alloy mix-ups and unauthorized substitution while making the correct part easy for the operator to find.
Leave protective windows and lenses in original clean packaging until use. Store flat or in protective cells, away from grinding dust, oil mist and direct handling.
Use clearly labeled locations. A used optical part should never return to new stock, and a rejected nozzle should be physically quarantined.
Preserve classification, diameter, heat/lot information and supplier label. Cover partial spools and prevent steel debris from contaminating aluminum paths.
Follow manufacturer requirements for seals, adhesives, coolant, filters and optical coatings. Record expiration dates where the supplier provides them.
A nozzle or window that physically fits is not necessarily compatible. Label bins with the machine, head, item number and approved operating mode.
Base it on average consumption, supplier lead time, delivery variability, number of machines and downtime exposure—not a generic starter-kit quantity.
Eyewear and helmets do not make an uncontrolled Class 4 process safe.
Handheld industrial laser welders are typically Class 4 systems. OSHA guidance gives engineering controls primary consideration and requires suitable protective measures for direct, reflected and scattered radiation. Laser eyewear must match the wavelength and required optical density, while a welding helmet addresses visible/UV radiation and spatter. They perform different roles.
Inspect safety equipment by condition
Check eyewear and helmet filters for cracks, deep scratches, damaged coatings, illegible wavelength/OD markings and poor fit. Inspect flame-resistant clothing, gloves and barriers for holes, contamination and damage. Replace according to the safety program and manufacturer criteria.
Control the workplace first
Use a documented laser-controlled area, restricted access, interlocks, beam containment or laser-safe barriers, warning systems, trained personnel, safe work practices and source-capture ventilation. Respiratory protection, if required, must follow a proper workplace program.
Laser welding can produce hazardous airborne contaminants from the base metal, plating, coatings, oil and filler. Track extraction-filter condition and replace filters by the system’s pressure, service or exposure criteria. Shielding gas does not replace local exhaust ventilation.
Check consumables before rewriting a proven welding program.
A consumable problem can resemble an incorrect laser setting. If a released process suddenly changes, preserve the parameter file and inspect the simplest physical causes first.
| Observed symptom | Consumable-related checks | Other checks before changing parameters |
|---|---|---|
| Sudden loss of penetration or wider, weaker bead | Protective-window haze/burn marks, focus-lens contamination, incorrect or loose nozzle | Focus position, red-light alignment, source output, travel speed, joint gap and work angle |
| Wire stubs, slips or feeds intermittently | Wrong roll groove, worn roll, dirty liner, undersized tip, spool tangle, contaminated or kinked wire | Roll pressure, spool brake, feeder synchronization, guide alignment and torch motion |
| More oxidation or discoloration | Low/empty gas, leak, blocked nozzle, damaged hose, wrong gas or contaminated wire | Part cleanliness, gas flow, travel speed, heat input, draft and joint shielding geometry |
| Protective window burns repeatedly | Wrong window, seal damage, contamination during installation or delayed replacement | Torch angle, back-reflection, spatter direction, nozzle choice, parameters and gas delivery |
| Contact or interlock faults at the torch | Worn/deformed nozzle contact points, loose tip, damaged energized ring or contaminated work surface | Work-sense clamp, cable, interlock circuit, grounding and approved diagnostic procedure |
| Cooling alarm or reduced duty | Low/wrong coolant, loaded filter, blocked vent or dirty heat exchanger | Ambient temperature, condensation, pump/fan operation, leaks, pressure and machine alarm history |
Ask for the consumables plan before buying the laser welder.
The best time to discover a proprietary, long-lead or expensive consumable is before the purchase order. Request a priced bill of materials for start-up, one year of normal use and critical downtime protection.
List windows, seals, focus lens/cell, every nozzle, contact/guide tips, liners, drive rolls, coolant and filters by machine and welding-head configuration.
Ask what is stocked locally, normal and emergency shipping times, minimum order, shelf conditions and whether alternate suppliers are approved.
Require demonstrations for window inspection, approved cleaning, nozzle change, wire-path setup, cooling maintenance, fault logging and safe restart.
Request a first-year consumption estimate
The estimate should state its assumptions: operating hours, materials, process mode, contamination level, number of operators and expected failure rate. Treat it as planning—not a guaranteed life prediction.
Define warranty-sensitive parts
Ask whether non-original windows, lenses, nozzles, coolant, filters or feeder parts affect warranty coverage. Put authorized alternatives and required installation methods in writing.
Tell Oceanplayer your machine configuration and welding workload.
Share the welder model, welding-head model, feeder type, wire diameters, materials, shift pattern and destination. We can prepare a compatible consumables list, recommended starter stock and sample-test plan without mixing routine consumables with unnecessary replacement parts.
Laser welding machine consumables FAQ.
What are the main consumables for a handheld laser welding machine?
The main routine consumables are protective windows, welding nozzle tips, filler wire and shielding gas. Wire-welding systems also use contact or guide tips, liners, tubes and drive rolls that wear over time. Water-cooled and extraction systems may require approved coolant and filters. The exact list depends on the machine and welding head.
How often should a laser welding protective window be replaced?
There is no universal hour or weld-count interval. Inspect at the cadence required by the manufacturer and replace when contamination, burn marks, haze, scratches, chips, coating damage or abnormal heating cannot be corrected by the approved procedure. Harsh spatter or dirty production can shorten service life.
Can I clean a protective window instead of replacing it?
Only if the manufacturer allows cleaning and the window has no permanent damage. Use the specified clean environment, gloves or finger cots, approved liquid and optical tissue or swab. If residue remains or the coating is scratched, burned, chipped or uncertain, install an approved new window.
Are the focus lens and protective window the same part?
No. The protective window is a sacrificial barrier intended to protect the more expensive focusing optics. The focus lens shapes the beam and is generally a service or replacement part, not a routine consumable. A damaged protective window can expose the focus lens to contamination and heat.
Can any nozzle that fits be used on a laser welding head?
No. Nozzles may differ in dimensions, contact sensing, power rating, gas flow, wire position and joint geometry. Use the part number and operating mode specified for the welding head. A physically fitting but unapproved nozzle can affect safety, alignment, gas delivery and warranty.
How do I choose filler wire for laser welding?
Select the filler classification from the base-metal grades, joint design, service requirement and qualified welding procedure. Then match the diameter to the feeder, drive rolls, liner, guide tip, gap and deposition requirement. A generic rule such as “stainless wire for stainless” is not precise enough.
Which shielding gas is best for handheld laser welding?
Argon and nitrogen are used by many handheld systems, while specialized procedures may use helium or mixtures. The best gas depends on alloy, weld requirement, equipment program and validation results. Use the supplier’s approved starting point and qualify purity, pressure, flow and nozzle delivery on the actual joint.
Can I use tap water in a water-cooled laser welder?
Do not add tap water unless the equipment manufacturer explicitly allows it. Many laser chillers specify distilled, deionized or otherwise controlled coolant because minerals and contamination can block circuits or damage optical and cooling components. Follow the exact fluid, additive and replacement procedure in the manual.
What should be in a beginner laser-welder consumables kit?
A model-specific kit should normally include approved protective windows and seals, each nozzle used by released programs, compatible wire-path tips or tubes, correct drive rolls and liners, optical-cleaning supplies, qualified filler wire, gas delivery spares and any approved coolant or filters. Set quantities from lead time and usage.
Why does my protective window keep burning?
Possible causes include contamination during installation, delayed replacement, wrong window or seal, severe spatter, incorrect torch angle, reflected energy, damaged nozzle, poor gas delivery or unsuitable parameters. Repeated failure requires root-cause investigation; simply stocking more windows does not protect the focus lens.
Are laser safety glasses a consumable?
They are better treated as safety equipment. Inspect them and replace damaged items, but do not rely on eyewear alone. A Class 4 handheld laser process requires engineering and administrative controls such as a controlled area, access restriction, interlocks or barriers, trained personnel and appropriate ventilation.
How should laser welding consumables be stored?
Keep optics sealed in clean packaging, wire dry and identified, nozzles protected from impact, and new, used and rejected parts separated. Label stock by machine, head and item number. Follow shelf-life and environmental requirements for seals, coolant, filters and optical coatings, and use traceable reorder records.
Sources used for this beginner's guide.
Manufacturer documents define model-specific parts and procedures. Safety controls and ventilation must also satisfy the applicable workplace assessment and local regulations.
- IPG Photonics — LightWELD Parts and Consumables
- Miller Electric — OptX Handheld Laser Welding and Cleaning System Owner's Manual
- Miller Electric — OptX Complete Package and Included Consumables
- JASIC — LS-15000F / LS-20000F Handheld Laser Welding Machine Manual
- OSHA — Guidelines for Laser Safety and Hazard Assessment
- OSHA Technical Manual — Laser Hazards and Ventilation