oceanplayer

Oceanplayer Industrial Laser Equipment | Cleaning, Welding, Marking, Automation Sample Testing | Free Engineering Tools | Global Shipping
Main Systems
Best Seller Oceanplayer 500W pulsed laser cleaning machine
Featured Model
500W Pulsed Laser Cleaner

Higher pulse cleaning speed with controlled surface impact.

500W PulsedFine ControlBest Seller
Engineering Tools
Applications
Industries
Company
Resources
Rust-covered hand tools before restoration
Tool restoration & corrosion control

How to Remove Rust on Cutting Tools: Step by Step

Restore chisels, shears, plane irons, cutters and workshop blades without sacrificing the geometry that makes them cut. This guide starts with damage assessment, moves from the least aggressive method upward, and finishes with sharpening, protection and storage.

Quick answer For a light orange film on a plain steel tool, clean off dirt, apply a few drops of light oil, rub gently with 0000 steel wool in the direction of the original grind marks, wipe clean, inspect the edge, sharpen only if needed, then apply a compatible protective film. Stop if you find cracks, loose carbide, deep edge pitting or major loss of section.
Light surface filmOil + 0000 steel woolStart by hand and follow the original machining marks.
Localized rough spotsRust eraser or labeled removerTest a small area and protect the cutting edge.
Heavy or flaking rustInspect before cleaningCleaning can expose damage; it cannot replace lost steel.
Cracks or loose carbideRemove from serviceRepair professionally or replace the tool before use.

Lead image: Biser Todorov / Wikimedia Commons, CC BY 3.0. Cropped for layout.

The safest restoration principle

Remove corrosion, not tool geometry.

Rust removal on cutting tools is different from cleaning a garden gate. A chisel, plane iron, pruning blade or milling cutter depends on precise bevels, lands, clearances, serrations and mating surfaces. An aggressive wire wheel may make the steel look bright while rounding the edge, scratching a reference face or reducing a critical dimension.

The safest sequence is therefore: identify the material and finish, assess whether the tool is still structurally sound, start with the least aggressive compatible method, clean only as far as necessary, dry immediately, then restore the edge separately.

Best first moveDry inspection under strong side lighting
Best light-rust routeFine hand cleaning with oil
Most important finishComplete drying and protection

Why cutting tools rust

Iron and ordinary steel corrode when moisture and oxygen reach the surface. The Canadian Conservation Institute notes that clean iron generally corrodes much faster above about 65% relative humidity, while salts, dust, fingerprints and pollutants can trigger corrosion at lower humidity. That is why a tool left in a humid garage, handled with bare hands, put away damp, or exposed to coolant residue may rust much sooner than a clean tool in controlled storage.

Rust occupies more volume than the original metal and can lift coatings, stiffen pivots and leave pits. On the body of a robust hand tool, shallow cosmetic pitting may be acceptable. On a cutting edge, bearing surface, precision guide, collet interface or brazed carbide joint, the same-looking corrosion may be a functional or safety problem.

Do not judge by color alone.

A dark, stained surface can still be stable, while bright orange powder, recurring spots, lifting scale or moisture beneath corrosion may indicate active deterioration. Cleaning should reveal enough to inspect the tool—not chase a perfectly bright finish at the cost of useful steel.

Step 1 · assess before you abrade

Is it surface rust, repairable pitting or a discard condition?

There is no universal pit-depth number that makes every cutting tool unsafe. Tool type, load, heat treatment, original dimensions, crack location and manufacturer limits matter more than a single measurement.

Usually a good DIY candidate

Thin, adherent surface rust

Orange haze or isolated spots with no flaking, no cracks and no visible loss of edge support. The surface still feels mostly smooth and the tool remains mechanically sound.

Start with oil and a very fine hand abrasive.
Restore with caution

Rough rust or shallow pits

Texture remains after loose rust is brushed away. The body may still be serviceable, but pits at the cutting edge, pivot, shank or clamping surface require closer inspection.

Clean enough to inspect, then sharpen or seek repair.
Stop and evaluate

Flaking, cracks or section loss

Deep scale, spreading cracks, loose brazed tips, a thinned blade, damaged fasteners or a weakened handle connection can make continued use unsafe.

Remove from service; repair professionally or replace.
Inspect the highest-stress areas first.

Check the cutting edge and bevel, tang inside a handle, pivot holes, fastener seats, shank transitions, carbide-braze line and any region that flexes under load. A polished face elsewhere does not compensate for a crack or loose joint.

Interactive starting-method guide

Describe the tool and rust.

Choose the closest combination. The recommendation updates instantly and is intended as a cautious planning route.

Cautious starting route

Start with oil and 0000 steel wool

This is the lowest-risk starting point for a light surface film on a removable plain-steel body.

WhyFine hand cleaning gives you feedback before you remove meaningful material.
AvoidDo not jump to a wire wheel, long acid soak or coarse paper.
Stop ifYou expose cracks, loose parts, deep edge pits or unexpected coating loss.

This tool does not replace the tool manufacturer's service limits, a chemical product label/SDS or inspection by a qualified sharpening and repair professional.

Fine steel wool used as a light hand abrasive
Fine steel wool can be appropriate for lightly corroded bright iron when used with light oil and a gentle hand. Image: Johan / Wikimedia Commons, CC BY-SA 3.0. Cropped for layout.
Step 2 · prepare the work safely

Control the sharp edge, chemical and rotating-tool hazards separately.

The rust may be the visible problem, but the cleaning process introduces its own hazards. Clamp the tool so it cannot move, cover or orient the cutting edge away from your hands, and separate chemical-compatible PPE from cut protection instead of assuming one glove does both jobs.

Read the product label and SDS first.

Glove material, eye protection, ventilation, rinsing and disposal depend on the exact remover—not the word “rust remover” on the front.

Never mix cleaning chemicals.

Do not combine acids, alkalis, bleach, solvents or commercial products. Use one compatible method, rinse or clean as directed, and change methods only after the surface is safe.

Flush chemical exposure; do not neutralize skin.

If a product contacts skin or eyes, follow its SDS. Immediate rinsing with plenty of clean water and removal of contaminated clothing are common first-aid instructions. Do not apply baking soda or another neutralizer to the body.

Keep guards on powered abrasives.

Use rated accessories, eye and face protection, secure workholding and the manufacturer's guard. Stop using damaged electric tools or wheels.

Protect handles, coatings and joints.

Disassemble only when the manufacturer permits it. Wood, plastic, rubber, adhesives, bluing, plating and brazed joints may not tolerate immersion or heat.

Method comparison

Choose the least aggressive route that can reach the accepted result.

Time estimates vary with rust thickness, steel condition, temperature and product chemistry. Use the ranges on a commercial label, not a universal internet timetable.

MethodBest useMain advantageMain riskUse on cutting edge?
Light oil + 0000 steel woolThin film on bright plain steelSlow, controllable and easy to stopCan scratch polished or coated surfacesOnly with very light pressure; sharpen separately
Rust eraser or mild abrasive pasteSmall localized spotsGood spot control without immersionCan leave a visibly different finishKeep off the apex unless you will resharpen
White vinegar / weak acidKnown plain steel with non-metal parts removedInexpensive and reaches recessesMay etch steel, attack finishes or creep into jointsNot a first choice for precision edges
Labeled commercial removerModerate rust when chemistry is compatibleInstructions and SDS define useCan remove bluing/coatings; products differ greatlyOnly when label permits and geometry is protected
Hand sanding / abrasive padRobust utility-tool bodiesFast local leveling and finish controlRounds corners and erases grind marksUse sharpening media for the edge itself
Powered wire or abrasive wheelLarge, robust non-critical surfacesHigh removal rateHeat, thrown wires, deep scratches and dimensional changeNo, unless part of a controlled professional process
Electrolytic rust removalSelected plain ferrous parts under expert controlCan loosen corrosion in complex areasElectrical, alkaline-solution and gas hazards; finish compatibilityNot the default route for hardened precision tools

For collectible, historically important or unknown tools, “bright and new-looking” is not necessarily the correct conservation target. Seek a metals conservator before removing original finish, markings or patina.

Complete restoration workflow

Eight steps from rusty tool to protected cutting edge.

Keep rust removal and sharpening as two connected but separate jobs. First reveal the true condition; then restore the working geometry.

01

Identify the tool

Confirm steel type if known, coatings, brazed tips, handle materials and manufacturer service guidance. Photograph markings and original bevels.

Do not erase evidence
02

Inspect dry

Brush off loose dirt, use side lighting and inspect the edge, tang, pivot, joint and clamping surfaces for cracks or loss of section.

Decide restore vs replace
03

Disassemble safely

Remove blades or metal inserts from vulnerable handles only when designed for service. Do not force seized fasteners or disturb permanent joints.

Protect mixed materials
04

Degrease first

Remove soil, oil and residue with a cleaner compatible with the tool. Rust treatments work more predictably on a clean surface.

Follow cleaner SDS
05

Remove rust gently

Start with the selected hand method. Work in the direction of existing grind marks and inspect frequently rather than chasing bright metal.

Stop before geometry changes
06

Rinse or wipe as directed

Complete the product's prescribed cleanup. Do not invent a neutralization step. Immediately dry recesses, holes, pivots and seams.

Prevent flash rust
07

Inspect and sharpen

Check whether pitting reaches the edge or functional surfaces. Preserve the original bevel and use the correct sharpening system for the tool.

Rust removal is not sharpening
08

Protect and store

Apply a thin compatible oil or wax, wipe away excess, lubricate pivots as specified and store dry with controlled humidity.

Break the corrosion cycle
Detailed removal methods

How to remove rust without turning restoration into re-machining.

Each method below begins with the same rule: test the least visible area, inspect often and stop as soon as the corrosion is controlled and the tool can be evaluated.

Method 1

Light oil and 0000 steel wool

01

This is the most defensible starting method for lightly corroded, originally bright plain steel. The oil lubricates the contact and helps carry away loosened corrosion.

  1. Clean dirt and grease using a compatible cleaner; dry the tool.
  2. Add only a few drops of light lubricating oil to the rusted area.
  3. Rub gently with 0000 steel wool in the direction of existing machining or polishing marks.
  4. Wipe, inspect under side light and repeat only where rust remains active.
  5. Finish with a clean wipe and a very thin protective film.
Best for thin surface film

Do not use steel wool on a mirror-polished, plated, coated or contamination-sensitive surface without confirming compatibility.

Method 2

Rust eraser or baking-soda paste

02

A rust eraser or a thick paste of baking soda and a small amount of water can act as a mild local abrasive for light spots. It should not be presented as a guaranteed chemical “neutralizer.”

  1. Mask or avoid the cutting apex and decorative finishes.
  2. Apply the paste or eraser to a small test area.
  3. Rub lightly along the existing finish, not across it.
  4. Wipe away residue, rinse only when suitable for the assembly, then dry immediately.
  5. Inspect for a change in gloss before expanding the treatment.
Best for localized cosmetic spots

Water can enter handles, pivots and laminated assemblies. Use a damp local application rather than soaking the whole tool.

Method 3

Controlled weak-acid treatment

03

White vinegar can loosen rust on known plain steel, but it may also etch base metal, alter color and attack beneficial oxide finishes. It is not a universal 24-hour soak.

  1. Use only on a removable plain-steel part with vulnerable materials separated.
  2. Test an inconspicuous area first.
  3. Use the shortest exposure that works and inspect at frequent intervals.
  4. Agitate gently with a non-aggressive brush rather than extending exposure blindly.
  5. Rinse as appropriate, dry immediately and protect the surface.
Conditional DIY method

Avoid on blued, browned, plated, coated, brazed, precision-ground, collectible or unknown materials unless the maker or a specialist approves it.

Method 4

Commercial chelating or chemical remover

04

Commercial products vary: some are water-based chelating soaks, while others use acids or form a conversion coating. The product category does not define the instructions.

  1. Confirm that the label includes the tool's metal and surrounding materials.
  2. Read the SDS and select gloves, eye protection and ventilation accordingly.
  3. Remove loose dirt and grease before treatment.
  4. Follow the manufacturer's concentration, temperature, contact time and agitation instructions.
  5. Rinse or wipe exactly as specified, dry completely, inspect and protect.
Best for moderate, accessible rust

Some products remove bluing, browning, paint or other protective oxide coatings. A small test patch is part of the process.

Method 5

Hand abrasives and powered cleaning

05

Abrasive paper, pads and brushes can be useful on robust utility-tool bodies, but they remove both rust and metal. Powered wheels magnify every positioning error.

  1. Clamp the work and protect the cutting edge.
  2. Start finer than you think you need; move coarser only if the test area is ineffective.
  3. Keep strokes aligned with the existing finish.
  4. Use powered equipment only with its guard, rated accessory and correct PPE.
  5. Control heat and stop before corners, reference faces or markings are rounded.
For robust non-critical surfaces

The Canadian Conservation Institute warns that powered wire brushes and emery can leave deep scratches and cause dimensional change on machined ferrous surfaces.

Method 6

Electrolytic rust removal

06

Electrolysis can loosen corrosion on selected ferrous objects, but it combines a DC electrical source, conductive alkaline solution and gas evolution. It is not the first method for an assembled or precision cutting tool.

  1. Use only a documented process with a suitable power supply and expert supervision.
  2. Confirm the metal, heat treatment, coatings, joints and allowable finish change.
  3. Provide ventilation and keep ignition sources away from the work area.
  4. Prevent electrical contact errors and follow chemical handling requirements.
  5. After treatment, clean, dry, inspect and protect the tool immediately.
Advanced controlled process

Do not improvise an electrolysis bath for carbide-brazed, plated, coated, multi-metal, historically important or safety-critical tools.

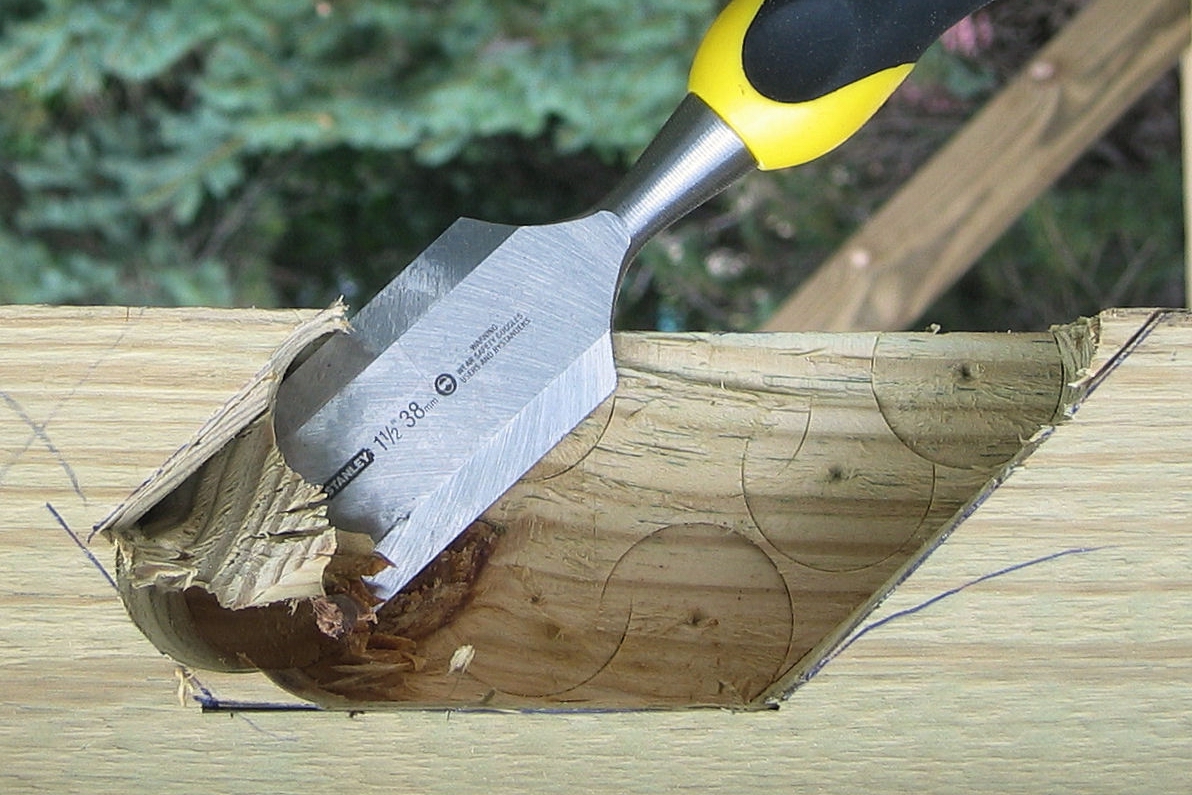
Sharp wood chisel cutting a mortise after edge restoration
A restored tool still needs correct cutting geometry. Image: Fishdecoy / Wikimedia Commons, public domain. Cropped for layout.
Rust removal ends where sharpening begins

Rebuild the edge with the correct sharpening system.

Cleaning reveals the edge; it does not automatically make it sharp. If pitting reaches the apex, the edge may need to be ground back until continuous sound steel supports it. Preserve the maker's bevel and clearance geometry instead of applying a generic angle.

Preserve reference faces.Do not round the back of a chisel, plane iron, shear face or guide surface while chasing pits.
Control heat.Powered grinding can overheat a thin edge. Use the correct wheel, cooling practice and pressure for the steel.
Use specialized service when needed.Serrated, hollow-ground, carbide-tipped, helical and precision industrial cutters often need dedicated fixtures or professional sharpening.
Verify function after assembly.Check pivot movement, blade alignment, fastener torque, guards and cutting clearance before returning the tool to service.
Material-specific limits

The same orange spot can require a different treatment on each tool.

If the alloy, coating or construction is uncertain, use the least aggressive dry or oil-assisted method and ask the manufacturer before immersion.

Carbon & tool steel

Most familiar rust behavior

Plain carbon steels readily form red-brown rust. Light oil and fine hand abrasion are a practical first route on bright, uncoated surfaces.

Protect immediately after cleaning.
High-speed steel

Preserve grind and heat treatment

HSS is more corrosion-resistant than plain carbon steel but not immune. Avoid aggressive surface removal on flutes, reliefs, shanks and precision seats.

Use professional sharpening for complex cutters.
Stainless steel

Confirm it is rust—not transferred iron

Orange staining may come from embedded carbon-steel contamination. Avoid carbon-steel brushes that can deposit more iron onto stainless surfaces.

Use stainless-dedicated tools and a compatible process.
Carbide-tipped or brazed

Protect the joint and brittle tip

Aggressive chemistry, impact or heat may affect the braze region or surrounding steel. Rust near a loose tip is a stop condition.

Manufacturer or tool-service review is preferred.
Coated, blued or plated

The finish may be functional

Dark oxide, plating or thin-film coatings may provide corrosion, wear or friction performance. A remover can strip the finish before it reaches the rust beneath.

Test and identify the coating first.
Food-contact cutting tools

Control chemical residue

Use cleaners, rinsing procedures and protective products suitable for the intended food-contact application and the tool manufacturer's instructions.

Do not assume a workshop oil is food-compatible.
After cleaning · diagnose the result

Common problems and what they mean.

Orange returns quickly

Flash rust

Water or solution remained on bare steel, or drying was too slow.

Dry immediately, clean the new film gently and protect.
Surface turns gray or black

Finish change

The remover altered oxides or exposed uneven underlying steel.

Stop and assess before polishing more material away.
Bright scratches appear

Abrasive is too aggressive

Grit, pressure or direction does not match the original finish.

Stop; do not “blend” the entire tool automatically.
Pivot remains stiff

Rust or residue remains inside

Cleaning the exterior does not clear hidden joint contamination.

Service the joint as designed; do not force it.
Pits reach the edge

Sharpening decision

The edge may need to be ground back to continuous sound steel.

Preserve geometry or use a sharpening specialist.
Handle loosens after soaking

Assembly damage

Water or chemistry entered wood, adhesive or a mechanical joint.

Remove from service until the handle is repaired safely.
Two-sided sharpening stone used to restore a cutting edge
Sharpening media should match the tool, abrasive and target edge—not a universal grit schedule. Image: Richard Frantz Jr. / Wikimedia Commons, public domain.
Prevention

Make the restoration last longer than the next humid week.

Rust prevention is a system: clean storage, low moisture, controlled handling and a compatible barrier. No single oil compensates for a wet sheath or salt-contaminated drawer.

After every use

Clean, dry and inspect

Remove water, coolant, sap, fingerprints and metal dust before storage.

  • Dry holes, flutes, pivots and seams
  • Use clean cloths that do not carry abrasive grit
  • Check for new orange spots before coating
Protective barrier

Apply only a thin compatible film

Light oil or microcrystalline/paste wax can help selected iron and steel tools.

  • Follow the tool and coating manufacturer's advice
  • Keep oil off surfaces where it creates a work hazard
  • Use food-compatible protection when required
Storage climate

Keep humidity below the corrosion threshold

Clean iron generally corrodes faster above roughly 65% RH, but contamination can cause trouble lower.

  • Avoid damp basements, leaking cases and wet sheaths
  • Use a hygrometer instead of guessing
  • Conditioned storage around 50% RH is a useful practical target for many clean tools
Handling & inspection

Catch corrosion while it is still a film

Regular inspection turns a major restoration into a quick maintenance task.

  • Wipe handled bright steel before storage
  • Separate damp abrasives and corrosive chemicals from tools
  • Inspect after transport, outdoor use or coolant exposure
For industrial batches and larger tool bodies

When does laser cleaning enter the conversation?

Manual oil-and-abrasive cleaning is sensible for one lightly rusted chisel. It becomes slow and inconsistent when a factory has repeated fixtures, robust cutters, production tooling or many steel components to clean. Laser cleaning may remove rust without blasting media or immersion chemistry, but it is not automatically safe for every edge or tool.

Good reason to evaluate itRepeated rust removal on robust steel bodies, controlled zones or high-volume maintenance work.
What must be protectedCutting-edge geometry, temper, coatings, precision reference surfaces and brazed carbide joints.
How to qualify the processTest a representative tool, inspect the surface and edge, confirm extraction, then document accepted parameters.
Need a repeatable rust-removal route?

Validate the process on the actual tool, coating and corrosion.

Send photos or a sample and describe the steel, edge, coating, rust condition, accepted finish and monthly volume. Oceanplayer can help determine whether pulsed, CW, handheld or automated laser cleaning deserves a controlled trial.

Material: tool steel, stainless, HSS, carbide or unknown
Condition: light film, pits, scale, coating or mixed contamination
Critical area: body, edge, bore, joint, flute or reference face
Production need: one-off repair, maintenance batch or automated process
Frequently asked questions

Rust removal on cutting tools FAQ.

What is the safest way to remove light rust from cutting tools?

For a lightly corroded, originally bright plain-steel tool, a cautious first method is a few drops of light lubricating oil with 0000 steel wool, rubbed gently in the direction of existing grind marks. Clean, inspect and stop before changing the surface geometry. Do not assume this method is suitable for plating, coatings or mirror finishes.

Can I soak cutting tools in white vinegar overnight?

Do not treat an overnight soak as a universal rule. Vinegar can loosen rust, but prolonged exposure may etch steel, change appearance and attack finishes or joints. Use it only on known plain-steel parts after removing incompatible materials, test a small area and inspect at short intervals.

Does baking soda chemically neutralize rust?

Baking-soda paste is most useful here as a mild abrasive and cleaner for light localized rust. It should not be described as a guaranteed rust-conversion process. It also should not be applied to skin after an acid splash; follow the chemical SDS and rinse with clean water as directed.

Can rust pitting be polished out of a cutting edge?

Shallow pits away from functional surfaces may remain cosmetic. Pits that reach the cutting apex require sharpening back to continuous sound steel, if the tool has enough material and the manufacturer's limits allow it. Deep pits, cracks or major section loss are reasons to seek professional evaluation or replace the tool.

Should I use a wire wheel on rusty tools?

A powered wire wheel may be appropriate on a robust, non-critical tool body when used with proper guarding, rated accessories, secure workholding and PPE. It can round corners, erase markings, throw wires and alter precision surfaces, so it is a poor first choice for cutting edges and collectible or precision-ground tools.

How do I stop flash rust after rinsing?

Complete the product's prescribed rinse or cleanup, remove water immediately from holes, joints and seams, dry with clean air or other manufacturer-approved means, and apply a compatible thin protective film. Do not let freshly exposed steel air-dry slowly in humid conditions.

Can stainless steel cutting tools rust?

Yes. Stainless steel can corrode, and orange staining may also come from carbon-steel particles transferred by shared brushes or grinding equipment. Use stainless-dedicated cleaning tools and avoid introducing more free iron.

Is electrolysis safe for hardened cutting tools?

Electrolysis is an advanced controlled method rather than a default home treatment for hardened or precision tools. It involves electrical equipment, conductive alkaline solution and gas evolution, and its suitability depends on the alloy, heat treatment, joints, coatings and required finish. Professional review is appropriate.

What oil should I apply after rust removal?

Use a thin corrosion-protective oil or wax compatible with the tool, work environment and next operation. Food-contact tools require an appropriate food-compatible product. Wipe away excess so the coating does not trap abrasive dust or create a handling hazard.

What storage humidity helps prevent tool rust?

Clean iron generally corrodes much faster above about 65% relative humidity, while salts, dust and fingerprints can cause corrosion lower. A clean, conditioned storage environment around 50% RH is a useful practical target for many tools, with lower humidity needed for salt-contaminated or actively corroding iron.

When should a rusty cutting tool be replaced?

Remove a tool from service when corrosion reveals cracks, loose carbide, a weakened tang or handle connection, severe loss of cross-section, damaged clamping surfaces or edge damage that cannot be restored within the manufacturer's service limits. Appearance alone is not a safety inspection.

Can laser cleaning remove rust from cutting tools?

It can be evaluated for selected steel tool bodies and repeated industrial maintenance work. The process must be tested to protect edge geometry, heat treatment, coatings and brazed joints. A representative sample test and post-cleaning inspection are more reliable than choosing laser power from appearance alone.

Technical references

Sources used to verify this guide.

The original article was expanded and corrected against conservation, occupational-safety and manufacturer documentation.

Canadian Conservation Institute — Basic care of iron objectsCorrosion causes, humidity, handling, light oil and fine steel wool, protective coatings.Read the source
CCI Notes 9/6 — Care and Cleaning of IronStable versus active corrosion, dry cleaning and coating considerations.Read the source
CCI Notes 9/8 — Mechanical Removal of RustRisks of wire wheels, emery, scratching and dimensional change on machined ferrous surfaces.Read the source
Canadian Conservation Institute — Preventive metal careHumidity, contamination and flash-rust mechanisms.Read the source
OSHA — Dermal exposure control and preventionChemical glove selection depends on the chemical, concentration, contact and task.Read the source
OSHA — Abrasive wheel machineryMachine guards, work rests and safe grinder configuration.Read the source
WD-40 Specialist Rust Remover Soak — Technical data sheetExample of manufacturer-defined preparation, immersion, rinse, drying and protection instructions.Read the source
Oceanplayer — Laser Cleaning Feasibility CheckerPlanning route for industrial rust-removal applications that may benefit from laser cleaning.Open the tool

Technical review date: July 27, 2026. Always follow the current tool manual, chemical label, SDS and local workplace requirements.