

Laser Lens Cleaning & Damage Causes
Clean only when inspection shows contamination and the equipment manual permits cleaning. Replace an optic that is permanently stained, scratched, chipped, cracked or coating-damaged—and investigate the process when a new window fails again quickly.
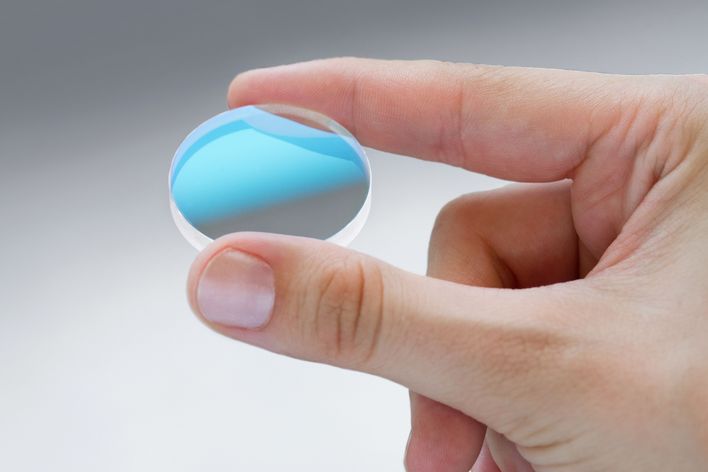
Use only the method, solvent and handling procedure approved for the exact optic, coating and housing.
Physical and laser-induced damage is not removed by more wiping. Continued use may worsen heat absorption and beam distortion.
Check spatter, fumes, seal condition, purge gas, nozzle geometry, standoff, parameter stability and the surrounding environment.
Maintenance on an embedded Class 4 industrial laser must follow the manufacturer's isolation and personnel requirements.
Hero image and protective-glass function: TRUMPF Genuine Parts.
Why do laser lenses need cleaning—and why do they become damaged?
Laser lenses and protective windows need attention because airborne dust, condensed process fume, oil, fingerprints and spatter can settle on optical surfaces. A contaminant that absorbs even a small part of the beam can create a localized hot spot. The result may begin as reduced transmission or an unstable process and progress to coating discoloration, pitting, thermal stress or fracture.
Cleaning is not automatically the correct response. Every cleaning event also creates handling risk. Newport's optical-cleaning guidance summarizes the principle well: if an optic is not dirty, do not clean it. Some industrial-machine manuals go further and tell the operator to inspect and replace a contaminated protective window rather than clean it. The exact instruction depends on the optical material, coating, mounting, safety design and manufacturer.
Inspect first. If the problem is loose or soluble contamination, use the approved cleaning procedure. If there is a permanent defect, replace the optic. If contamination returns quickly, stop treating the window as the root cause and inspect the process conditions that are depositing material on it.
Do not use a universal “every 100 hours” rule
The source article proposed cleaning every 100 hours, but a fixed interval cannot suit every laser. A sealed marking head in a clean room, a welding torch exposed to spatter and a cutting head operating over coated plate have very different contamination rates. Condition-based inspection, combined with the interval in the manufacturer manual, is a more defensible approach.
For example, the Miller OptX manual calls for daily inspection of the protective window and focus lens and timely replacement when contaminated. This is a machine-specific maintenance instruction—not a universal rule for all laser lenses. Record what your process actually shows and shorten the inspection interval when contamination accelerates.
Protective window, focus lens and internal optics are not the same service item.
The first step in safe maintenance is identifying what you are looking at. “Laser lens” is often used for several different components, yet their access, coatings, replacement cost and permitted cleaning methods can differ substantially.
Protective window or cover glass
This sacrificial optic sits closest to the process and helps shield expensive internal optics from spatter, smoke residue, vapor and debris. It is designed for a particular wavelength, pressure environment and sensing system—not merely as a clear piece of glass.
Focus or collimating lens
These optics shape and focus the beam. Contamination can change transmission and thermal behavior, while incorrect orientation, focal length or coating can alter the process. Access may require qualified maintenance personnel.
Mirrors, scanner optics and fiber interfaces
These components can be sealed, alignment-sensitive or highly specialized. Do not open a sealed beam path or touch a fiber connector unless the manufacturer's service instructions explicitly assign that task to your personnel.
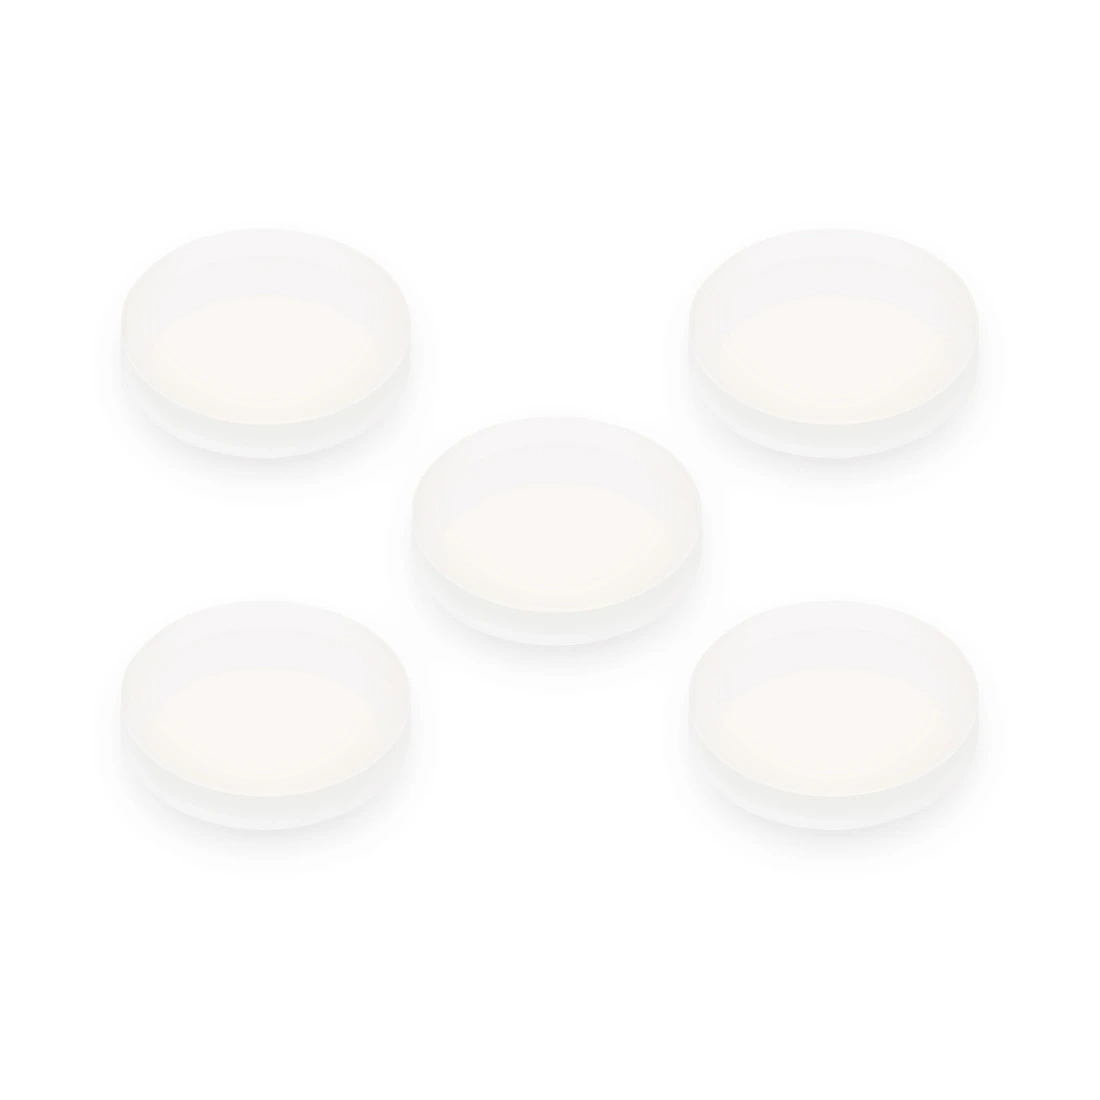
When it becomes dirty or damaged, determine whether the defect is limited to this replaceable cover or whether contamination has entered farther into the head.
Protective-window image and product function: Miller OptX Protective Window.
Read the optic before you reach for a wipe.
What you see—powder, film, isolated dots, a colored halo, scratches or a crack—changes the maintenance decision. Inspect with the laser disabled, using bright visible light at several angles and the magnification specified by the equipment procedure.
Dust or loose particles
Random particles may scatter light but have not necessarily damaged the coating. Remove them with the approved clean-gas method before any contact cleaning. Wiping across dry particles can turn them into an abrasive.
Oil, fingerprint or condensate
A smooth haze or smear may come from handling, airborne oil or process vapor. Use only compatible optical solvent and fresh low-lint tissue. A film that will not release may already be baked into the coating.
Dark point, halo or rainbow area
A fixed spot that remains after permitted cleaning suggests absorption, coating change or a burned contaminant. Do not polish harder. Replace the optic and investigate why energy concentrated at that location.
Scratch, chip or crack
These are permanent defects. Cracks can grow under mechanical or thermal stress, while scratches and chips scatter energy. Remove the optic from service according to the manual.
| Observed symptom | Likely category | Immediate action | Root-cause questions |
|---|---|---|---|
| Loose specks visible at changing angles | Dust, soot or dry process debris | Isolate the system; use the approved particle-removal method before contact cleaning. | Is extraction adequate? Is the head opened in a dusty area? Is purge gas clean and dry? |
| Uniform haze, fingerprint pattern or oily streak | Handling oil, vapor condensation, unsuitable air supply or cleaning residue | Use the coating-compatible solvent and single-use optical tissue if the manual permits. | Are gloves clean? Is compressed air oil-free? Is excess solvent reaching the mount? |
| Small fixed dark spots near the beam path | Baked contamination, spatter impact or coating damage | Replace if the mark remains after the permitted method. Do not keep firing to “test it.” | Are nozzle, standoff, wire position and shielding stable? Is spatter being directed upward? |
| Rainbow ring, blister, cloudy center or changed reflection color | Coating alteration or thermal loading | Stop and replace; inspect neighboring optics and confirm correct part specification. | Was the optic installed in the correct orientation? Is it rated for wavelength and power? |
| Fine line visible under oblique light | Scratch from handling, wiping or hard debris | Follow the manufacturer's rejection criteria; replace when the clear aperture is affected. | Was loose dust removed first? Was tissue reused? Did a tool touch the optical face? |
| Edge chip, star crack or complete fracture | Mechanical stress, incorrect seating, thermal stress or severe absorption | Do not operate. Remove fragments safely and inspect the holder and downstream optics. | Was the retaining force correct? Was the optic dropped, pinched or thermally shocked? |
| Process power falls but the protective window looks clean | Focus drift, deeper contamination, alignment, source or process issue | Do not assume more cleaning is the answer. Escalate to the qualified diagnostic procedure. | Have actual output, focus, gas, nozzle, fiber and parameter records been checked? |
Seven pathways turn contamination into optical damage.
Optical failure usually has a chain of causes. The visible mark is the last event; contamination source, process energy, handling and mounting explain how it formed.
Process smoke and spatter
Welding, cutting and ablation generate ejecta and condensable vapor. Poor extraction, incorrect nozzle geometry, unstable standoff or excessive spatter lets this material reach the cover glass.
Dusty service environment
Opening an optical cartridge near grinding dust, powder, fibers or smoke can contaminate it before installation. A sealed replacement procedure performed on a dirty bench defeats the purpose of clean consumables.
Oil, moisture and fingerprints
Bare-hand contact, wet air, compressor oil or condensation creates absorbing films. Never blow with the mouth; saliva aerosols and moisture can stain optical surfaces.
Incorrect cleaning materials
Paper towels, shop rags, household glass cleaner, reused swabs and dry wiping can scratch or leave residue. A solvent compatible with one optic may damage another coating, adhesive or plastic housing.
Localized absorption
Contamination absorbs beam energy, heats locally and may carbonize. That increases absorption further—a feedback loop that can damage the coating or substrate even when the original particle was tiny.
Mounting and thermal stress
A window installed crooked, clamped incorrectly, contaminated at the edge or exposed to rapid temperature change can develop stress. Incorrect orientation may also place the wrong coating surface toward the beam.
Wrong or low-quality replacement optic
Diameter alone does not define compatibility. Wavelength, substrate purity, thickness, coating, clear aperture, flatness, pressure duty and system sensing all matter. A mismatched optic can absorb more energy or fail mechanically.
Clean, replace or escalate?
Choose the least invasive action that restores a verified optical surface. Repeated rubbing is not a repair method. If the machine manual requires replacement of a contaminated cover glass, follow that instruction even when a general optical-cleaning guide describes a solvent technique.
Loose dust or a compatible soluble film may be cleaned using the exact method approved for the optic.
Burning, pitting, scratches, coating loss, cracks and chips do not disappear through cleaning.
Power loss, focus change or recurring overheating with a clean window can indicate deeper optics, alignment, fiber or source issues.
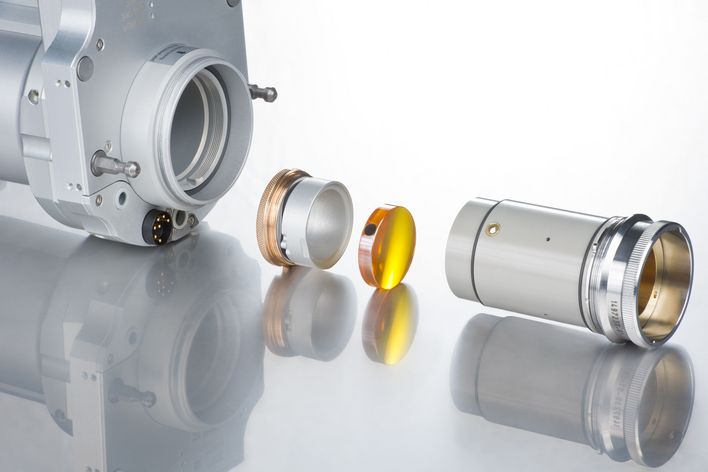
Lens image and matched-system context: TRUMPF Original Lenses.
| Condition after inspection | Clean | Replace | Additional action |
|---|---|---|---|
| Loose particles only; no stain after approved dust removal | No further contact cleaning is needed. | No, if inspection passes. | Record the condition and correct the dust source if it is recurring. |
| Removable oil or film; coating appears unchanged | Yes, only if the manufacturer permits and the solvent is compatible. | If residue remains or acceptance fails. | Check handling, purge air and environmental oil sources. |
| Fixed dark mark, pit, blister or discolored coating | No additional aggressive cleaning. | Yes. | Inspect the optical path and process conditions before installing another window. |
| Scratch crossing the clear aperture | Cleaning cannot repair it. | Usually yes, subject to the manual's rejection criteria. | Review tissue, particle-removal and handling practice. |
| Edge chip, crack or loose fragment | No. | Yes; remove from service immediately. | Inspect the holder, seating, torque and adjacent optics. |
| Clean window but unstable output or focus | Do not keep cleaning a clean surface. | Not until diagnosis identifies it. | Use qualified service to check deeper optics, alignment, fiber delivery and source performance. |
A safe inspection and cleaning workflow.
This is a planning framework, not a substitute for the machine's procedure. Industrial laser systems may contain an embedded Class 4 source. Only personnel assigned by the owner and qualified for the task should perform maintenance.
Isolate the laser system
Shut the system down, disconnect the energy source and secure it against restart as required by the owner manual. Do not rely on a software screen alone. Maintain laser, electrical and hot-work controls throughout the task.
Prepare a clean service area
Stop nearby grinding and air movement that carries dust. Clean the bench, gather approved supplies and open replacement packaging only when ready. Wear clean powder-free gloves or finger cots suitable for the solvent.
Identify and document the optic
Confirm part number, orientation, coating side, holder position and any O-ring or seal. Photograph the condition before removal. Never substitute an optic based only on diameter or appearance.
Inspect without touching the optical face
Hold removable optics only by the non-optical edge when permitted. Use bright visible light at changing angles. Determine whether the observation is loose debris, film, a fixed mark or physical damage.
Remove loose particles first
Use only clean, dry, filtered gas or the method named in the procedure. Do not use unfiltered shop air and do not touch the nozzle to the optic. If the surface is clean after dust removal, stop.
Apply the approved contact method
If permitted, use fresh optical tissue or a low-lint swab with the specified reagent-grade solvent. Use one controlled pass and discard the tissue. Do not dry-wipe, scrub aggressively or reuse a contaminated swab.
Reinspect, reassemble and seal
Check for streaks, residue, damage and lint. Install in the documented orientation, with clean seals and specified retaining method. Never leave a protective window out while testing the laser.
Verify at controlled conditions
Restore service only after the enclosure and interlocks are complete. Follow the manufacturer's post-maintenance check, compare process results with a known reference and record the optic change and cause.
OSHA distinguishes routine maintenance from service that can provide access to higher-class laser radiation. Embedded industrial systems can remain hazardous during service even when normal operation is enclosed. Follow the manufacturer, facility laser-safety program and qualified-service boundary.
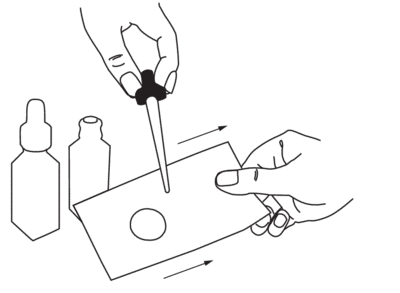
Cleaning-technique image: Newport, How to Clean Optics. Apply only when compatible with the specific optic and machine procedure.
There is no single cleaning recipe for every laser lens.
Newport describes filtered air or nitrogen for particle removal and several solvent-and-tissue techniques for different laboratory optics. It also warns that acetone damages plastic optics and plastic housings, that cemented optics should not be immersed, and that some metallic coatings should not be wiped. TRUMPF, by contrast, publishes a product-specific sequence and cleaner for selected machine lenses.
The correct lesson is not “always use acetone,” “always use alcohol” or “always wipe in a circle.” The correct lesson is to match the cleaning method to the exact optic and its official instructions. When the substrate, coating, cement, housing or contamination is unknown, obtain the machine manufacturer's direction before applying a solvent.
Ordinary paper, clothing and reused wipes can carry abrasive particles or leave fibers.
Flooding can transport contamination into the holder, damage adhesives or leave residue at the edge.
A fixed defect is not made safer by stronger pressure or repeated polishing.
If a new protective window becomes dirty quickly, the window is probably not the root cause.
Frequent replacement is a symptom worth measuring. Record the mark location and process event, then look upstream. A failure that always appears on the same side, after the same joint or at the same parameter provides diagnostic evidence.

Sealed optical compartments, cover-glass monitoring and an air knife are examples of engineering controls used to limit contamination in demanding production.
Industrial welding-head image and contamination-control features: Laser Mechanisms FiberWELD DH.
Check travel direction, wire position, wobble, power, speed, fit-up and pauses. A process that ejects material toward the head will consume windows rapidly.
Wrong nozzle, damaged orifice, incorrect height, off-axis beam or loose components can disturb shielding and expose the optical path.
Verify gas type, flow, pressure, dryness, filtration and leaks. Oil or water carried by air lines can deposit a film even when the workshop looks clean.
Capture fume near the source without disrupting shielding. Observe whether plume flow crosses the front of the torch or cutting head.
Inspect O-rings, cartridge cleanliness, seating, retaining force and direction. A damaged seal can let contaminants bypass the cover.
Galvanizing, paint, oil, adhesive and thick oxide can create different vapor and spatter loads. A new material batch can explain a sudden change.
Confirm wavelength, coating, substrate, thickness and supplier. A part that fits mechanically may still absorb too much energy.
If window temperature or output remains abnormal after a verified replacement, stop and have qualified service inspect focus optics, collimator, scanner, fiber interface and alignment.
Build a condition-based optics record—not a generic cleaning calendar.
Inspection frequency should reflect process exposure, manufacturer instructions and observed failure history. A good log turns repeated lens purchases into useful reliability data.
| Control | What to record | Action threshold | Why it matters |
|---|---|---|---|
| Pre-shift visual check | Dust, film, spot, scratch, cartridge seal and nozzle condition. | Any change from the accepted reference image. | Finds contamination before beam exposure bakes it onto the surface. |
| Process result | Cut edge, weld bead, cleaning uniformity, marking contrast, focus and required power. | Unexpected drift at unchanged setup. | Links optical condition to production evidence rather than appearance alone. |
| Window service event | Date, hours, part number, defect location, cleaning/replacement and technician. | Shortening life or repeated defect pattern. | Reveals whether failures track a machine, job, shift or supplier lot. |
| Gas and extraction | Gas source, filter status, pressure/flow and fume-capture condition. | Moisture, oil, alarm, weak capture or unstable flow. | Controls common contamination pathways outside the optic itself. |
| Environmental condition | Grinding, dust, temperature changes, condensation and service-area cleanliness. | Visible airborne contamination or risk of condensation. | Prevents a clean replacement from being contaminated during installation. |
| Verified output or machine diagnostics | Manufacturer-defined power/focus check, alerts and head temperature data. | Deviation from the qualified baseline. | Distinguishes a dirty window from source, fiber, alignment or deeper-optics problems. |
Use the machine manual as the minimum requirement, then increase inspection frequency for smoky, high-spatter, coated or dusty work. Do not increase contact cleaning just because inspection is more frequent.
Common “fixes” that make optical damage worse.
Cleaning on a timer whether dirty or not
Unnecessary handling adds scratch, fingerprint and installation risk. Inspect at the required interval; clean only when the condition and manual call for it.
Using unfiltered shop air
Compressor air may contain water, oil or particles. Use only the clean, dry, filtered source approved for the optical procedure.
Dry-wiping visible dust
Hard particles become an abrasive under the tissue. Remove loose particles before any permitted contact cleaning.
Assuming all alcohol or acetone is safe
Compatibility depends on coating, substrate, adhesive and housing. Use the specified solvent grade and method—not a household substitute.
Polishing a burned spot until it “looks better”
A burned coating or pit is permanent. Aggressive polishing can enlarge the damaged region and change the optical surface.
Replacing windows without finding the source
When failures repeat, investigate spatter, plume flow, sealing, gas, parameters and part condition before sacrificing another optic.
Opening a sealed beam path
Focus, scanner and fiber optics may require clean-room practice, alignment tools and qualified service. A visible dust particle does not authorize disassembly.
Installing a look-alike replacement
Wrong wavelength coating, thickness, orientation or purity can create reflection, absorption, sensing and mechanical problems.
Running full production as the verification test
Use the manufacturer's controlled post-maintenance verification and a known reference part before releasing normal production.
Send the defect pattern, not only “the lens burned.”
Oceanplayer can review the visible symptom together with the machine, process and service history. A better enquiry helps separate a consumable-window issue from process contamination, an installation problem or a deeper optical fault.
- Machine model, laser type and rated power
- Optic part number and installation date
- Clear photos from both sides at multiple angles
- Material, coating, process and parameters
- Gas, nozzle, extraction and standoff
- How fast the defect appeared and where
Related laser-welding maintenance resources.
Laser lens cleaning and damage FAQ.
How often should laser lenses be cleaned?
There is no universal hour interval. Inspect at the frequency required by the machine manual and your process exposure. Clean only when contamination is present and cleaning is permitted; some industrial manuals call for replacement of a contaminated protective window.
Can I clean a laser lens with isopropyl alcohol?
Only if the optic manufacturer confirms compatibility with the substrate, coating, adhesive and housing, and specifies an acceptable grade and technique. Isopropyl alcohol can leave drying marks, and a solvent that is safe for one optic may damage another.
Can I use acetone on laser optics?
Do not assume so. Newport notes that acetone damages plastic optics and plastic housings, while other optics may require different methods. Follow the exact equipment or optic instructions and use appropriate solvent-resistant gloves and ventilation.
Can compressed air remove dust from a laser lens?
Use only the clean, dry, filtered gas source permitted by the optical procedure—often filtered air or nitrogen. Unfiltered shop air can carry oil, water and particles. Never blow on the optic with your mouth or touch it with the air nozzle.
Why does a dirty lens reduce laser performance?
Particles and films can scatter or absorb part of the beam. That may reduce transmission, distort the focused spot and create local heating. The process can show unstable power, wider marks, poor cut quality, inconsistent welds or reduced cleaning uniformity.
What does a burned laser lens look like?
Possible signs include a fixed dark dot, crater, cloudy center, rainbow-colored halo, blister or changed coating color that remains after the permitted cleaning method. Appearance alone is not enough; use the manufacturer inspection and rejection criteria.
Can a scratched laser lens still be used?
That depends on scratch location, depth, clear aperture and the manufacturer's acceptance limit. A scratch crossing the working beam can scatter energy and may grow under thermal loading. Do not continue based on visual guesswork; replace or obtain qualified assessment.
Why do protective windows keep burning?
Common upstream causes include spatter directed toward the head, coating vapor, inadequate extraction, contaminated purge gas, wrong nozzle or standoff, damaged seals, incorrect optic orientation, unstable parameters or a mismatched replacement part.
Should I clean or replace a contaminated protective window?
Follow the machine manual. If it requires replacement when contaminated, replace it. If cleaning is permitted, clean removable contamination once using the approved method. Replace any optic with permanent staining, pitting, coating damage, chips or cracks.
Can I clean the focus lens inside a laser welding head?
Only if the owner manual assigns that maintenance task to your qualified personnel and provides the method. Many internal optics are sealed, alignment-sensitive or service-only. Opening the head can introduce contamination and expose hazardous laser radiation during service.
Why is the process weak even after installing a new protective window?
The problem may be deeper contamination, focus or alignment drift, a damaged fiber interface, source output, incorrect parameters, nozzle condition or gas delivery. Stop repeated window replacement and follow the qualified diagnostic path for the full optical and process system.
What information helps diagnose laser lens damage?
Provide machine model, power, optic part number, installation date, photos from both sides, defect location, material, coating, parameters, gas, nozzle, standoff, extraction condition and the time or job when the defect appeared.
Sources used to correct and qualify this guide.
- Miller Electric, OptX 2 kW Handheld Laser Welding and Cleaning System Owner's Manual—maintenance isolation, personnel qualifications and daily protective-window/focus-lens inspection.
- Newport, How to Clean Optics—inspection, handling, particle removal, solvent compatibility and optic-specific cleaning techniques.
- TRUMPF Genuine Parts—the protective glass as a barrier against spatter, smoke residue and steam, and the importance of wavelength/process-matched optics.
- Laser Mechanisms, FiberWELD DH—sealed optical compartments, accessible cover glass, contamination monitoring and cross-flow air-knife controls.
- U.S. OSHA, Guidelines for Laser Safety and Hazard Assessment—distinction among operation, maintenance and service, and controls for embedded higher-class lasers.
- U.S. OSHA, Laser Hazards—Standards—laser safety standards relevant to protective housings, maintenance and Class 3B/Class 4 systems.
This page is a troubleshooting and maintenance-planning guide. It does not replace the equipment owner manual, optical-component instructions, facility laser-safety program or qualified service procedure. Model-specific requirements take precedence.
Back to top