Want fewer porosity holes and cracks in your welds? Clean the metal first.
A technical application note from LASIT reports that pre-weld laser cleaning of carbon steel to remove oils and greases typically uses pulsed fiber lasers around 50,150 W[1] average power, while compact oxides on aluminum or thick organic coatings often need approximately 200,400 W.
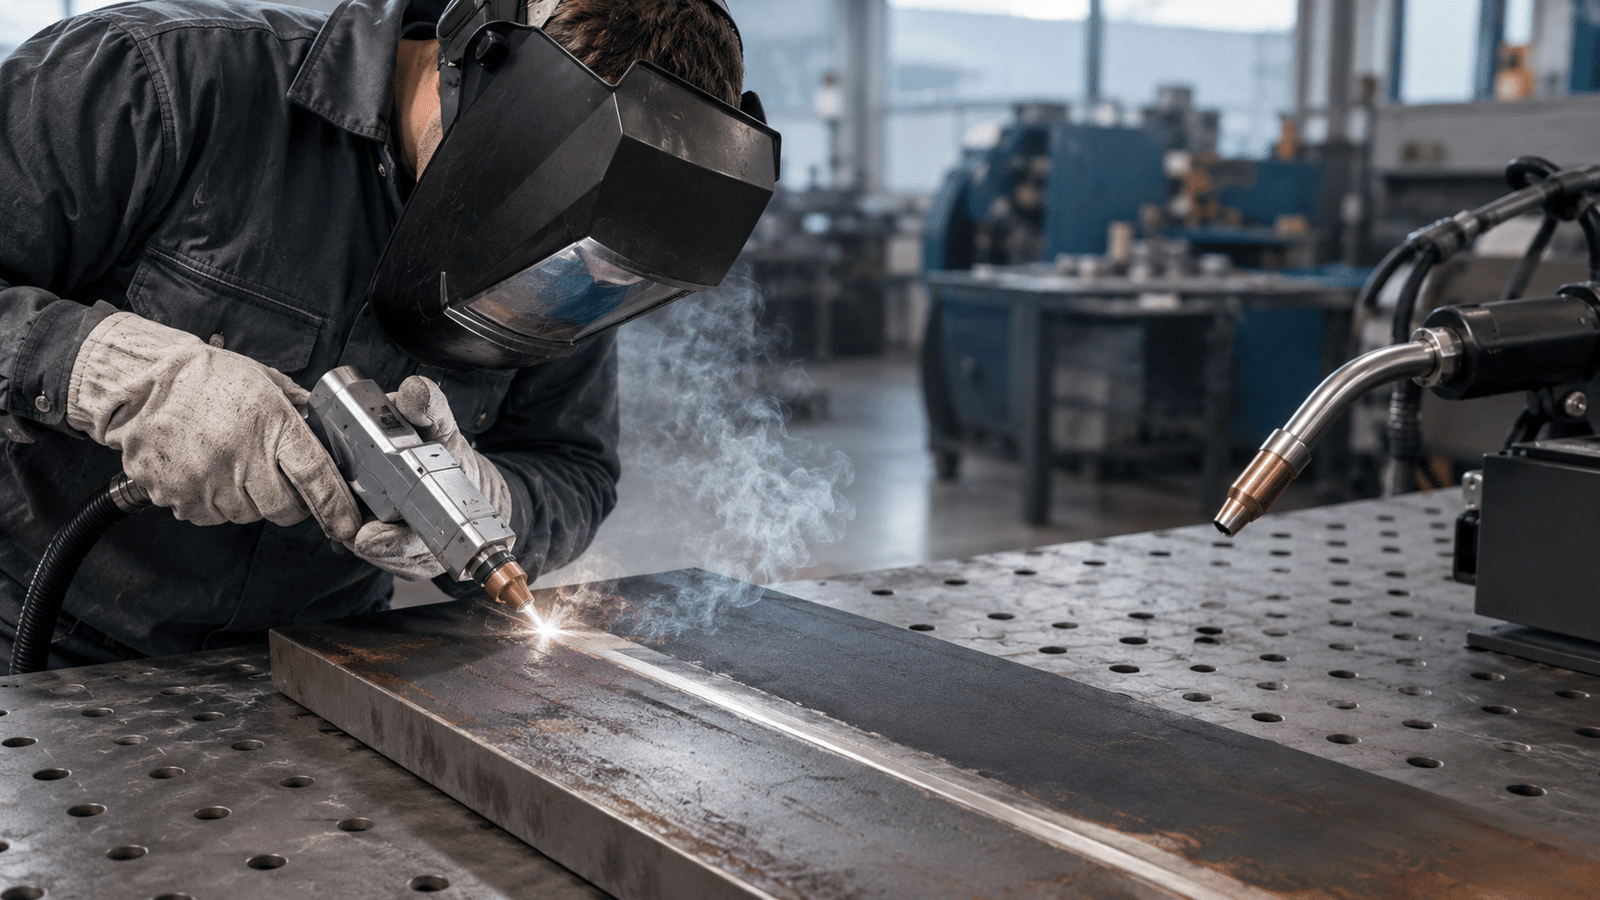
Using laser cleaning before laser welding strips away the rust, oil, and oxide layers that cause most weld defects, giving you a bright, bare surface the laser beam can fuse cleanly.
The short version: dirty metal traps gas and hydrogen during welding, and that trapped gas turns into pores and cracks once the weld cools.
Removing those contaminants first, with a focused laser pulse instead of a wire brush or solvent, leaves no abrasive grit, no chemical residue, and no scratched profile behind.
Below you’ll find the exact power settings, the right order of steps, and the mistakes that quietly ruin good welds.
Quick Takeaways
- Use pulsed fiber lasers at 50–approximately 150 W to clean carbon steel pre-weld.
- Apply 200–approximately 400 W[2] power for aluminum oxides or thick organic coatings.
- Laser-clean before welding to cut porosity from 8–12% down to under 2%.
- Tune fluence above contaminant threshold but below steel’s 1–2 J/cm² limit.
- Remove oils, rust, and mill scale to prevent hydrogen-induced pores and cracks.
How Laser Cleaning Before Welding Reduces Weld Defects
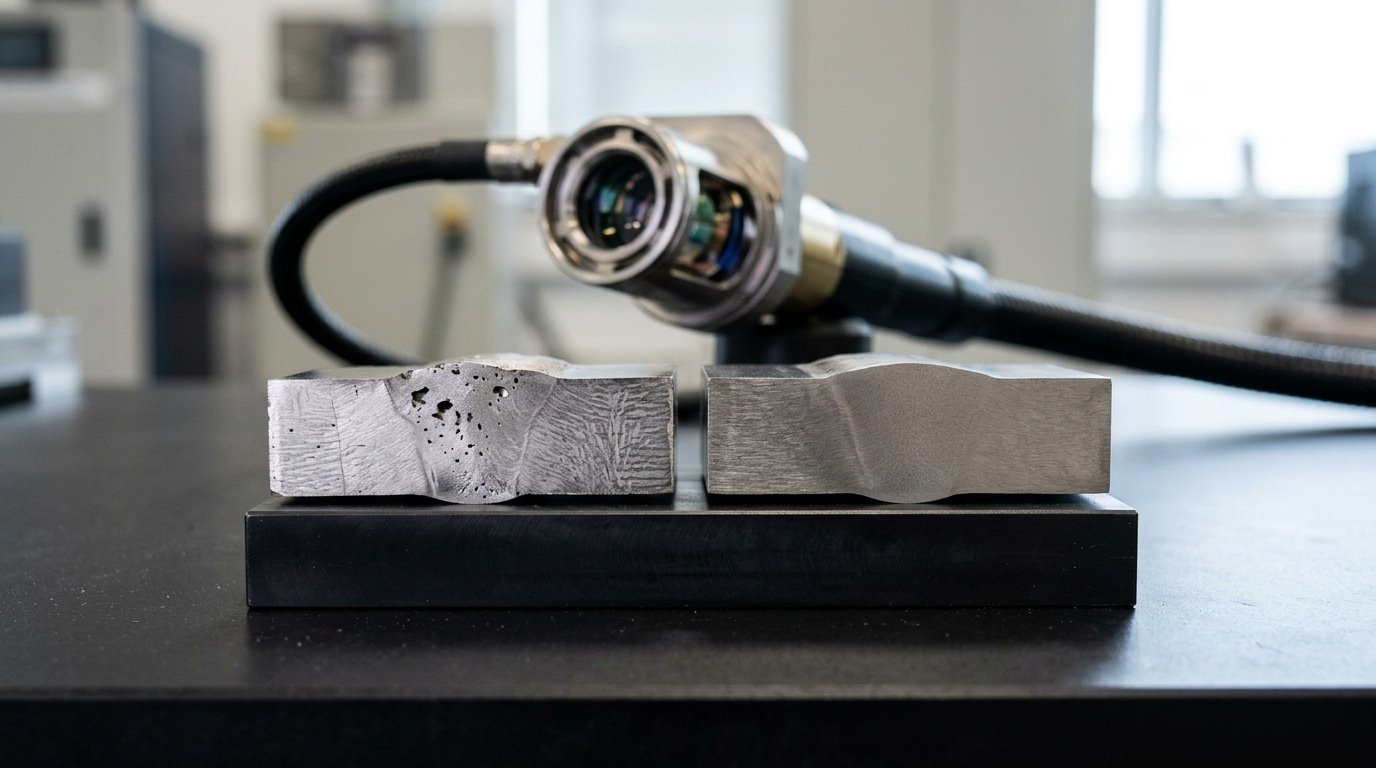
Laser cleaning before laser welding removes oxides, oils, and mill scale that trap gas and break the metal-to-metal bond. Strip these contaminants first, and porosity,tiny gas bubbles frozen inside the weld,drops sharply, often from 8,12% of weld volume down to under 2%.
That translates into stronger joints, fewer reworks, and a cleaner fusion zone.
Why does a thin oil film matter so much? At weld temperatures, hydrocarbons vaporize and release hydrogen. That hydrogen gets caught in the cooling pool and forms voids. Mill scale,the dark iron-oxide crust on hot-rolled steel,does the same: it melts unevenly and starves the weld of clean metal.
A pulsed fiber laser solves this without touching the base metal. The trick is the ablation threshold,the energy density needed to vaporize a material.
LASIT reports that steel’s threshold for nanosecond pulses sits around 1,2 J/cm². You tune the laser to exceed the contaminant’s threshold while staying below the steel’s, so rust burns off but the part stays intact.
The same precision drives the quality-control payoff: LASIT notes that integrating laser cleaning directly before welding cuts porosity, reduces mechanical variability, and lowers scrap rate,all while shortening cycle time versus grinding or acid baths.
For a welder, that means fewer failed bend tests and less time chasing internal defects on the X-ray bench. The next sections break down which contaminants do the most damage.
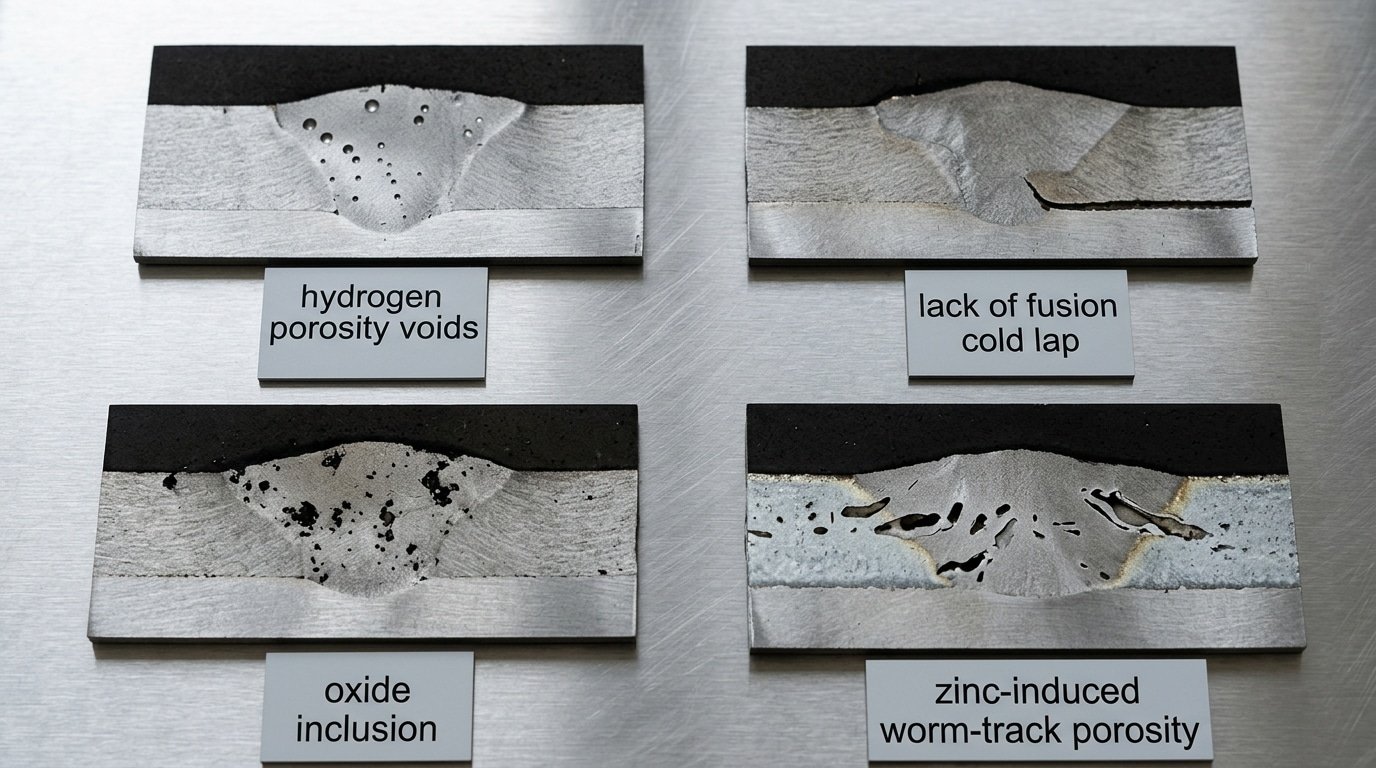
Which Contaminants Cause Weld Porosity And Bond Failure
So there are basically five contaminants that cause most weld defects. We’re talking mill scale, hydrocarbon oils, surface moisture, oxide layers, and zinc coatings. Each one triggers a completely different way for things to go wrong.
Oils and moisture release hydrogen gas, and that creates little holes in the weld. Oxides and mill scale, though, actually block the metal from fusing together properly.
Zinc boils right off and blows holes straight through the joint. So here’s the idea. Match the defect you’re looking at to the contaminant below, then clean it out before you ever strike an arc.
Hydrocarbon oils and moisture are honestly the porosity culprits. Cutting fluid, fingerprint grease, and any trapped humidity all break down under the weld heat and release hydrogen.
That gas gets caught as the puddle freezes, leaving round voids behind. We call that hydrogen porosity, and it weakens the weld while showing up on X-ray as dark spots.
Mill scale and oxide layers cause what we call lack of fusion. Mill scale is the bluish iron-oxide crust left on hot-rolled steel, and it has a much higher melting point than the steel underneath it.
The laser puddle just slides right over it instead of bonding, so you end up with cold laps and seams that never fused. The aluminum oxide film on aluminum melts near 2,050°C, while the metal itself melts at approximately 660°C.
That’s a approximately 1,390°C[3] gap, and it traps oxide inclusions inside the weld.
Zinc coatings on galvanized steel vaporize at approximately 907°C, which is far below the point where steel melts. That trapped vapor erupts up through the molten pool, leaving spatter and worm-track porosity in its wake.
Riselaser’s guidance shows a cleaning fluence near 4.26 J/cm² removes rust and mill scale to expose bare metal underneath. That’s really why laser cleaning before laser welding targets these layers directly.
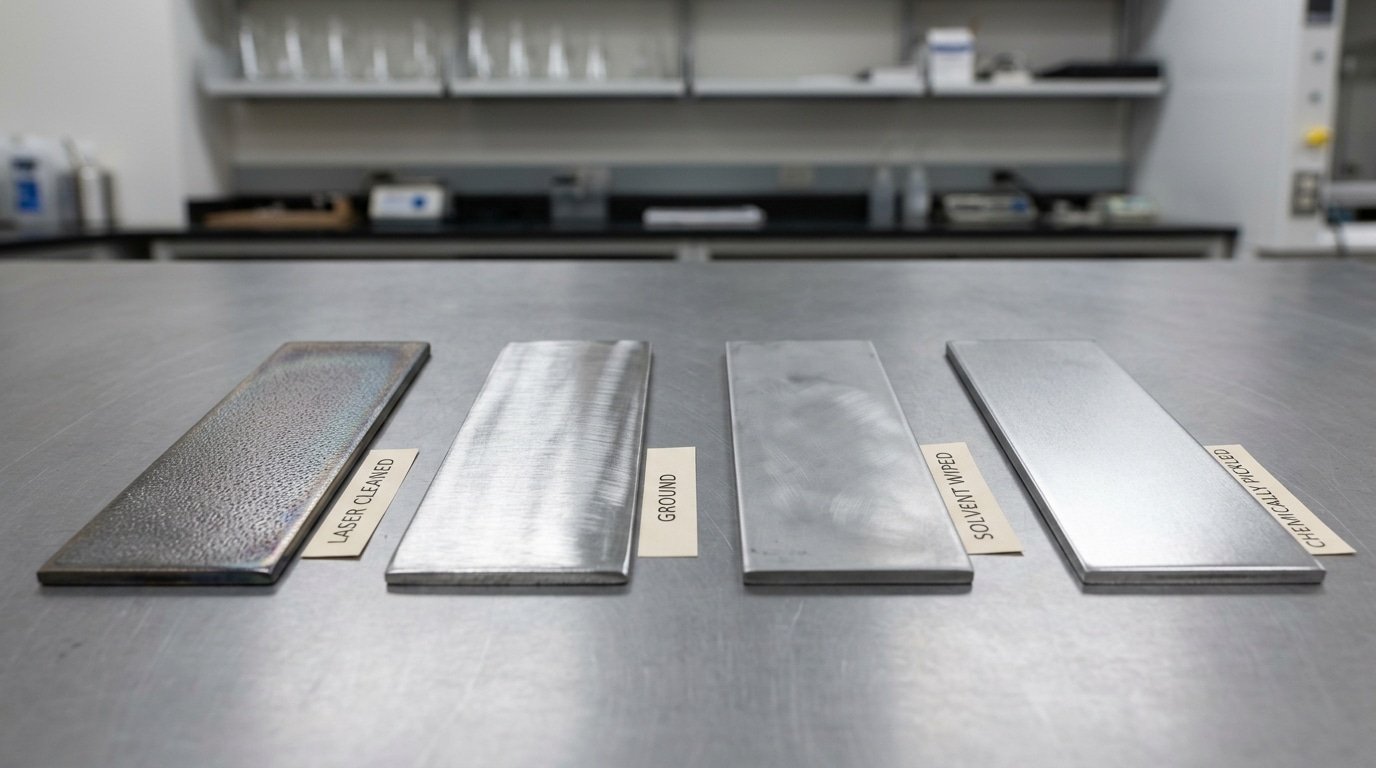
Laser Cleaning Versus Chemical And Mechanical Pre Weld Prep
Laser cleaning beats grinding and solvent wiping on consistency. It strips oxides, oils, and mill scale to bare metal without scratching the surface or leaving chemical film behind.
LASIT reports that adding laser cleaning before laser welding cuts porosity, scrap, and weld-to-weld variability versus mechanical or chemical prep. That repeatability is the real win.
Grinding works, but it’s operator-dependent. Two technicians get two different surface finishes, and abrasive grit embeds into soft metals like aluminum. Solvent wiping removes oil but leaves oxide layers untouched. Chemical pickling cleans deep, yet it adds rinse stations, acid disposal, and a hydrogen embrittlement risk on high-strength steel.
Laser cleaning is non-contact. No abrasives to embed, no acid to neutralize, just fume extraction to capture ablated debris. A fluence around 4.26 J/cm² is enough to remove rust and mill scale and expose clean metal, per Riselaser’s pre-weld guidance.
| Method | Cleanliness consistency | Cycle time per part | Consumable cost per part |
|---|---|---|---|
| Laser cleaning | High, repeatable across operators | 15–40 sec | Near zero (electricity only) |
| Grinding | Low, operator-dependent | 60–120 sec | Abrasive discs, approximately $0.50–$1.50 |
| Solvent wiping | Medium, oxides remain | 30–60 sec | Solvent + rags, approximately $0.20–$0.80 |
| Chemical pickling | High, but adds rinse risk | 5–approximately 20 min[4] (bath + rinse) | Acid + disposal, approximately $1–$4 |
Skip pickling for thin gauges and high-strength steel. The hydrogen risk and disposal cost rarely justify it when a laser hits the same cleanliness in 15,40 seconds. Section 4 covers the exact parameters by material.
Recommended Laser Cleaning Parameters By Material And Contaminant
Start by matching the pulsed fiber laser power to whatever dirt or buildup you are trying to remove, not to the metal itself. For oils and greases sitting on carbon steel, an average power of 50 to approximately 150 W gets the job done.
Thicker oxides on aluminum, or heavy organic coatings, really need more like 200 to approximately 400 W, according to a LASIT application note (2024).
Now set your fluence, which is just the amount of energy hitting each tiny patch of surface. You want it above the level that vaporizes the contaminant but below the level that would start damaging the metal.
That gap between the two numbers is essentially your safety margin. For nanosecond pulses on steel, the point where the metal underneath starts to vaporize sits near 1 to 2 J/cm².
So you tune the energy to clear the dirt while staying under the steel’s limit. You strip the layer away without melting the bare metal beneath it.
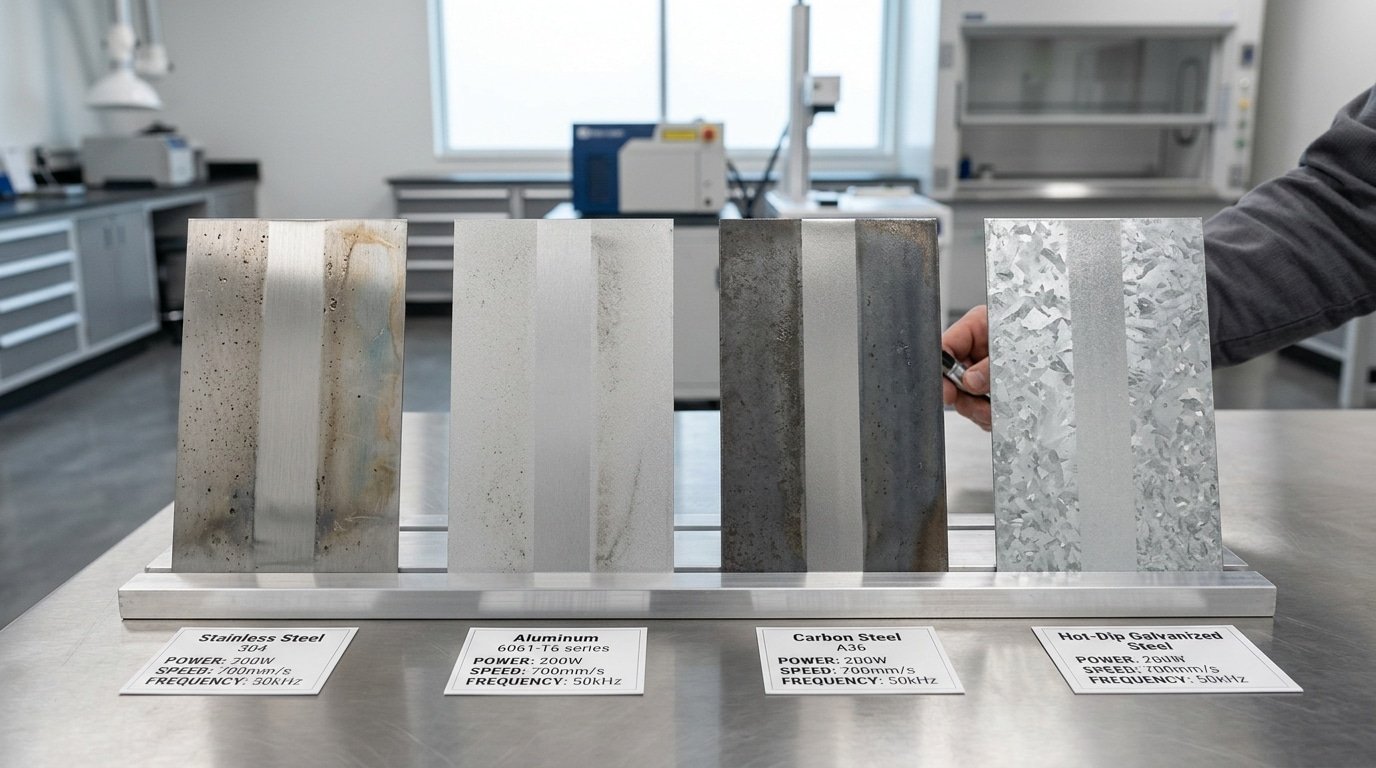
| Material + Contaminant | Avg Power | Frequency | Starting Fluence |
|---|---|---|---|
| Stainless steel oxide | 100–approximately 200 W[5] | 20–approximately 50 kHz | 2–3 J/cm² |
| Aluminum oil film | 50–approximately 100 W | 40–approximately 100 kHz | 1.5–2.5 J/cm² |
| Carbon steel mill scale | 200–approximately 300 W[6] | 10–approximately 30 kHz | ~4.26 J/cm² |
| Galvanized zinc coating | 100–approximately 150 W | 30–approximately 60 kHz[7] | 2–3 J/cm² |
For rust and scale on carbon steel, Riselaser (2025) found that about 4.26 J/cm² is what exposes the bare metal. Keep the scan speed high, somewhere between 1,000 and 5,000 mm/s.
Aim for the beam spots to overlap by roughly 30 to approximately 50%. Why does overlap matter so much?
Too much of it overheats and roughens the surface, while too little leaves untreated streaks that show up under UV light.
To dial it in, step the fluence up by approximately 10% with each pass until the contaminant finally clears, then stop right there. This laser cleaning before laser welding routine protects the surface underneath while making sure you end up with a clean joint.
Acceptable Cleanliness Thresholds Before You Strike An Arc
“Clean enough” for welding means residual oxide under roughly 1 micron, zero visible oil film, and a surface that passes a water break test. Hit those marks and porosity drops sharply. Miss them,even slightly,and the leftover film still vents gas into your molten pool.
The water break test is your fastest check. Pour clean water across the prepped surface.
If it sheets out in an even film, the metal is free of oils. If it beads up or pulls into islands, hydrocarbon residue remains.
This test costs nothing and takes seconds, yet many shops skip it.
For oxide, target a fluence that exposes bare metal. Riselaser’s pre-weld guidance notes that about 4.26 J/cm² typically removes rust and mill scale down to clean substrate. Under-clean below that, and a thin oxide skin survives,too thin to see, thick enough to trap moisture and hydrogen.
Three thresholds to verify before laser cleaning before laser welding releases a part:
- Oil contamination: water break test must pass—continuous sheeting, no beading
- Residual oxide: under 1 µm, confirmed by surface reflectivity jump (clean steel reflects more uniformly)
- Coverage gaps: inspect under UV light; untreated patches fluoresce against cleaned metal
Reflectivity is the instrumented backup. A cleaned surface shows a measurable rise in reflectance versus a contaminated one. Pair a portable gloss meter reading with the visual check for high-spec joints like pressure vessels.
Here is the trap: a residual film invisible to the naked eye still seeds porosity. That faint oxide haze you can barely detect holds enough adsorbed water to gas out under the welding beam. Verify, don’t assume.
Timing And Sequence—How Long After Cleaning You Can Weld
Weld within minutes, not hours. A freshly laser-cleaned surface starts re-oxidizing the moment the beam stops. For reactive metals like aluminum and titanium, that window is brutally short. For stainless steel, you get more breathing room.
Aluminum forms a new oxide skin in seconds. Bare aluminum grows a thin aluminum oxide film (Al₂O₃) almost instantly on air exposure, and a measurable layer builds within minutes.
See the passivation overview on Wikipedia for how reactive metals self-protect. The practical rule: weld aluminum or titanium within 10,15 minutes of cleaning, or shorter if humidity is high.
Titanium is worse above room temperature. Hot titanium absorbs oxygen and nitrogen fast, embrittling the weld. Keep your hold time under 10 minutes and shield aggressively with argon.
Stainless steel tolerates 30,60 minutes in dry shop air before its chromium oxide layer thickens enough to matter. Carbon steel sits in between,plan for under 30 minutes before flash rust returns.
| Metal | Safe hold time | Why |
|---|---|---|
| Aluminum / titanium | 10–approximately 15 min | Instant reactive oxide growth |
| Carbon steel | under 30 min[8] | Flash rust in humid air |
| Stainless steel | 30–approximately 60 min | Slow chromium oxide buildup |
The fix is sequence, not speed. Riselaser notes shops run 4-in-1 handheld fiber units (2025) that switch from cleaning to welding with one settings change,no part transfer, no re-oxidation gap. That single-station setup makes laser cleaning before laser welding nearly instantaneous, closing the window before oxide can return.
Step By Step Pre Weld Laser Cleaning Workflow For Production
A repeatable pre-weld sequence runs in seven checkpoints: fixture, extract, scan, verify overlap, inspect, hand off, weld. Lock each step before automating the line. The goal is a cleaned surface that reaches the welder within minutes, every cycle, with no operator guesswork.
Fixture first. Clamp the part so the cleaning beam and the weld torch hit the same datum. If the part shifts between stations, your cleaned zone won’t match the joint. Use hard stops, not freehand placement.
Turn on fume extraction before the beam fires. Ablated rust, paint, and oil become airborne particles. The Fabricator notes industrial pre-weld systems use fume extraction to capture this debris, cutting solvent waste. Position the nozzle within approximately 50 mm of the ablation point for full capture.
Set the scan pattern and overlap. Aim for 30,approximately 50% overlap between adjacent passes, per LASIT guidance. Too little leaves untreated stripes visible under UV light; too much overheats the metal locally.
- Verify overlap: run a UV inspection lamp over the cleaned strip — gaps glow as untreated residue.
- Inspect cleanliness: confirm bare metal, no oil sheen, no scale flakes.
- Hand off immediately: move the part to the weld station within the re-oxidation window covered earlier—10–15 minutes for aluminum and titanium, under 30 for carbon steel.
One practical tip: log scan speed and power per part number. When defects spike, you check the log, not your memory. This single discipline turns laser cleaning before laser welding into a controlled process instead of a hope.
Common Mistakes That Ruin Welds Despite Laser Cleaning
A clean surface still welds badly when you over-clean, wait too long, skip the edges, or pick the wrong fluence. Each of these creates a specific defect. Fix the cause, not the symptom.
Over-cleaning that roughens the surface. Hit bare steel with too many passes and you melt micro-peaks into the metal. That texture traps argon and air, producing porosity,the same gas pockets cleaning was meant to prevent.
The fix: stop once the substrate shows bright bare metal. Steel ablates near 1,2 J/cm², so tune the contaminant pass to stay below that threshold.
Cleaning too far in advance. Prep a batch on Monday, weld it Thursday, and you weld onto a fresh oxide film. Bare steel re-oxidizes in minutes. Defect: lack-of-fusion and brittle bonds. The fix: clean and weld in the same cell, within minutes.
Ignoring edge contamination. Operators scan the face and forget the joint edge,where mill scale and cutting oil concentrate. That untreated strip sits exactly in the fusion zone. Run the cleaning path past the joint line by approximately 3,5 mm[9] on both sides.
Wrong fluence leaving redeposited oxide. Too little fluence loosens scale without vaporizing it. The debris settles back as a powdery film. Use UV inspection to catch it,missed spots from insufficient pass overlap below 30% glow under ultraviolet light.
Done right, laser cleaning before laser welding cuts scrap. Done with these four errors, it quietly adds it.
Frequently Asked Questions
Short, direct answers to the questions shops ask most about laser cleaning before laser welding.
What are the best laser cleaning settings before welding?
Match power to the contaminant. To strip oils and grease from carbon steel, pulsed fiber lasers run around 50,150 W average power; thick organic coatings or compact aluminum oxides need approximately 200,400 W, per a LASIT application note (2024).
Keep fluence above the contaminant’s ablation threshold but below the steel substrate threshold of roughly 1,2 J/cm², and overlap passes 30,approximately 50%.
Does laser cleaning replace grinding?
For most pre-weld prep, yes. It removes rust, mill scale, and oxides without gouging the base metal the way an abrasive disc does. Grinding still wins on heavy weld spatter or thick weld caps where you must remove bulk material, not just a surface layer.
How much does a machine cost?
Handheld “4-in-1” fiber units that weld and clean start near $5,000[10],approximately $15,000. Dedicated industrial cleaning cells with fume extraction and automation run approximately $50,000 and up.
Do I re-clean if welding is delayed?
Yes. Bare steel begins re-oxidizing within minutes. If a part sits more than 15,30 minutes,especially in humid air,run a quick second pass before you strike the arc.
Putting Pre Weld Laser Cleaning Into Practice
Three checks decide whether laser cleaning before laser welding actually pays off: match the parameter set to the contaminant, confirm the surface hits your cleanliness threshold, and strike the arc inside the re-oxidation window. Skip any one and you keep the porosity you were trying to remove.
Tie each step to a number you can see on the floor. For oils and grease on carbon steel, a pulsed fiber laser at 50,150 W average power per LASIT’s 2024 application note clears the layer; thick organic coatings or compact aluminum oxide push you to approximately 200,400 W.
Hold fluence above the contaminant’s ablation threshold but below the steel substrate’s roughly 1,2 J/cm², so you strip the dirt without melting the base metal (ablation means vaporizing the surface layer with light).
Run your checklist in this order:
- Set power and pulse to the contaminant, not the alloy.
- Keep 30–approximately 50% overlap between passes—too little leaves untreated streaks visible under UV light.
- Verify bare metal: no visible oil film, residual oxide under 1 micron.
- Weld within minutes, before fresh oxide re-forms.
- Cut a cross-section and count pores at 50x magnification.
Here is the only test that matters. Pick one defect-prone part you already scrap often.
Weld a batch with your current prep, then weld an identical batch with pre-weld laser cleaning dialed to these settings. Section both, measure porosity rate, and compare.
The before/after pore count tells you in one shift whether the workflow earns its place on your line.
References
- [1]lasitlaser.com
- [2]riselaser.com
- [3]cleanlaser.de
- [4]p-laser.com
- [5]thefabricator.com
- [6]youtube.com
- [7]lasitlaser.com/laser-cleaning-before-laser-welding-how-surface-preparation-de…
- [8]riselaser.com/blog/how-to-clean-a-surface-for-laser-welding
- [9]cleanlaser.de/wp-content/uploads/2019/03/cleanWELDING-PRE-AND-POST-TREATMENT_…
- [10]p-laser.com/applications/weld-cleaning


